
To make your own DIY shirts, you don’t need industrial machines or an art degree. All you need is this tutorial, a little time, your trusty Cricut, and before you know it you’ll be making your own shirts in your sleep.
(Please don’t make shirts in your sleep!)
In this tutorial, I’m going to cover exactly how to make shirts with Cricut. If you’re ready to get started, let’s go!
Table of Contents
Why make shirts with your Cricut?
Why should you use a cutting machine like Cricut to make your own t-shirt? I mean… it’s fun?
Whether you’re a beginner or a pro, there’s something special about creating your own t-shirt design, ironing it onto the shirt, and then proudly walking around displaying it.
Need some other reasons? How about these:
- It’s super easy to do and doesn’t require a lot of crafting experience. You don’t need to be a graphic designer or Martha Stewart to make a cute t-shirt. Trust me, if I can do this, you can do this!
- Create the exact shirt you want. Show off and develop your own personal style. Stand out from the crowd.
- Long-lasting. Your designs will still look great after more than 50 washes!
- Perfect for teams, clubs, holidays, and family activities.
- Create a side business. Shirtmaking can bring in quite a bit of money, as long as you don’t violate any licensing laws.
Some fun project ideas:
- Create personalized t-shirts as gifts for co-workers, teachers, and friends
- Stand out at family reunions or other events with funny matching shirts
- Advertise your home business by adding your logo to a shirt
- Create adorable t-shirts for babies and children
DIY Cricut Shirt Tutorial
It’s time to get started making an iron-on t-shirt. We’re going to use a Cricut Explore Air 2 and an EasyPress to make a custom shirt. If you haven’t used Design Space before, don’t worry, it’s super easy.
This tutorial will work for any machine, but I suggest using a Cricut Maker if you have one available.
Materials:
- T-shirt (cotton)
- Iron-on vinyl/heat transfer viny
- Weeding tool
- Cutting mat
- Tape measure
- Heat press/EasyPress/everyday iron
- Cricut cutting machine
- A design
Step 1 – Design your shirt
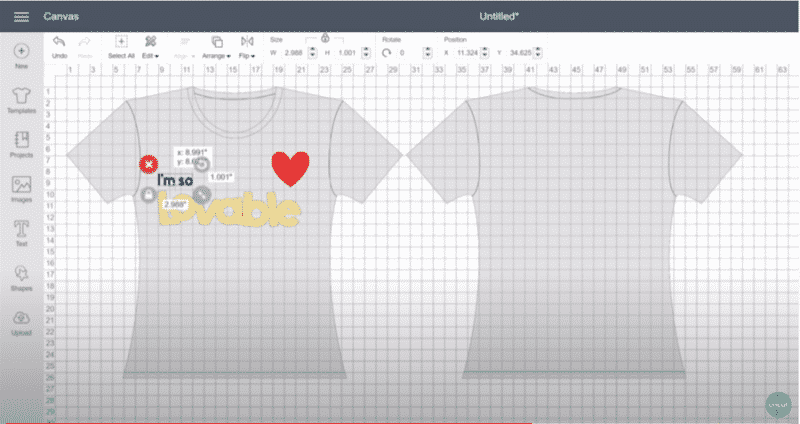
Start a new project in Cricut Design Space. Choose ‘Template’ on the left-hand menu and find the t-shirt option. By dialing in your t-shirt type and size, you can visualize your work as you design your shirt. This option also simplifies the measurement process in the next step, because you can see how the design fits on your shirt.
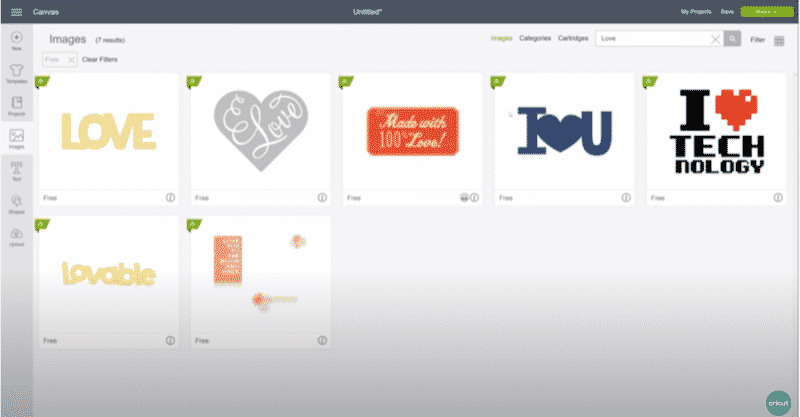
Or skip the template option and choose ‘Image’ to add a pre-designed image. Use the filter in the top right-hand corner to search for images that are free and then type in a keyword.
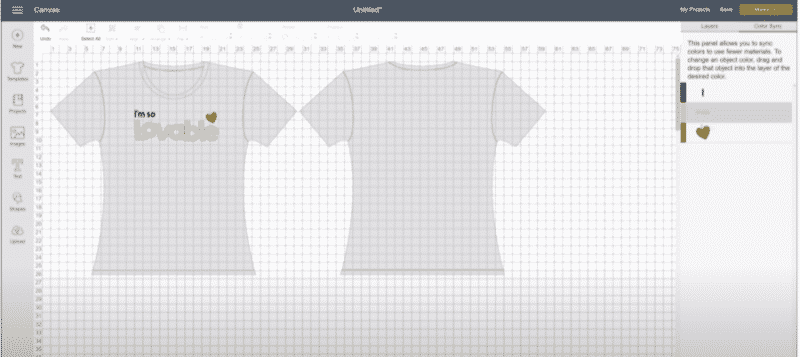
If you’d like to print all the iron-on vinyl elements in the same color, go to the layers menu on the right-hand side of the screen and choose ‘color sync’. Click and drag the unwanted colors to the color you want, so each element becomes the desired color.
Step 2 – Use the right size
Once you’re happy with the iron-on elements and their placement, select all the elements together and re-size the design. If you aren’t sure which size of a design to use, I have an easy guide that covers it all.
Step 3 – Cut out your design
When you’re happy with your design, click select all, and then click ‘attach.’
Click ‘Make it’ on the top right-hand side of the Design Space screen.
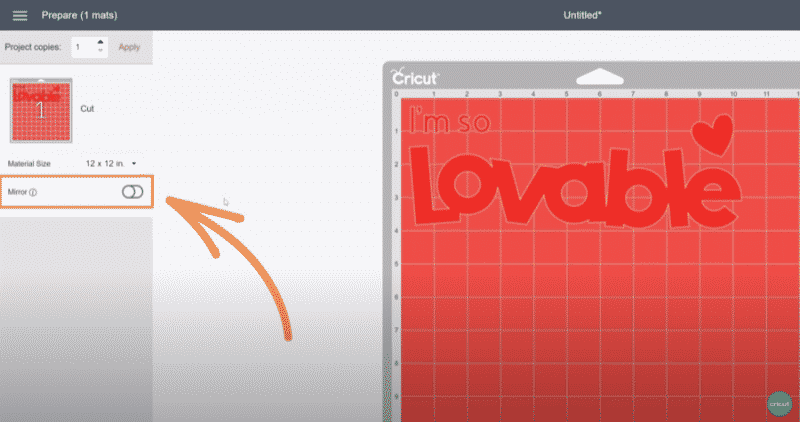
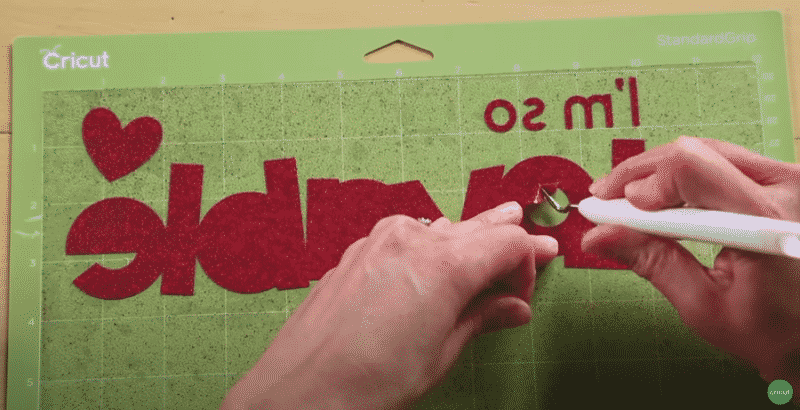
On the next screen, select ‘mirror’ for your images. If you forget this step, the image will print backward and you’ll end up with a shirt that reads ’emosewa’ instead of ‘awesome.’
Press continue.
Set the Cricut Explore Air 2 dial to custom and then choose the correct material in the Cricut Design Space screen. Choose from a variety of iron-on types, including glitter, glow-in-the-dark, and more.
Click the ‘Open’ button on your Cricut. Press the power button.
Align your iron-on material on your cutting mat, shiny side down, and smooth it down.
Pro tip: trim your vinyl so you’re only using the amount you need for the design you’ve created. Don’t use 8″ x 6″ if you only need 2″ by 4″.
Load the mat with the iron-on vinyl into your Cricut by pressing the load button. Press the flashing Cricut button to begin cutting out your design.
Step 4 – Remove the excess vinyl and weed your design
When your Cricut is finished cutting your design, unload the mat with the cut vinyl by pressing the unload button on your Cricut.
Remove the vinyl sheet from the mat and peel away the excess vinyl from your design.
(Call me weird, but I think this next part is fun!)
Using your weeding tool, remove the remaining vinyl. If you’re new to weeding and have no idea what I’m talking about, weeding means removing all the small extra bits from your design. Check out our guide on how to weed vinyl words if you get stuck.
Step 5 – Preheat your shirt
If using an iron: If using a household iron, set it to the cotton setting without any steam. Once it’s warm, iron your shirt for about 15 seconds.
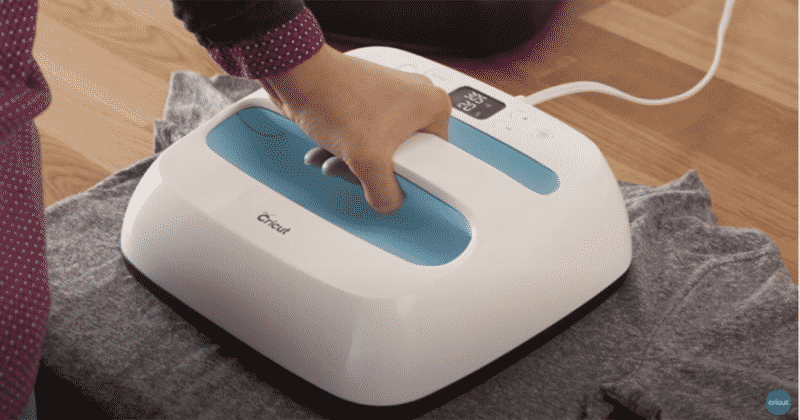
If using EasyPress: Set up your EasyPress on a flat heat-resistant surface, preferably waist-high. A kitchen table works well. Use a folded thick towel to protect your surface, but make sure to smooth it out to avoid any wrinkles. Refer to the chart included with your EasyPress to determine the correct temperature and time settings you’ll need. Your EasyPress light will turn green when it reaches the right temperature. Pre-heat your shirt by running the EasyPress over the material as if you were using an iron.
Step 6 – Apply your design to the shirt
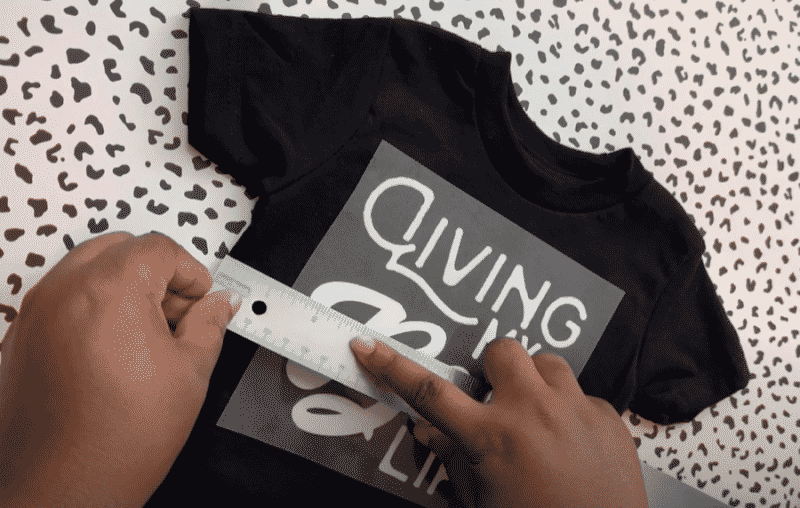
Using a ruler or tape measure, position your design on your shirt. Make sure the vinyl is against the shirt.
Step 7 – Apply heat
Iron: Place your iron on top of the design and press down hard, for about 30 seconds. Lift the iron and place it in a new position and press down again.
Pro tip: Do not slide the iron as if you’re ironing clothes. Lift the iron up and place it down again.
Repeat these steps until the entire design has been ‘pressed’ into the material. I like to place my forearm on the iron and lean into it when pressing to really apply pressure.
Flip the shirt over and repeat the entire process.
EasyPress: Set the Easy Press on top of your design and click the green button. When the EasyPress beeps, remove it and set it back on its base. Flip your material over and repeat.
If you’re using a heat press, follow our heat press guide.
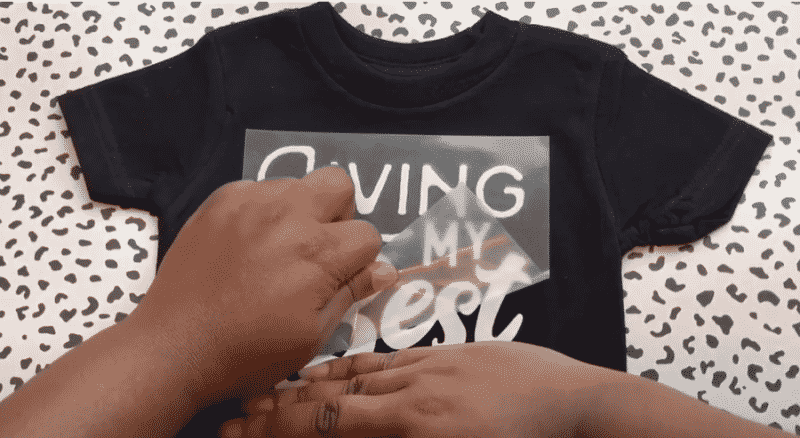
Step 8 – Remove the iron-on vinyl carrier sheet
Allow your design to cool for a few minutes before removing the clear carrier sheet.
Things to Avoid
I promise, this is a super easy project, but there are a few issues that often come up. Don’t worry, I’ve got them outlined right here:
- Incorrect temperature. As long as your iron is set to the Cotton/Linen setting, or your EasyPress is set to the temperature stated on the temperature guide, you can’t go wrong.
- Difficult to weed designs. Avoid intricate designs at first. Wait until you have a few projects under your belt.
- Wrong design size. An easy mistake! By laying out your shirt in Design Space you’ll be able to easily visualize your design before cutting.
- Vinyl facing the wrong way. Just remember, the vinyl goes against the shirt. The carrier sheet is always between the vinyl and the iron. Placing an iron directly on the vinyl will melt the vinyl and could ruin your iron.
Conclusion
By now you should be feeling pretty confident and ready to make shirts with your Cricut. Heat transfer vinyl is super easy to use and the best way to get started is to, well… just start!
Once you get the hang of it start experimenting with more complex designs, cursive fonts, or your own custom designs that you’ve dreamed up yourself.
What are you waiting for? Go make some t-shirts!
Let us know your thoughts in the comments below.
Don’t forget to share this article with a friend who needs some crafty inspiration.
Frequently Asked Questions
Which Cricut is best for making shirts?
Both the Explore Air 2 and Maker work with Design Space, making them pretty easy to use. T-shirts are actually a pretty easy project to make, so go with what fits into your budget.
Can you sell shirts made with Cricut?
The short answer, yes!
Cricut has an Angel Policy allowing you to sell products that contain non-licensed images from the Cricut Library.
One caveat is licensed and trademarked images, such as Ninjago or Disney images, which are protected. You cannot use these on any product you intend to sell.
It goes without saying that designs created by other designers are also off-limits unless you purchase a license.
How much does it cost to make a shirt with a Cricut?
Once you have a Cricut machine, your only real costs are the t-shirt and the heat transfer vinyl, which is under $10.00.
How do I care for my new custom shirt?
For best results, wait at least 24 hours before washing. Wash inside out and either hang dry or use a cool dryer setting.


