I’ve spent a lot of time working with heat transfer vinyl before getting my own heat press. An embarrassingly long amount of time.
I liked using an iron, convinced myself I could control the pressure better, and didn’t really need to learn how to use a heat press machine.
I was wrong. So, so wrong.
Using a heat press allows you to control the pressure, heat, and duration with complete precision. For me, this is the difference between the design peeling off my t-shirts and looking like they’re professionally made.
I’ll teach you everything that helped me get started, cover the common mistakes, and even include a few advanced tricks that took me a while to learn.
Table of Contents
Why use a heat press for making T-shirts?

If you’re like me, maybe you’ve been doing this with an iron for a bit and aren’t sure what the hype is all about.
Heat presses (especially if you pick the wrong one) can be a bit pricey and if you’re just getting started at a craft, you should keep expenses low.
I don’t blame you, and in fact, I think starting with an iron is just fine! But you should also learn how to use a heat press because I assure you if you like making custom t-shirts or working with heat transfer vinyl, it’s only a matter of time.
If you haven’t tried an iron yet, start there and you can still follow this guide because a lot of the basics carry over.
Here’s a brief glimpse at some of the projects/heat press uses there are:
- T-shirts. This is the number one draw for most people.
- Tote bags
- Hoodies
- Sweatpants
- Onesies
- Backpacks
- Bookmarks
- Cell phone case
- Pet collars
- Baby blankets (I love making these!)
Basically, anything made of fabric that can be somewhat flattened works great. I have a few tricks for working with mugs & hats that I’ll explain at the end of this article.
What is a heat press machine?
So I’ve covered a bit of about what a heat press can make, but let’s talk about what they actually do.
A heat press machine is designed to apply heat and pressure to a material for a set amount of time. They’re typically used with fabrics, but specialty machines exist for mugs, hats, plates, or hats.
There are manual heat presses where you’re physically in control of the pressure and time, as well as a variety of automatic machines which will stay closed at the pressure you specify for the time you set. I’ve used both, and we’ll go into more detail later about the differences in using each.
Heat pressing t-shirts is different than screen-printing, you aren’t applying any ink but instead, you’re infusing your materials with a special type of vinyl called heat transfer vinyl.
Heat transfer vinyl or transfer paper?
Heat transfer vinyl (or HTV) is a lot like your standard adhesive vinyl except the adhesive it’s backed with is only activated by heat, this makes for a really nice bond on fabrics where it adheres strongly with the clothing.
Instead of using HTV you can also print designs onto a specialty paper called transfer paper. Similar to HTV, transfer paper only releases its ink when it’s exposed to a high temperature. There are different papers depending on if you have an inkjet or laser printer, and also different papers depending on if you’re working with lighter or darker fabrics.
If this seems like a lot to figure out, don’t worry, you’re going to play around with both, and in time you’ll get a good feel for which projects/designs work better with which materials. Especially if you mess up, you’re going to learn a lot just from trying!
Using a heat press vs an iron

As I said above, an iron is really great for getting started, but there are a few factors that really give a heat press machine an advantage, especially if you’re going to make a lot of t-shirts!
Heat press advantages:
- Heat presses let you set a time
- You can better set the right temperature
- You can control the pressure by turning a pressure knob
- They’re completely flat
- They don’t scorch your fabric as easily
- They have a much larger area, making it easy to work with larger designs
- Much easier to mass produce an item with higher quality
Okay, time for the heat pressing tutorial instructions!
How to Heat Press a Shirt
First, you’re going to want to gather some supplies, if you don’t have exactly what I specify, that’s okay! You can always leave a comment and ask and I’ll try to recommend some alternatives.
Supplies:
- Heat press machine (or iron if you don’t have one yet)
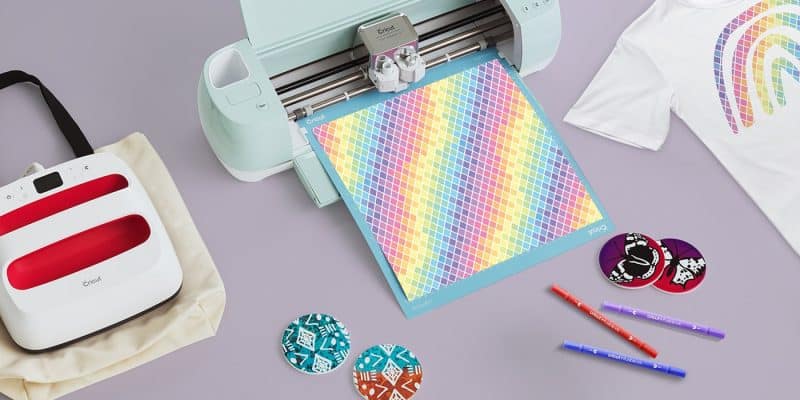
- A vinyl cutting machine (like a Cricut or Silhouette, only needed if using heat transfer vinyl)
- Fabric or materials you want to press (we’re using a T-shirt for this tutorial)
- Design
- Heat Transfer Vinyl (or transfer paper)
If you don’t have a heat press machine yet, I’ll be writing an article shortly about how to pick one out.
You’ll get to pick between using transfer paper (Cricut calls their brand Infusible Ink) & HTV or iron-on. If you have a cutting machine, I’d go with the vinyl, otherwise Infusible Ink is going to be easy to get started.
Step 1 – Select your materials
There are a lot of options for fabric, and what you decide at first might come down to what you have to work with. That being said, there are some fabrics that beginners should avoid, like some synthetics, really thin fabric (especially if you’re working with vinyl), water proof fabrics, or fabric intended to wick sweat or with a lot of pores. Neoprene (like a mouse pad) can be used, but only some heat transfer materials will work with it.
Fabrics that I recommend using are:
- cotton
- polyester
- nylon
- spandex
- leather
After you’ve selected a fabric, you’re going to want to press-wash them (if you can). Let them dry completely, and we can move on to our next step.
Step 2 – Choose a T-shirt design
If you’re using transfer paper, the first consideration is thinking about what colors you can print and having a design that matches that.
What do I mean?
Well, like trying to print a mirror, you’re going to have trouble if you try to print something that’s white with a standard printer.
If your own designs are white and you aren’t using a white T-shirt, I recommend changing that part of the design to something off-white, or slightly tinted.
Similarly, HTV has a limitation where it only comes in one color per sheet/roll. So depending on your design, you’ll naturally have an inclination toward using transfers or HTV.
Step 3 – Select your transfer paper
Transfer paper comes in two varieties: inkjet and laser jet. You’ll want to check which kind of printer you have and pick a transfer paper that matches.
Transfer paper also comes in “light” and “dark” which are for printing on light or dark materials. Just match the transfer paper with the material you’re using.
I have an article that goes over some of the best heat transfer vinyl choices available, as well as heat transfer paper. If you’re using HTV, you’re going to pick out the kind of HTV you want to use.
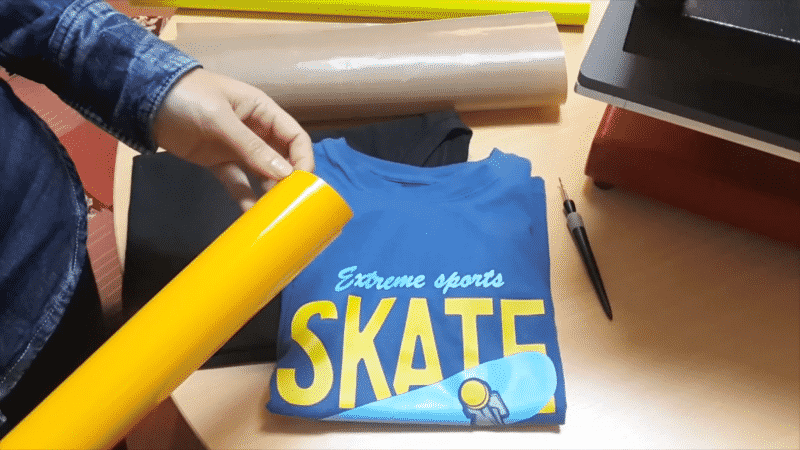
Step 4 – Print your design or cut the HTV
Once you have a design picked out, a press (or iron!) somewhere handy, and your HTV or transfer paper in hand, you’ll want to print out and prep your design.
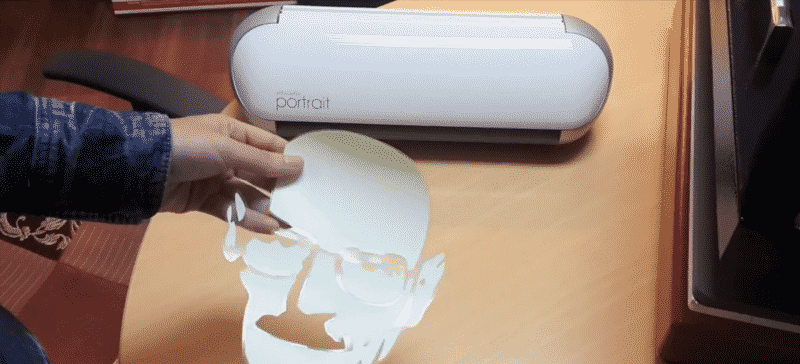
If you’re using HTV, simply cut it with your cutting machine like you would any other vinyl. Then weed it so you only have the design on the backing.
If you’re using transfer paper, you need to make sure the design is mirrored when you’re printing it out so that it shows the correct way on your material.
Make sure your T-shirt design is only as large as the graphic itself, so in your editing software you’re going to crop or trim the area around the design. Similarly, after you print it out you want to trim just around the design.
Step 5 – Heat the machine
Heat (along with pressure) are going to do a lot of the work for us, so the machine should be set to the desired temperature. If you use too high a temperature, you can scorch the material and bleed the design. If the temperature is too low, you might have issues with adherence and vinyl or a transfer that doesn’t completely take.
Your machine is going to come with the exact specifications for each type of material. If you don’t have the manual, look it up real quick and make sure to dial in that heat. Some people like to pre-press to warm their fabric up, but in my experience, this isn’t necessary.
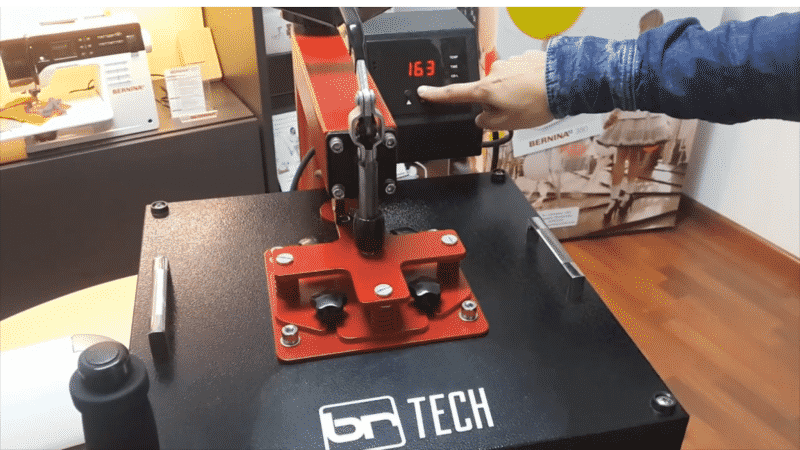
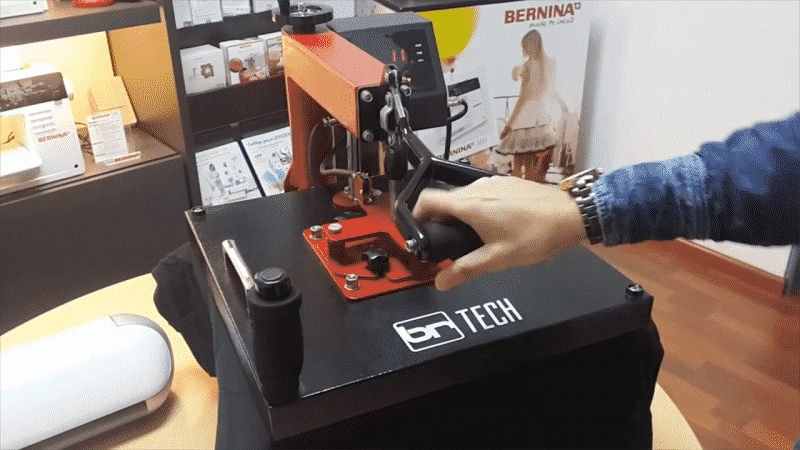
You’ll want to open up your heat press and leave it that way as it heats up. Depending on the kind of machine you have, you’ll see a manual dial or digital control. You’ll know it’s preheated because your preheat light will come on, this means we’re ready to go!
If you’re working with an unlisted material, I’d typically start around 340 degrees and increase quantity from there.
With an iron, you want to set it to high or cotton. Make sure the steam function is off.
Step 6 – Set the pressure and time
Heat is a pretty important part of the equation, but pressure and time right there with it. You could have the correct temperature set but if you don’t use enough pressure or press for long enough, you’re not going to have much of a design.
Pressure is typically going to be adjusted by turning the pressure knob on the top. If you turn it clockwise pressure will increase. If you turn it counterclockwise… you get it!
You’re going to start with a medium pressure for most materials, but if your manual has a specific setting for what you’re working with, follow that! If you don’t see it covered in the manual, check on the material you purchased, it will let you know exactly what the settings should be.
Vinyl typically likes medium pressure, ~320 degrees, 15 seconds.
Transfer paper usually likes medium pressure, 350 degrees, ~45 seconds for a half sheet design.
If you’re using an iron, well, play around a bit. You should never have to put so much pressure that you get exhausted, but definitely push down pretty hard.
If your press doesn’t show you the pressure you’ve set or you’re having difficulty, you can try the dollar bill test! You’ll turn the machine off, let it cool, and then insert a dollar bill into the side of the machine. Adjust the pressure until you just can’t pull it out easily, and then you’re set!
Step 7 – Place the fabric between the top platen and bottom platen
This part is simple, we’re almost there!
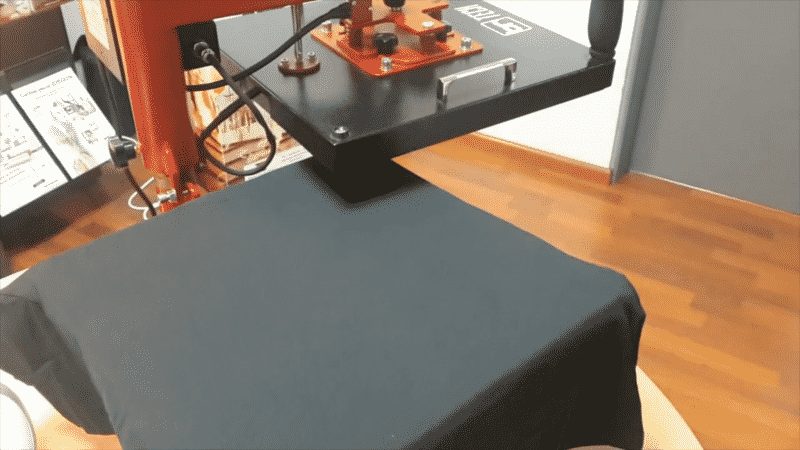
You want the design side to be face up. Make sure it isn’t bunched up, you can pull it pretty tight so it looks like a hotel sheet. You really want to err on the side of stretched out for this stage, because like a tattoo it’s going to look better as it compresses than if it stretches out further in the future.
This is also where you can pre-press if you want. This means closing the press on your material and heating it up for around 10 seconds or so. If you have the iron, well, do what the iron does best and go to town on those wrinkles!
You also want to make sure the fabric is aligned correctly if it’s something like a T-shirt. You’ll want to tag up, facing the back of the machine which will help with this next step.
Step 8 – Place the design on your T-shirt
With the T-shirt inside of your heat press, you can now place your design on the fabric so that it’s perfectly aligned. You want to be very careful here, not just because you can mess up your design but because this is a very hot press.
Some people prefer to align their design and then transfer it into the press, or turn on the heat press after so that they don’t have to worry about it. Your own preferences will form in time, but just know these are decisions that even experienced crafters debate!
If you’re using transfer paper, make sure to place it face down on the T-shirt. This means shiny side up!
If you’re using HTV, you want the adhesive side down. If you have a Teflon pillow or Teflon sheets, you can also throw one on top of the design to protect the HTV from sticking to your top platen, but this is totally optional.
Some difficult materials require a pillow, like if they’re not completely flat or if they have buttons/thick ridges which will make the HTV not lay flat on its own.
Step 9 – Start the heat presses!
With everything set up, it’s time to press! Phew! You’ll make sure the timer is set correctly, pull the handle down until it locks, and then the timer should start counting down.
Once the timer goes off open the press up again and let the t-shirt briefly cool. If you peel vinyl too early you’ll take it right off the material, so as eager as you are, take a few seconds and enjoy your success!
Step 10 – Remove the shirt
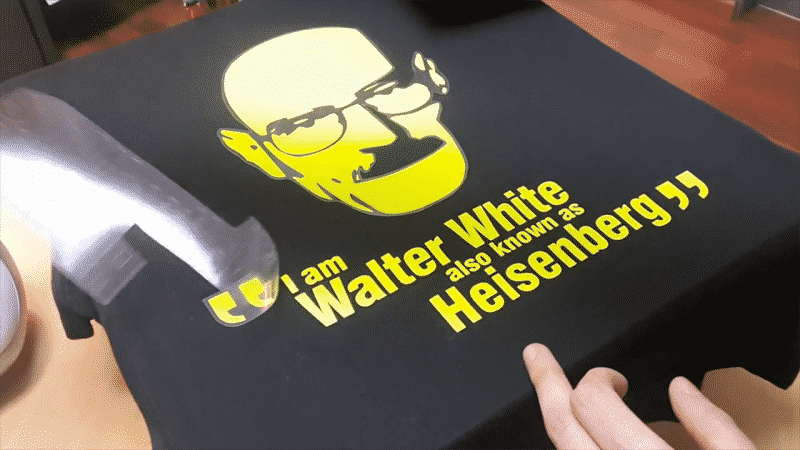
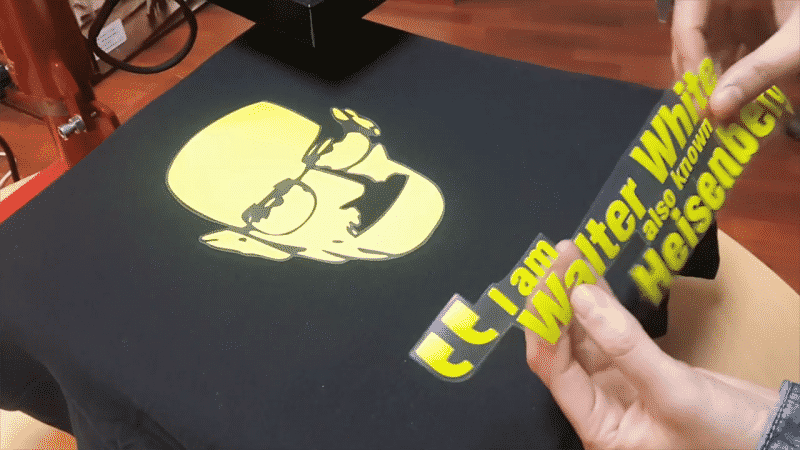
Now that it’s cooled (it shouldn’t be completely cooled, but safe to touch) you can remove the paper or pull up the backing.
Yay! We did it!
Other types of materials
Mugs

These are great to make, but as you can probably guess, the shape and material doesn’t necessarily lend itself to being pressed flat. So when you’re picking out a heat press, you can buy one that has a mug attachment, or use a specialty mug heat press.
If you want to get the feel for whether or you’ll get a lot of use out of a mug press, you can start with regular adhesive vinyl and then upgrade to a heating press if you’re doing it a lot.
Hats
Some hats you can get away with using standard heat presses, but others you’ll (like the mug) need a specialty press. In my experience, HTV works best with hats, but you can play around with transfers as well.
If you’re using an iron, you can rotate the iron on the hat as you transfer the design while holding it carefully with an oven mitt. The same principles apply for using a heat press, instead of closing it you’ll hold it and gently roll the hat on the heating element.
Tips & Things to avoid
- Don’t wash too soon. Especially if you’re using vinyl, the adhesives in your material will take some time to set. I’d give it at least 24 hours if you can!
- Don’t use too high of a heat setting. So there’s a happy middle ground where you use just the correct amount of heat, but if you see your heat press smoking or if your T-shirts are becoming a charred yellow, your settings are way too high. Not all presses are properly calibrated, so pay more attention to the results and less to the settings if things are going wrong and then calibrate your desired temperature from there.
- Be careful with which fabric you choose. If you’re trying to work with something waterproof or very thin, you could have issues. If you’re just getting started, nothing beats working with fabric. Almost all machines are calibrated and designed for cotton, so you know if something’s going wrong it’s not the material at least and you can troubleshoot it from there.
- Load the design and heat press correctly. Take your time in making sure the design is correctly placed before you set the timer. You’ll get much better results with a little bit of care.
- Don’t ignore test-prints. If you’re working with a new material, always make a test to see how it turns out before ordering loads of it. If you’re trying a new technique, same thing, make a test, wash the material a few times, and make sure it turned out okay. I do this with all of the gifts I make so that if they fail, I have a chance to fix them before it’s too late!
Conclusion
I hope you feel a bit more knowledge now than at the start! For me, learning how to use a heat press machine completely changed how I approach crafting – I no longer shy away from t-shirts or even making jerseys for my kids’ teams.
If I was going to start my own business, I’d ABSOLUTELY, 100% buy one of these right off the bat, but not before making sure there was enough of a demand.
Please let me know in the comments if you enjoyed the tutorial, and be sure to share the article if it was useful to you!
FAQ
Where should I place my heat press?
Because you’re going to be generating a bit of heat, I like to have mine in our craft room on its own permanent place on a table. If you have limited space, you could store it in between uses, but like anything the more accessible it is, the more you’ll use it.
Can I use polyester?
Absolutely! Just make sure to limit the amount of heat you use and follow the machine’s directions.
What are the lower platen and top platen?
The lower platen and top platen are the two flat surfaces of a heat press machine that come into contact when the heat press is closed. The lower platen, also known as the bottom platen, is the stationary base where you place your material.
The top platen, or upper platen, is the heated surface that presses down on the material and transfers the design. These two platens work together to apply heat and pressure evenly for a successful transfer.
Are screen-printed transfers different for printing shirts?
Yes, screen-printed transfers are different from other transfer methods like HTV or sublimation.
Screen-printed transfers use a special type of ink that is screen printed onto paper. The design is then applied to the garment using a heat press. This method is popular for larger quantities and more intricate designs, as it allows for a really nice finish with a wide range of colors and effects. The downside is that it’s not really as cost-effective for one-off or small-scale projects.
Do I need heat tape?
Heat tape is not always necessary, but it can be helpful in certain situations. It is used to hold a design or transfer in place on the surface during the pressing process.
Heat tape can also help keep designs in place when working with uneven or curved surfaces, like mugs or hats. If you find that your transfers are shifting or not staying in place, heat tape might help, but it’s usually not needed for T-shirts.
What is a Teflon sheet used for?
A Teflon sheet, you’ll also sometimes see it called a non-stick or heat-resistant sheet, is used during the heat press process to protect your materials and designs from direct contact with the heat press. It helps prevent scorching, melting, or sticking, which can occur when using certain materials or high-heat settings.
They’re reusable, easy to clean, and can be placed between the top platen and the surface being pressed to provide a barrier and ensure a clean, professional-looking result.
How do I do thicker materials like hoodies?
You may have to adjust the pressure down if it doesn’t close well, you can test the fit by pre-pressing your hoodies and seeing how well they fit.
Do I need to mirror my words?
Yup, whether you’re working with a transfer or HTV you’ll want to mirror the entire design.
Can I use an iron instead of a heat press?
Absolutely! This whole tutorial works fine with an iron, and I really recommend using one until you’re comfortable with spending the money for a machine. There are a lot of specific heat press machine uses that an iron doesn’t cover, but for beginners, they’re perfect.


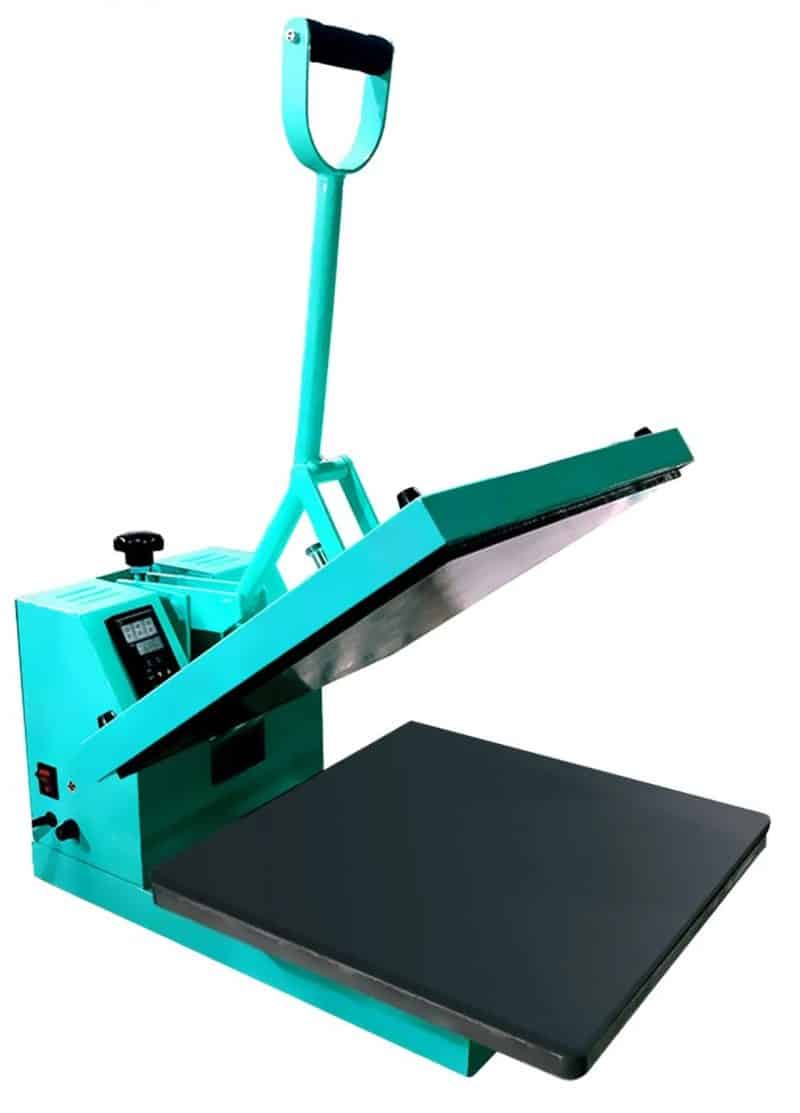
What heat press do you recommend?
Looking for bigger one than Cricuit – what is the one you have in the picture above?