For Mothers Day I had given a friend a pack of Cricut’s Iron-On vinyl and guess what she told me? She hadn’t even opened it!
I thought I was giving her a gift, or some fun new vinyl to play with, but really I had given her a problem: she needed a Cricut heat press guide!
So… I wrote up this tutorial on exactly how to use Cricut Iron-on vinyl to make shirts (or hoodies, onesies, etc) with your Cricut machine.
(Sorry, it took me so long Val!)
I’ll go over what materials you need, and give you step-by-step instructions for how to design, cut, and weed your vinyl decal.
And then I’ll show you how to apply the vinyl with a household iron, EasyPress, or any other heat press.
Consider this tutorial as atonement for a troublesome gift!
Table of Contents
Using Cricut Iron-on Vinyl
While we’re calling this our Cricut heat press guide, you’ll be able to follow along even if you don’t have a Cricut press (or any heat press, really).
A regular iron works great, too!
What is Cricut iron-on vinyl?
Cricut Iron-on vinyl, also called heat transfer vinyl (HTV), is a type of vinyl with a heat-sensitive adhesive. You simply cut out your design, hit it with a hot iron or heat press, and voila! It permanently sticks to any fabric.
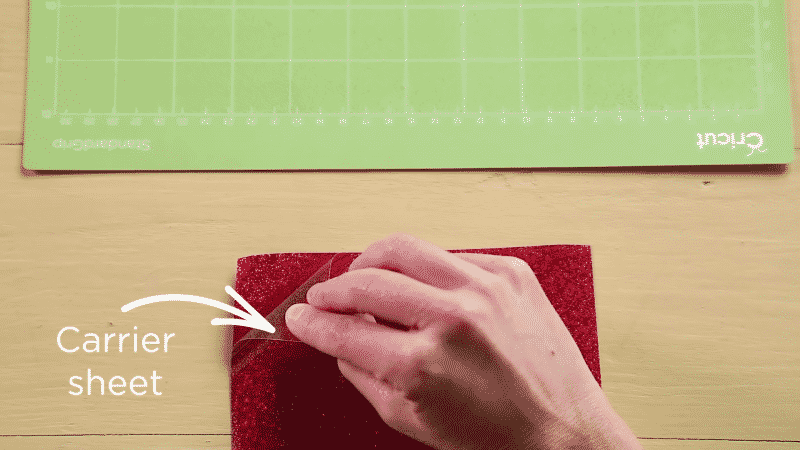
Heat Transfer Vinyl is backed by a clear, plastic transfer sheet, also known as the carrier sheet. The cut vinyl design is weeded (excess vinyl removed) while it’s still on this sheet, and then flipped over and ironed onto your fabric. You’ll remove the carrier sheet after ironing. So unlike regular adhesive vinyl, you don’t need to use transfer tape or transfer paper, because the carrier sheet does the job.
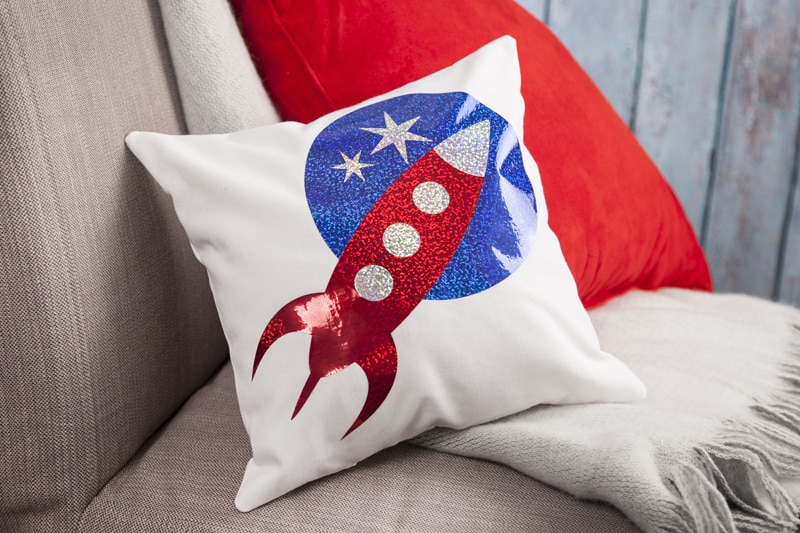
Iron-on vinyl comes in all sorts of colors, patterns, and textures. There’s the regular Everyday Iron-On, which we’ll use in this tutorial. But there’s also glitter, mesh, flocked, glow in the dark, and even holographic HTV.
Like regular vinyl, heat transfer vinyl can come in individual sheets or large rolls. You can find HTV in a variety of colors and textures: smooth, flocked, glittery, metallic, printable, even holographic!
It’s irreplaceable for making DIY t-shirts, bags, jackets, jerseys, basically any fabric that you want to permanently decorate with a vinyl design. If you grew up in the 80’s, you know about vinyl t-shirts, if not…you missed out.
I promise that by the end of this tutorial you’ll not only know how to use iron-on vinyl, you’ll be an expert!
What can you make with iron-on vinyl?
You can make so many different projects with iron-on vinyl! It can stick to all sorts of fabrics (cotton, polyester, felt, leather, etc) as well as wood, metal, paper, cardstock, & more!
Some Iron-on projects to consider:
- Personalize t-shirts, onesies, hoodies, hats, etc.
- Make matching jerseys and jackets for a sports team.
- Design a tapestry for your baby’s nursery.
- Decorate luggage tags and backpacks.
- Create a wooden or metal sign.
You can apply Cricut Iron-on vinyl to most fabrics that can handle a hot iron for about twenty seconds. The exact fabrics depend on the specific type of HTV you are using, so you’ll want to read the manufacturer’s instructions carefully.
Cricut Iron-on vinyl can be applied to:
- 100% cotton
- 100% polyester
- Poly-cotton blends
- Leather (check the label)
- Lycra/spandex (check the label)
- Nylon (check the label, and test first!)
Iron-on vinyl is generally not recommended for:
- wool
- silk
- acetate
- acrylic
If this seems like a lot of information to remember: don’t worry about it! HTV is super easy to use and I learn by experimenting so we’ll just dive right in together.
How to cut Cricut Iron-On vinyl
Iron-on vinyl is actually really easy to work with, especially if you know the correct technique. So I’ll start with which materials you need, then we’ll get into how to use it.
Supplies you’ll need:
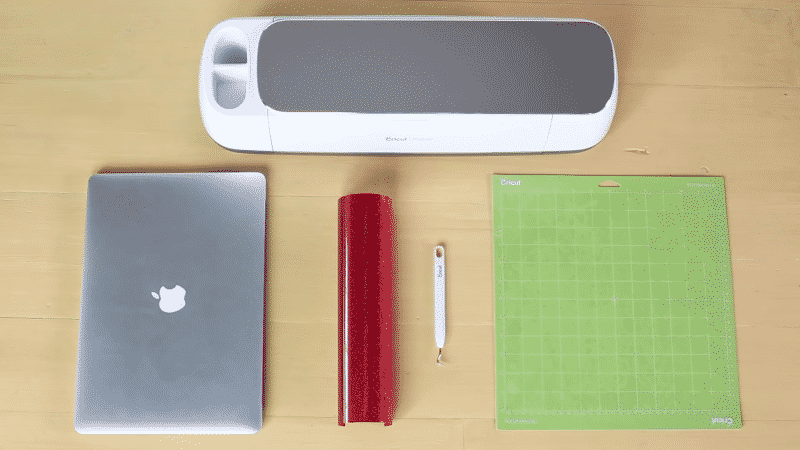
For cutting a design out of vinyl, you will need:
- A computer with Cricut Design Space installed.
- SVG or design ready to use. You can search for images and design your decal completely within Cricut Design Space.
- Cricut Explore Air 2 or Cricut Maker. Any other vinyl cutter you know how to use will work as well, but this tutorial shows how to use a Cricut machine.
- Cricut Everyday Iron-On Vinyl or Cricut Glitter Iron-on. If you have Smart Iron-on you’ll be able to follow along without using a mat.
- Cutting mat. Either the green standard grip or the blue light grip mat will work for iron-on vinyl.
- Weeding tool. A weeding hook is the easiest way to lift up corners and grab tiny pieces of vinyl.
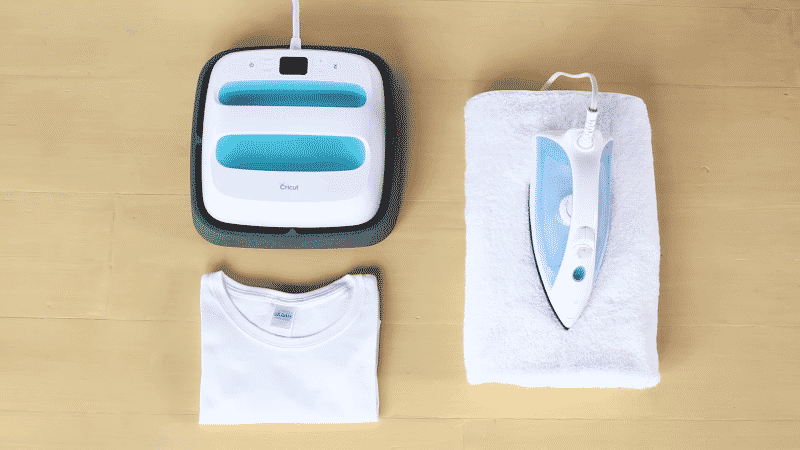
For applying the iron-on, you’ll need:
- A shirt (or other fabric you want to decorate). The fabric needs to be pre-washed without fabric softener and completely dried.
- Iron, Cricut EasyPress, or heat press. I recommend the Cricut EasyPress to take all the guesswork out, for a perfect application every time! If you don’t know how to use one, I have an article that explains how to use a heat press in detail!
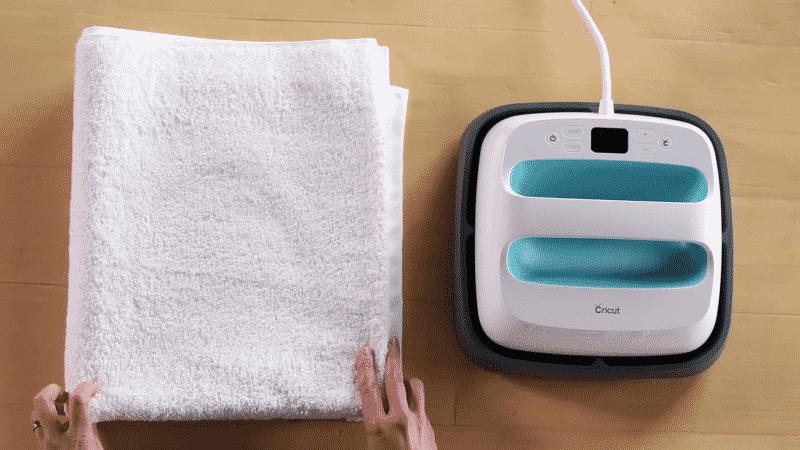
- Cricut EasyPress mat or a folded towel.
Let’s get to it!
Here are the step-by-step directions for cutting Cricut Iron-on vinyl:
1. Load your design.
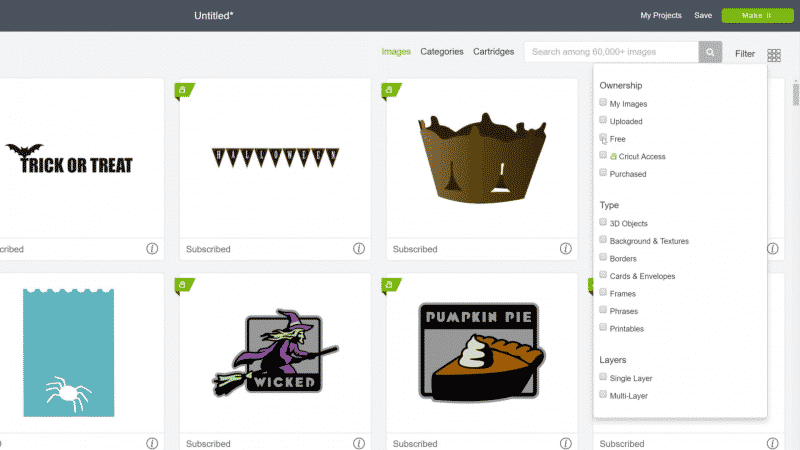
First, open up Cricut Design Space and load your design. You can:
- upload files (SVGs or JPGs) that you’ve found online,
- search the Cricut Image Library (hint: you can Filter by “free” to find free images!),
- or create a unique design from shapes and fonts directly in Design Space.
If you don’t have a design already in mind, check out the list (cutcutcraft.com/free-svg-images-cricut-silhouette) I put together of free SVGs that you can import.
For your first design, I recommend trying a basic shape. It will be a lot easier to weed and transfer, letting us focus on the heat transfer parts of this tutorial. After you’ve gotten the hang of simple shapes, you can move on to more complicated designs.
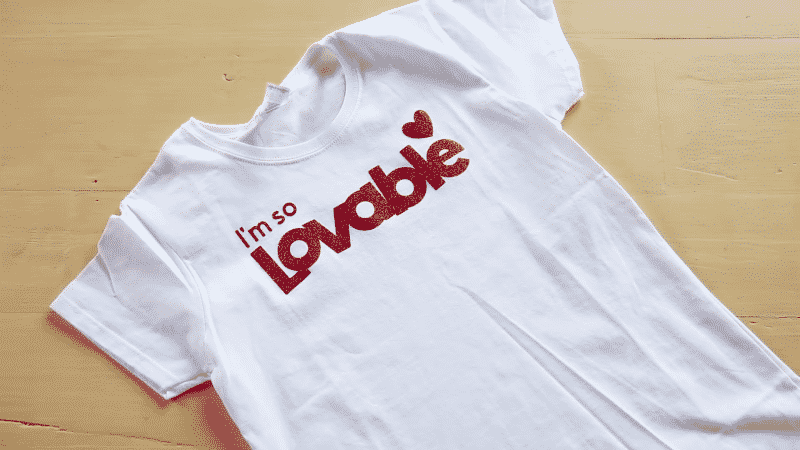
If you’ll be using lettering in your design, you’ll want to make it as easy on yourself as possible for your first time. I recommend using a large, bold font because thin lettering is more difficult to weed.
2. Adjust your design.
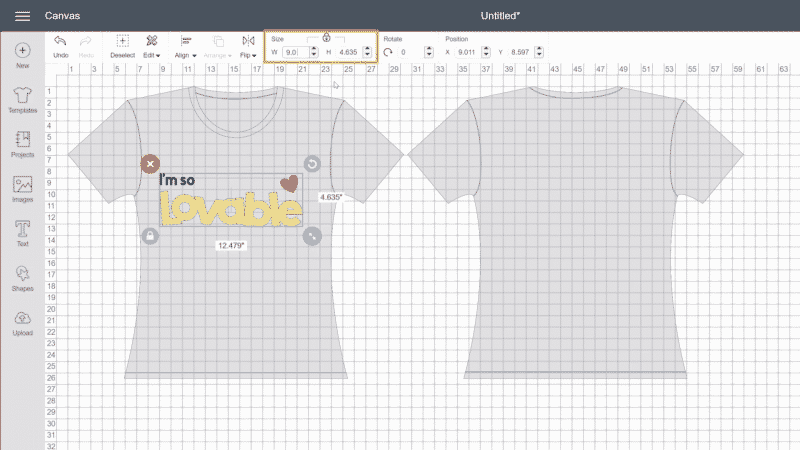
Resize your images to fit your project. You can use a t-shirt template within Design Space to see how the design will look on a shirt.
Select your entire design and adjust the size on the top toolbar to set the dimensions. A decal that is 9 inches wide will fit well for a standard t-shirt.
Then, hit Color Sync in the top right and make sure that all the parts of your design will be cut from the same color.
Once your design is finalized, click the green “Make It” button in the top right to take you to the preview screen.
3. Mirror your design.
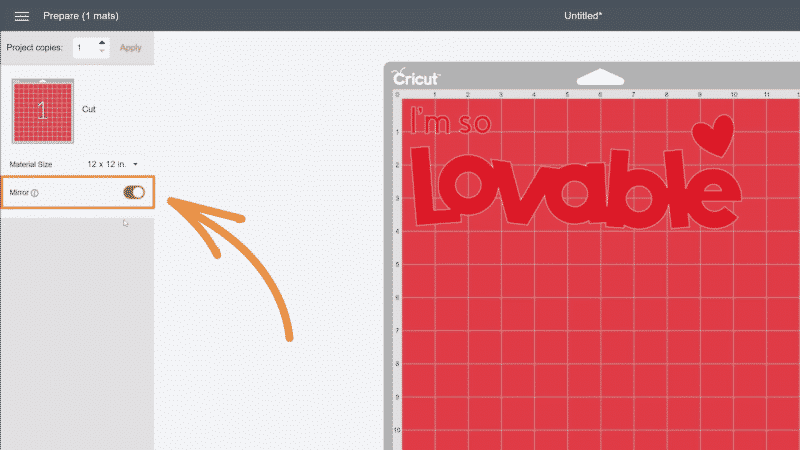
Select the “Mirror” option on the left panel. (It should be green when selected.) Then hit the green “Continue” in the bottom right.
Don’t forget to mirror your design! I made this its very own step because it’s so easy to forget.
4. Select the material.
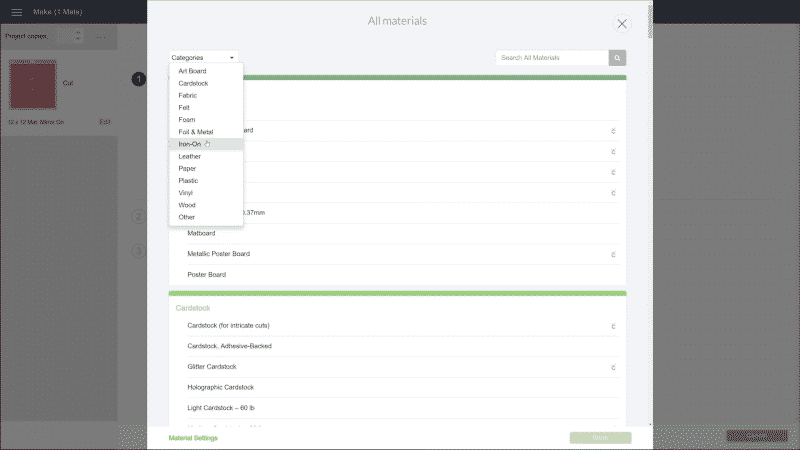
After clicking continue, Cricut Design Space will connect to your machine, and ask you to select your iron-on material.
- If you’re using a Cricut Maker, select the iron-on type from the drop-down menu.
- If you are using a Cricut Explore, then just rotate the dial on your machine to Iron-On.
5. Prepare the vinyl on your cutting mat
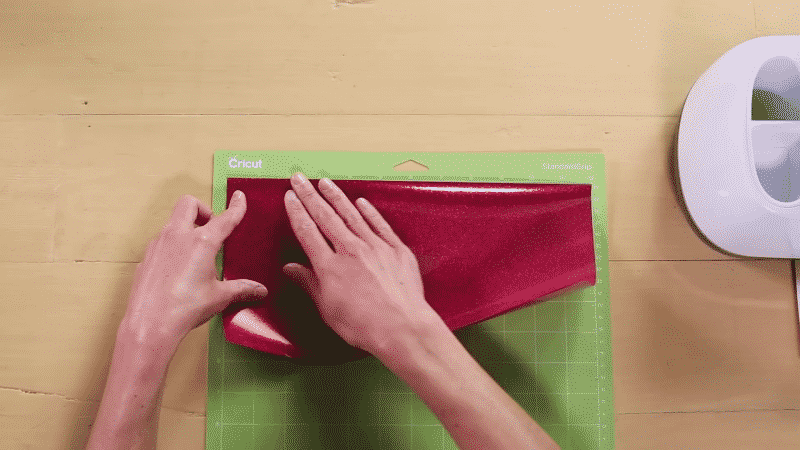
Place the iron-on vinyl plastic side down onto the cutting mat. Make sure the shiny plastic carrier sheet is facing downwards, so it doesn’t get cut. Smooth the vinyl onto the cutting mat with your fingers or a brayer.
Now is also a good time to double check to make sure that your machine has the fine point blade installed.
6. Insert mat into machine and cut
![]()
Insert the cutting mat (with the vinyl) into your Cricut, and push the up-down arrow button on your Cricut machine so it grips the mat.
Then, press the blinking “C” button on your Cricut to start cutting. Sit back and watch the magic happen!
7. Weed the vinyl
Once the Cricut is done cutting, press the arrow button once again so it releases your cutting mat, complete with cut out vinyl decal.
And now…it’s time to weed.
Weeding is the process of removing all the excess vinyl material that is not part of your final design. I like to leave the HTV attached to the cutting mat as you peel pieces off, so everything is held in place.
Starting with the big outer pieces, use a weeding tool or hook to lift up a corner of the vinyl. Then you can use your fingers to gently pull all the material away from the mat at a 45° angle.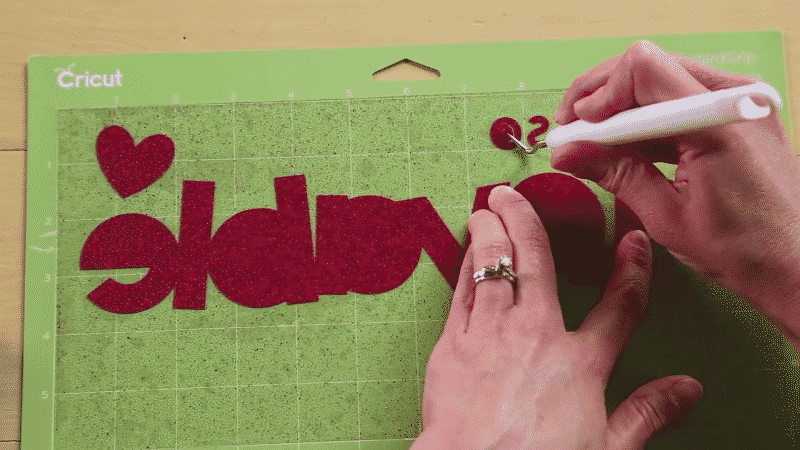
Next, use your hook or a pair of tweezers to grab and remove all the smaller pieces of vinyl. Don’t forget the interior of A’s and O’s.
Compare your cut design with the image on your computer to make sure you removed all the right pieces.
Here’s a helpful video to watch how to cut and weed your vinyl decal:
8. Transfer the design
You can use a regular household iron, the Cricut EasyPress, or any other heat press to apply the vinyl to a t-shirt (or any other material). The general process is the same, but I’ll go over the specifics for each method in our applying heat guide.
Heat Method 1 – Cricut Easypress
Okay, time to jump into our Cricut heat guide. Now that you have a design cut out, we’ll cover how to to apply heat on that design using your Cricut Easypress (or Easypress 2).
An Easy Press is, by far, the easiest way to use Iron-On vinyl. It’s designed to work with Cricut HTV, so it takes all the guesswork away! It’s simple to set the temperature, the timer, and it’s big enough to cover your entire project in one go.
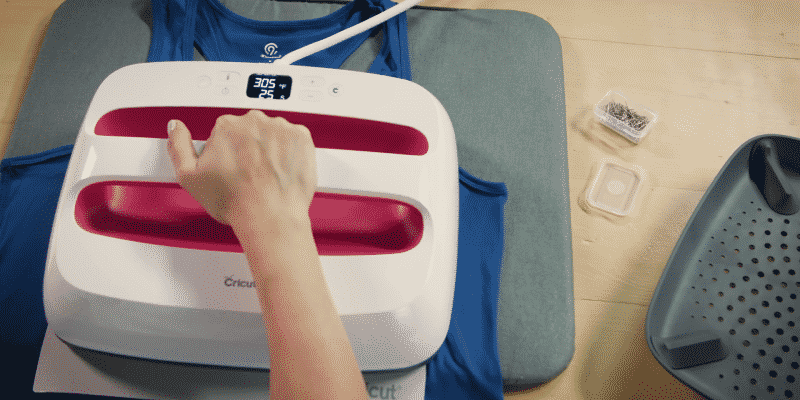
1 – First, heat up your Easy Press.
So what temperature do you iron on Cricut vinyl? If you’re working with 100% cotton (like we are) & Cricut Everyday Iron-On, set the temperature to 315°F.
For other types of Iron-On and other materials, search the amazing Cricut Heat Guide. You can search and find the exact temperatures and timings for every single combination. So if you want to know the settings for how to use Cricut iron-on glitter, they have you covered.
2 – Pre-press
After the EasyPress is hot, you need to pre-press your fabric. This flattens the material, removes any moisture, and heats the fabric so it’s ready to bond to the HTV.
Lay your shirt down on the Cricut EasyPress Mat or a folded towel, so you have a smooth, soft pressing surface. Set the timer for 5 seconds at 315°F, position the EasyPress in the middle of the shirt, and hit the green “C” button to start the countdown.
3 – Press
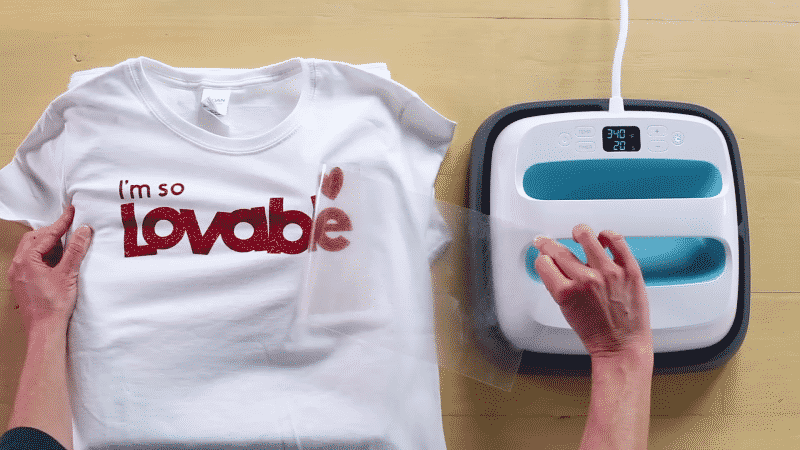
Position the weeded vinyl decal shiny side up, so the vinyl is against the fabric and the plastic back is facing up. Make sure it is centered exactly where you want it.
Set the EasyPress timer for 30 seconds at 315°F, and place the EasyPress over the design. Hit the “C” to start the countdown and press down with light pressure.
Remember: the heat is doing most of the work here. Just keep an even, gentle pressure, and don’t move the EasyPress around.
Flip your whole project over, and press from the back of the shirt for 15 seconds at 315°F.
4 – Peel
Let the shirt cool off for a few minutes, especially if you’re using a cold peel vinyl like Cricut Everyday. You can check the vinyl you’re using to see if it says “cool peel” or “warm peel.”
Now, try to gently peel away the clear plastic liner from the vinyl. If the vinyl starts pulling away from the shirt, stop! Replace the liner and hit it with more heat. I usually do another 10 seconds on the front and 10 seconds on the back.
Once your HTV is fully bonded to the fabric, peel the plastic liner completely off, and admire your creation!
Heat Method 2 – Household iron
You don’t need to use any fancy heat press to transfer HTV. I’ll explain exactly how to use Cricut Everyday Iron-On vinyl with an everyday iron.
Basically, we just need a reliable heat source and a flat surface. An iron works great!
1 – Pre-press
Like with a heat press, you need to preheat the iron and your t-shirt before you transfer the vinyl. Pre-pressing helps remove any wrinkles and moisture from the fabric, and ensures that the HTV bonds properly.
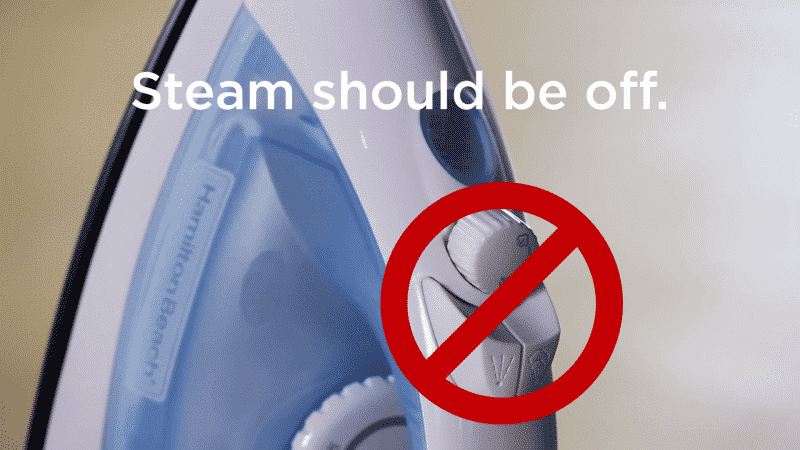
Set your iron to high heat with zero steam, and press for 10-15 seconds where the vinyl decal will be placed.
Important: Do not use steam. Any moisture will inhibit the Iron-on from sticking to the fabric.
2 – Press
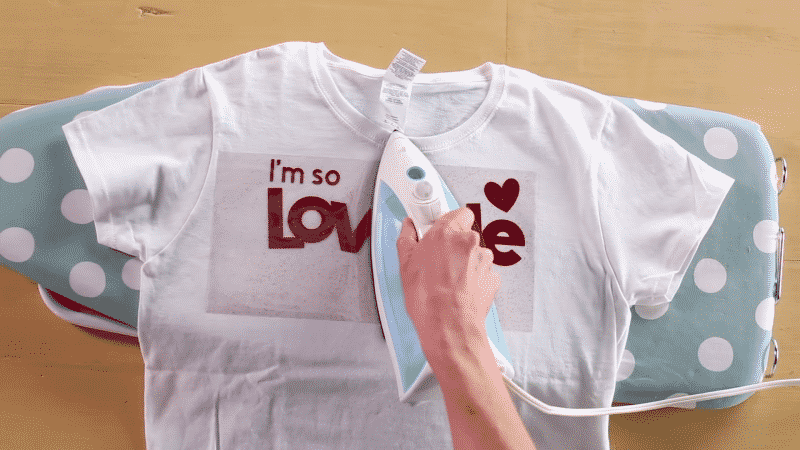
Now, place your weeded vinyl design plastic side up, where you want the image to go. The shiny plastic backing should be facing up, so the vinyl is directly on the fabric.
After your design is in place, cover the plastic with a thin piece of fabric (like a big cotton scrap or piece of pillowcase). Since most regular irons heat unevenly, this prevents any hot spots from melting the plastic.
With the iron set to high heat with no steam, press with medium pressure for 25-30 seconds on one part of the design. Then, lift up the iron, reposition it, and press again for 25-30 seconds, until you have covered the entire area.
Important: Do not slide the iron around. Moving the iron could cause the HTV to bunch up or slide out of position.
Flip your entire project over, and press for an additional 25-30 seconds from the back of the shirt. Again, pick up and reposition the iron, pressing each area for at least 20 seconds.
3 – Peel
Let the vinyl cool. Start gently peeling away the plastic liner from the design. If the vinyl begins to lift off with the liner, stop and replace the liner. Cover with the cotton scrap again, and iron at high heat (no steam!) for 10 seconds from the front and 10 from the back.
When the vinyl is fully bonded to the solid surface of the fabric, slowly peel away the clear plastic.
Heat method 3 – Heat press guide
Lastly, I’ll go over how to use a regular heat press for iron-on vinyl. It’s pretty similar to using the Cricut EasyPress, though please be extra careful not to burn yourself on the top plate.
1 – Pre-press
First, preheat the heat press to 315°F and pre-press your shirt for 5 seconds. This removes moisture and wrinkles, and makes sure the vinyl sticks well.
2 – Press
Next, carefully place the weeded vinyl design into position on your shirt, avoiding touching that top plate, and making sure the plastic backing is facing up.
Cover the work area with a Teflon heat press sheet, and press for 30 seconds at 315°F. Flip the project over, and press from the back for 15 seconds at 315°F.
Note: The Cricut Everyday Iron-On heat press temp can be found at Cricut’s Heat Guide above, which also shows the various pressure settings used for all other types of Iron-On and material.
3 – Peel
Let everything cool for a few minutes. Slowly start peeling the clear plastic liner off. If the vinyl lifts off your t-shirt, press again for 10 seconds or so. When it is fully bonded, then you can pull the plastic off the rest of the way.
Caring for your new project
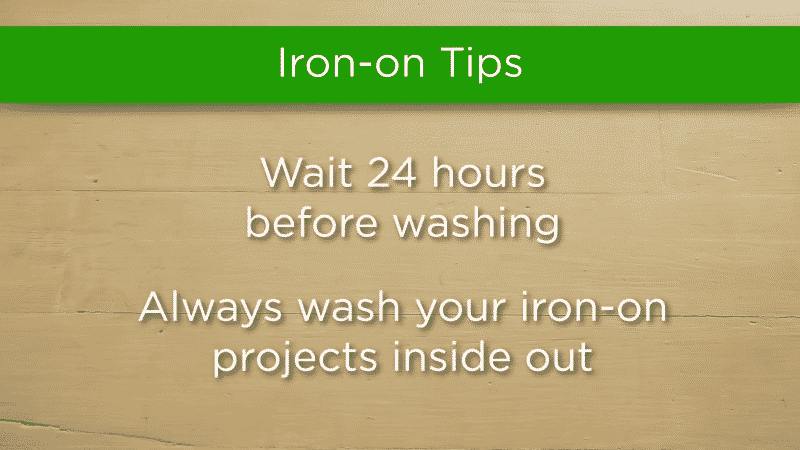
Wait at least 24 hours before washing or wearing your new shirt.
Wash (without bleach!) and tumble dry inside out to protect your design. (Air drying is fine as well.)
If any areas of iron-on begin to lift off the fabric, you can just press again using an iron or EasyPress to re-apply the vinyl.
Mistakes to avoid with iron-on vinyl
- Don’t forget to mirror your design before you cut! This is a mistake that will eventually happen even after you’ve made a hundred shirts. So make sure that the “Mirror” option is selected (green) before you cut. If not, you’ll have to either scrap your vinyl, or maybe you can just use it for some selfies.
- Make sure you don’t use too high of heat. The iron on needs heat, but too much heat can melt the plastic carrier, or make vinyl end up all wrinkly on your project. Place a piece of thin cotton fabric(an old pillowcase) between the iron and your project to protect it from any hot spots your iron may have.
- Don’t use steam! Any moisture will prevent the iron-on from sticking to the fabric. Make sure your materials are bone dry when applying the vinyl so it adheres well.
- Avoid pressing too hard. Press firmly and evenly, but remember that the adhesive is heat-activated, so let the heat do most of the work. Just use medium pressure, instead of putting all your weight behind it.
- Don’t slide the iron around. This could end up shifting your design around before it’s set, resulting in wrinkles and misplaced pieces. Instead, press one section at a time. Then lift the iron and place it onto the next section to press again.
- Don’t wash immediately with hot water. The HTV needs to set after you’ve applied it. Wait 24 hours, wash inside out in cool water, and avoid drying on high heat.
- Be careful not to cut through the carrier! If your cutting depth is too thick, you’ll cut all the way through the plastic carrier sheet that holds the vinyl together. If you cut through the plastic liner, you can still transfer a simple design piece by piece. But you’ll need to reduce the cutting thickness when you try to cut again.
More tips + tricks
- Always make a test cut! If you have a dull blade or the wrong machine settings, you could easily ruin your material and day. A small test cut takes only an additional minute and can save you quite a bit of heartache. This goes for any new material or project you might be working on.
- Depending on the type of HTV you’re using, the default settings might not be appropriate. Glitter HTV can be three times as thick as regular HTV! Read the manufacturer’s specifications for your HTV and make a test cut!
- Make sure there aren’t any little bits left on the carrier sheet, or these will be transferred onto your t-shirt!
- If your vinyl isn’t sticking, replace the carrier sheet and iron it again. You can try ironing from the inside as well.
- Use a firm surface, not an ironing board.
- Use the flat part of your iron; avoid the holes where steam can come out.
- If portions of your design lift up after ironing, re-cover the design and iron for an additional 5-10 seconds.
- You should be able to see the weave of the fabric through the vinyl you have applied.
Which side of iron-on vinyl goes down?
Iron-on vinyl (aka heat transfer vinyl) is one of my absolute favorite materials to use. But when you’re working with a shiny material, it can be hard to tell which side of the sheet you’re supposed to cut.
The simple answer is: place the iron-on vinyl shiny side down when you are cutting.
Iron-on Vinyl has 3 layers:
- the clear plastic carrier sheet (shiny!)
- the vinyl
- the heat-activated adhesive
You want to cut through the adhesive and the vinyl, while leaving the plastic carrier intact. Since vinyl cutting machines cut from the top, this means you want to place the clear plastic carrier (aka the shiny side!) down onto your own cutting machine mat.
If you’re using regular iron-on vinyl (like Cricut Everyday Iron-on), it’s easy to tell. The vinyl has a matte finish (which means not shiny), and then the plastic liner is super shiny.
However, there are SO MANY kinds of HTV, with all sorts of different patterns and finishes. (Part of what makes this material so fun!) But you definitely don’t want to limit yourself to using just the regular ol’ iron-on for your amazing ideas.
What if both sides are shiny?
This is the biggest issue when you’re trying to figure out how to lay out your vinyl sheet on the cutting mat. Sometimes one side looks just as shiny as the other!
Here are a few different ways you can judge which side is the shiny plastic liner:
- Is one side shinier than the other? Look at your vinyl under a bright light, and see which side of the sheet reflects more light. The shinier side will be the clear plastic liner that goes down on the cutting mat.
- Did your vinyl come off a roll? HTV is wrapped around the roll with the carrier side out. This means that you can use the curl of the cut sheet to see which side is the carrier. If the sheet curls down, then the carrier is facing up. If the vinyl curls up, then you have the vinyl facing up.
- Is one side the right color, and the other different? That “different” side is the back of the vinyl and the adhesive, which is the part you want to cut. So place the good-looking side of the vinyl (the side that is the right color, or glittery-ness), downwards on your cutting mat.
A simple test: lift up the corner.
Sometimes I’ve stayed up a tad too late making projects and maybe feel a bit sleep-deprived…and I just start doubting that whether I’m placing my vinyl the right way.
A simple test is to separate the corner to see which part is the opaque vinyl, and which is the clear carrier sheet. You can use a weeding hook or a pair of tweezers to try to dig into a corner to lift up. Or you can even use your fingers to pull apart the vinyl material from the backing.
If it’s the right way, it should be easy to pick into the adhesive backing with a weeding hook, and you’ll pull up some opaque material.
If it’s the wrong way, it will be hard to dig into the material. And if you do manage to pull it up, it will be the clear carrier sheet on top.
Conclusion
And that’s a wrap! I hope you enjoyed our Cricut iron-on tutorial. And I know you’ll enjoy your new ability to make anything you want out of iron-on!
If this guide was helpful, or if you have any questions, please let me know in the comments below!
FAQ
What temperature do I use for Everyday Iron-on?
For Cricut Everyday Iron-On, set your heat press or EasyPress to 315°F, or a regular iron to the high or cotton setting.
How deep do I cut iron-on vinyl?
With a Cricut, just set the material type to Iron-On and it will automatically know how deep to cut.
How can you use multiple colors of vinyl on your cutter?
Here’s a great video by Official Cricut on how to use two colors with iron-on.
Can I use transfer paper or freezer paper?
You don’t need to use sticky transfer paper since the HTV already comes adhered to a clear backing sheet that is used to transfer your design.
To protect your iron, you’ll want to place something between the plastic carrier sheet and your iron. I do not recommend freezer paper as it is coated with wax and this can melt onto your iron or the garment you are working on. I recommend using parchment paper, a silicone or teflon sheet, or a spare piece of thin fabric (like an old sheet).
Should I use a heat press?
A heat press will give absolutely give the most reliable results for long-lasting HTV designs. The large, flat surface is ideal for smoothly transferring designs. You can set the exact temperature recommended by the HTV manufacturer, and pre-heat your garment for consistent results. However, until you plan on making a lot of t-shirts or selling your finished products, you probably don’t need to invest in one.
Which vinyl should I use for other uses, like permanent adhesive vinyl?
I reviewed the best choices here: cutcutcraft.com/best-vinyl-cricut-silhouette.
What are the settings for glitter HTV?
Glitter HTV is THICK. It can be up to three times as thick as regular HTV, and so needs different settings. If you are using Siser Glitter HTV, the Silhouette Cameo cutter settings are:
- Blade: Standard, 4
- Material: Heat Transfer, Smooth
- Speed: 8
- Force: 11
You can find the Siser settings for other machines at the bottom of their page here.
Glitter HTV generally takes a higher temperature and pressure than regular HTV. For Siser Glitter, set your iron between Cotton and Linen (320°F/160°C) and press hard for 10-15 seconds.
Which side of the transfer paper or parchment paper do you place against the iron?
You generally don’t need to use adhesive transfer paper because HTV comes with its own plastic carrier sheet. If your heat transfer vinyl did not come with a backing, use transfer paper or transfer tape that can handle heat. (A carrier sheet from some old HTV should work, if it’s still sticky enough.) And you’ll want to place it sticky-side down!
If you are using parchment paper to protect your iron, place the slick, waxy side against up your iron. (This is actually a silicone coating, not wax!)
How do I get my HTV to stay on after washing it?
Make sure you pre-wash the fabric to prevent shrinking that can pull at your design. Iron your fabric before applying the vinyl to get rid of wrinkles. Press firmly with the iron over each part of your design, without sliding the iron around. If you’re using something thick like a towel in between the iron and the vinyl, try a thinner sheet or parchment paper instead.
Wait 24 hours before the first wash. Wash your garment inside out in cold water, dryer settings as usual, and don’t dry clean. If the design is pulling off your fabric, try ironing again for 5-10 seconds.


I have problems when doing the iron on, it will not stick to my t shirt!!!! I followed direction to the T rolling them down as I did the iron on but needless to say I am ready to throw it all in trash. I have wasted so much materials.
I have made several things with iron on but just cant get it done now , Please help
If you’re having issues with getting vinyl to stick to your shirt, here are the essential things we’ll need to know to help you out:
* What is the material of the shirt?
* What kind of vinyl are you using?
* What are you using for a heat press or iron?
* What settings did you use on that heat press/iron?
* Did you preheat the material?
Also, how did the project fail? Did it fall right off, did it peel at the edges? There’s usually one critical mistake that you can find that explains why a project didn’t quite turn out well.
And if you’re going through a lot of material, I’d suggest just trying to get a small bit to work first, use some of your scrap material left over and get that sticking to your t-shirt before trying elaborate designs. It’s a lot cheaper to fail that way!
Very helpful-thank you!