Glitter tumblers are one of my favorite things to make, but I had been scared to try because I heard they used epoxy and required a turner (whatever that was!).
Well, I sat down and figured it out and it was a lot easier than I thought! I’m all about taking on challenges and trying new things, so I’ll walk you through this adventure on how to make glitter tumblers.
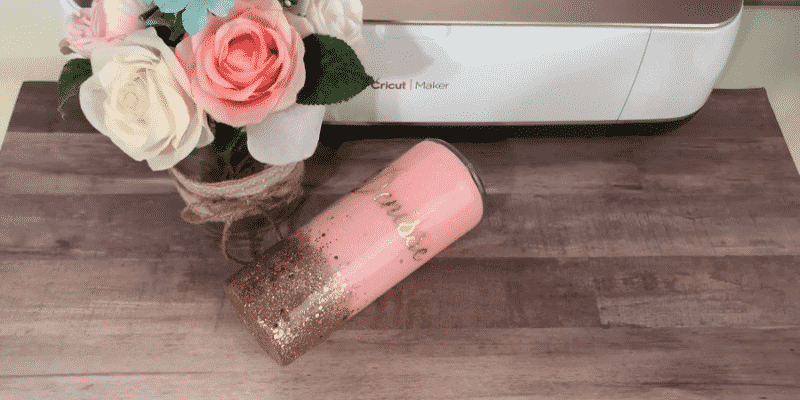
YOUR VERY OWN SPARKLY TUMBLER!!
Other tutorials I read left out a lot of important information, and I was so frustrated trying to follow them that I had to come up with my own way.
We’ll cover working with stainless steel, how to mix epoxy resin, whether or not to use mod podge, cleaning that glitter up, and which spray paint actually works.
By the end of this, you will have your very own DIY glitter epoxy tumbler.
(Oh, and turners? I have a quick way of making those too!)
Table of Contents
Why make a DIY glitter tumbler?
As a lot of you guys know, a few years ago I stopped going into the office and transitioned into this strange state of being a work-at-home mom.
I wouldn’t trade it for the world, but there’s a lot I miss, and part of that was showing off my own crafty flair.
Personalized stainless steel glitter tumblers? They:
- let you play with glitter! Any project that involves glitter, I’m always down to try.
- really encourage hydration. What I noticed when making these for my kids was they were a lot more excited about drinking water, so also anything that helps keep me [and them] hydrated, I’m into.
- are a lot easier to make than you might think. My method doesn’t require a million specialized devices, and most are optional. Working with stainless steel tumblers can have a bit of a learning curve, but I’ve eliminated most of the difficulties.
- let you work with a vinyl decal to customize them even more.
Devices like turners and working with epoxy resin can seem intimidating. Fine glitter can also get everywhere, and spray paint requires that you work outside or in a well-ventilated room.
I’ve tried my best to make this tutorial pretty straightforward, and I can also show you how to scale up your options if you want to start making these for friends or an Etsy business.
Epoxy tumblers are absolutely beautiful, so once your friends (or kids) see what you’ve made, you’re going to have a lot of demand. If you’re planning on going to a bachelorette party, you better get ready to make LOADS of these.
Plus, I also have some bonus tips and a method that doesn’t use epoxy at all.
How to Make Glitter Tumblers With Epoxy
First, you’re going to want to gather the correct supplies. If you don’t have all of them, you can still read through this tutorial to get an idea of how they’re used so you can decide if you want to buy them all.
You’ll notice that most of these supplies are optional because I really like to keep tutorials as simple as possible.
If you have them, great, if not, we can probably find a way of making due and keeping things inexpensive for a first project.
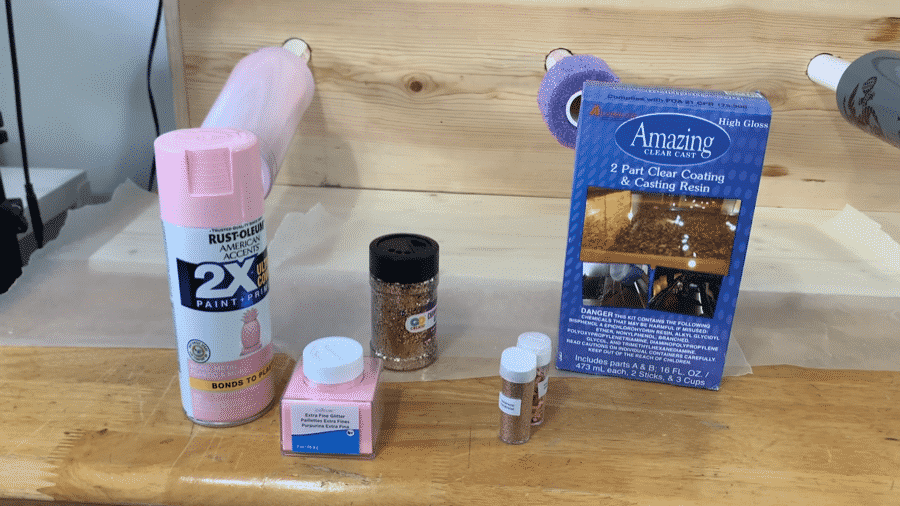
Supplies needed for our glitter tumbler tutorial
- A stainless steel tumbler (like a Yeti or Ozark, but plastic tumblers work too)
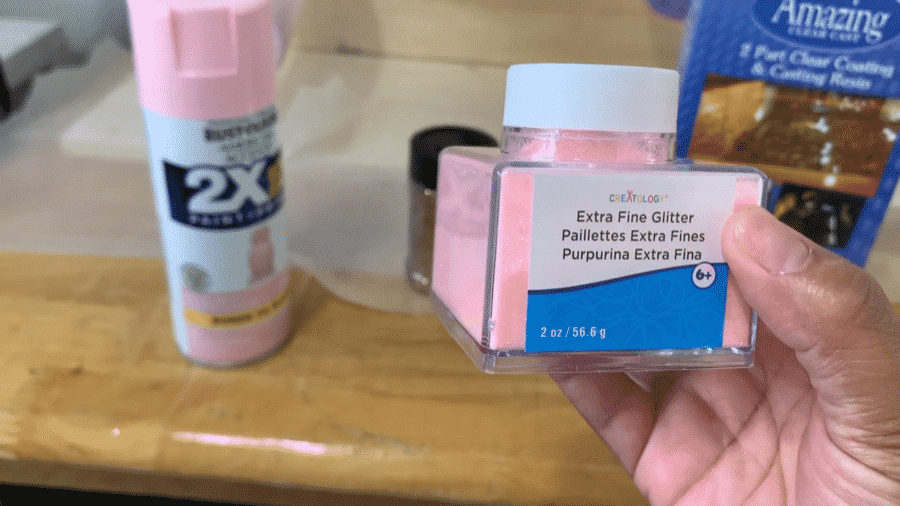
- Glitter (and lots!)
- Epoxy resin
- Spray paint
- Sandpaper (optional)
- Mod Podge (optional)
- Vinyl (optional, but I recommend some holographic)
- Cricut cutting machine (optional if working with vinyl)
- Tape (optional, it’ll depend on your design)
- A turner (optional)
- A Nerf football (also optional, but… you’ll see)
For mixing and applying the epoxy you’ll want:
- Nitrile gloves (protect those hands)
- Disposable plastic cups
- Popsicle sticks
- Parchment paper (or anything to put under it, newspaper or cardboard work fine too)
Step 1 – Tape off the top and bottom (optional)
A lot of tutorials include this step, but I didn’t find it necessary. It’s mostly a personal choice for a personalized tumbler.
If you want to have some steel revealed on the top and bottom, you’ll want to use masking or gaffer tape to cover those areas.
Some people like the idea of just drinking from the steel and not having epoxy touch anything, so that’s another reason to tape off the top. Any epoxy you should be using though is completely food safe and fine to drink from, otherwise, we wouldn’t be coating a tumbler with it!
But, everyone has their own preferences, so if you want to avoid the epoxy at the lip, definitely apply some tape evenly around the top.
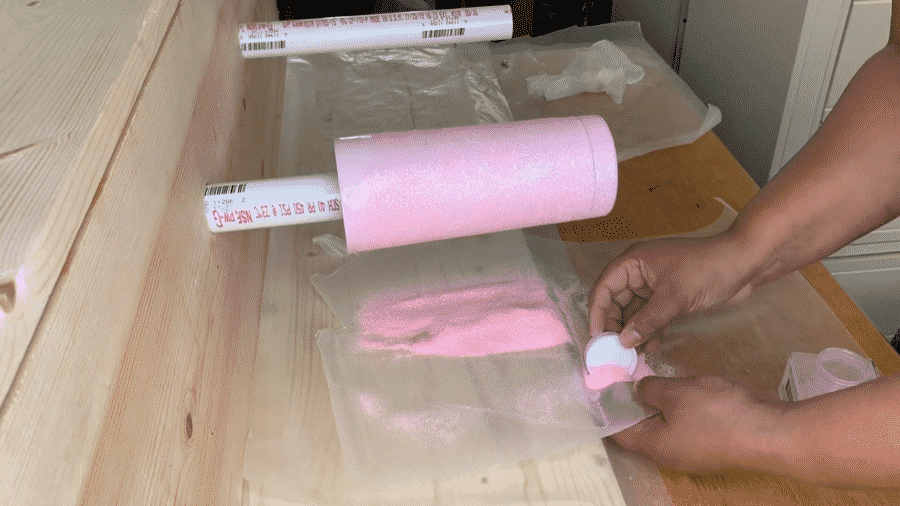
Step 2 – Spray paint your tumbler
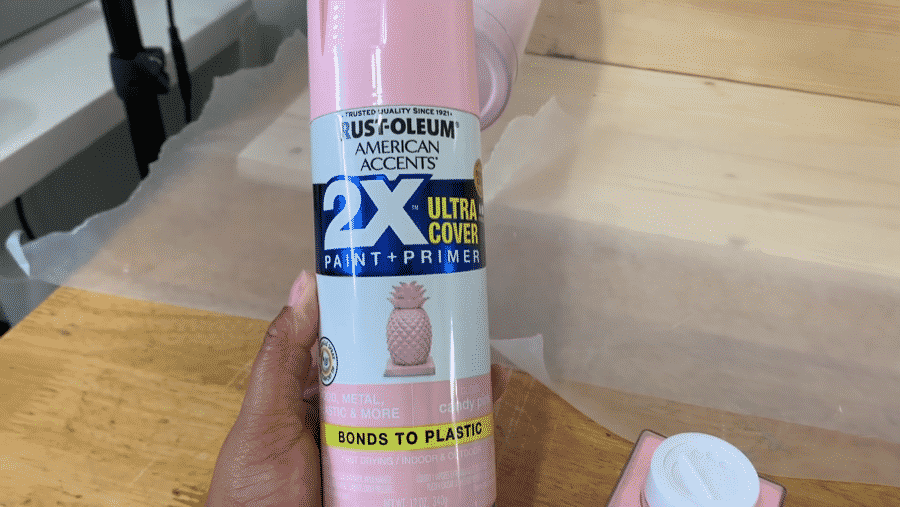
The reason we’re starting with spray paint is that glitter will pop a lot more on epoxied tumblers if there’s a base coat of color on it. I prefer using matte paint because the epoxy will bring out a lot of shine, but play around with it, this is DIY!
Some spray paints will require you to sand down the tumbler first, and a lot of tutorials include that step, but I haven’t found that to be necessary at all. I usually try things the simple way first, and if that doesn’t work, okay, I’ll make things a bit more complicated for myself if I really need to.
So I’ll approach this glitter tumbler tutorial the same way.
For this tutorial, I used Rust-oleum American Accents Paint + Primer, which bonds to plastics, metal, and wood just fine.
I’ve also used Krylon’s ColorMaster Paint + Primer. If you have something else, I really recommend trying it out first before sanding.
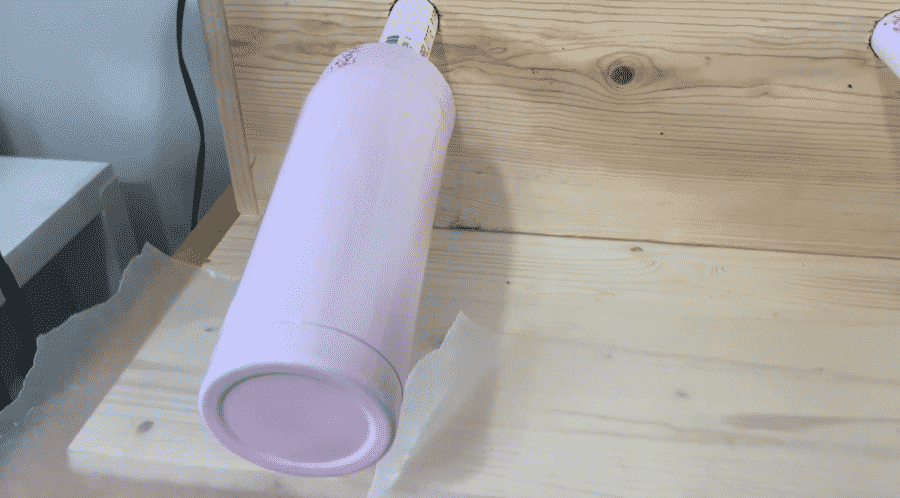
I used a Yeti tumbler, but any stainless steel tumbler will work the same! If you only have plastic, make sure your spray paint says that it bonds to plastic.
Spray paint dries really quickly, especially if you’re doing it outside (which I recommend)!
Step 3 – Prepare your turner
A turner looks like this:
It’s what will let your glitter tumbler dry streak-free and look really good. Stainless steel, even when spray painted, doesn’t absorb a lot of moisture so you’ll see your epoxy and glitter streaking on it if you don’t use a tumbler.
You can do this by hand, which involves turning your tumbler every 3-4 minutes while it’s drying for around half an hour. I really recommend if you take this route that you set little egg timers or a repeatable alert on your phone.
If you have a turner, great, let’s continue on! If not, you’ll want to skip to here where I explain how to build your own.
Step 4 – Mix and add epoxy resin
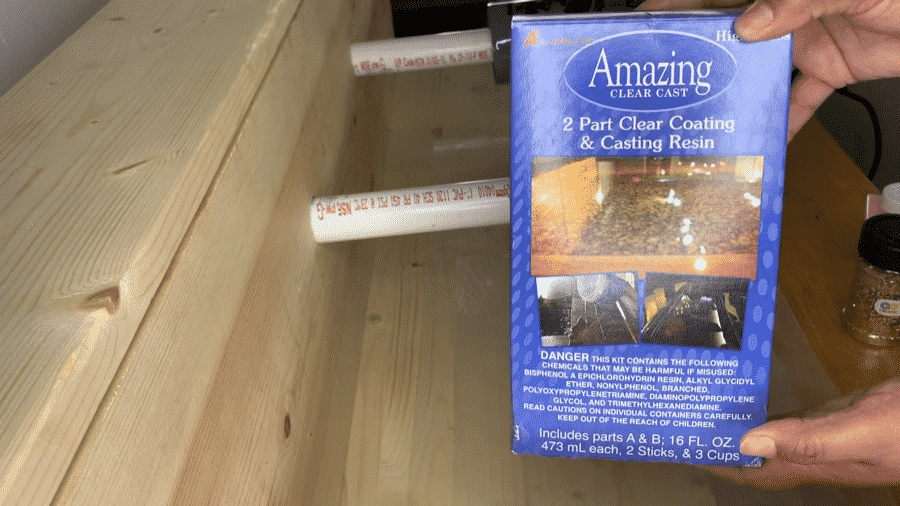
In this step, we’re applying the first adhesive so our glitter will stick to the tumbler. You have a few options, all of which work:
- Mod podge
- Spray adhesive
- Epoxy
Mod Podge can be really streaky and thick when applying, so we’re going to use the same epoxy we’re coating the tumbler with. If you have a spray adhesive, I’d go right ahead and use that.
Similarly, if you have Mod Podge and are a master at applying it, it should work just fine.
So much of crafting is about making things that are personalized and comes down to the choices we make. Any tutorial I have I really hope you guys deviate and DIY it at home.
You’ll learn a lot more by experimenting and trying new methods, this tutorial is really just here to give you a basic guide to return to when things get difficult or if you’re not sure what to do next.
Your epoxy should be from a reputable source and say authorized as food-safe by the FDA. You don’t want to use anything weird on something that will come this close to your mouth!
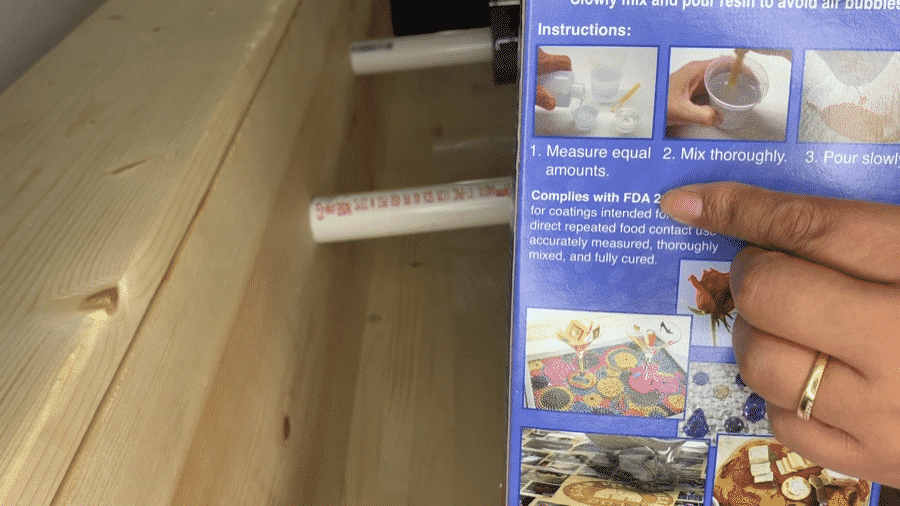
If you aren’t sure if it’s safe to use or not, I recommend finding a new epoxy where it’s very explicitly mentioned.
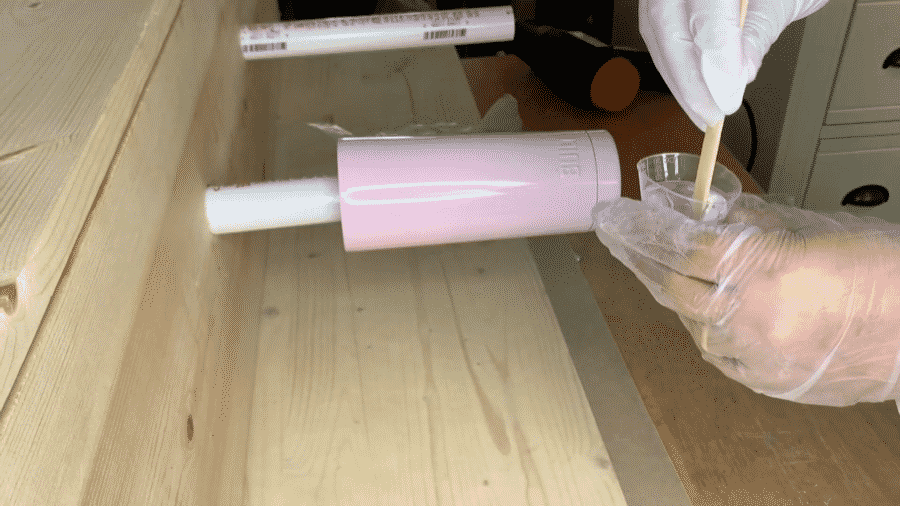
With this step, we’re going to be applying the glitter right after, so go ahead and place your tumbler on the turner and start turning! Make sure the glitter is handy because you don’t want things to dry too quickly.
The epoxy will come with instructions, but generally, you’re mixing equal parts of each (epoxy becomes activated when two liquids are mixed together, making it easy to store) and stirring slowly for around 3 minutes.
If you see any bubbles forming, try to stir a bit more slowly or pop them with your popsicle stick!
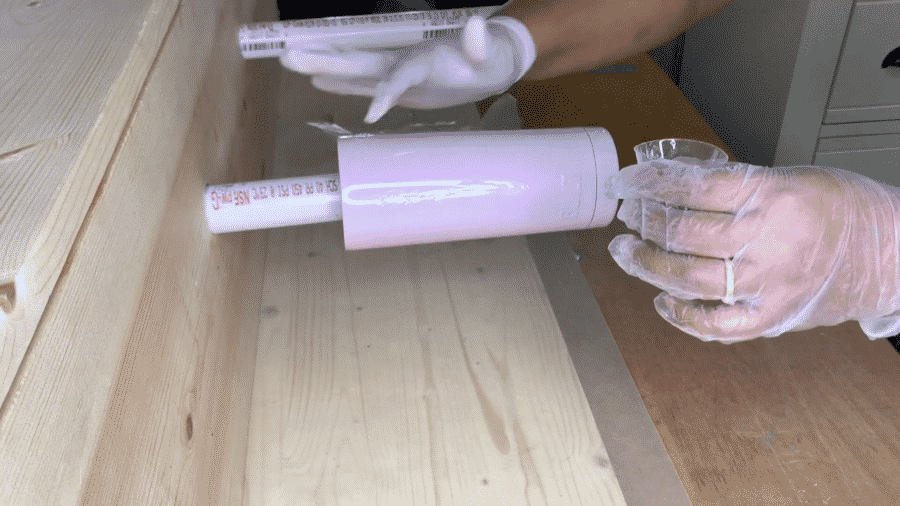
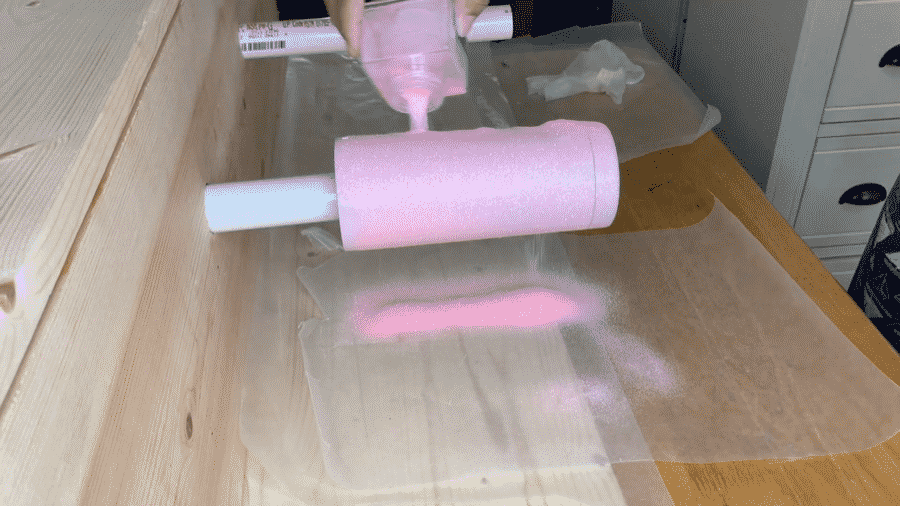
Apply the epoxy to the tumbler using gloved hands, spreading it evenly over the entire painted surface. As soon as you have an even coat, it’s time to apply the glitter!
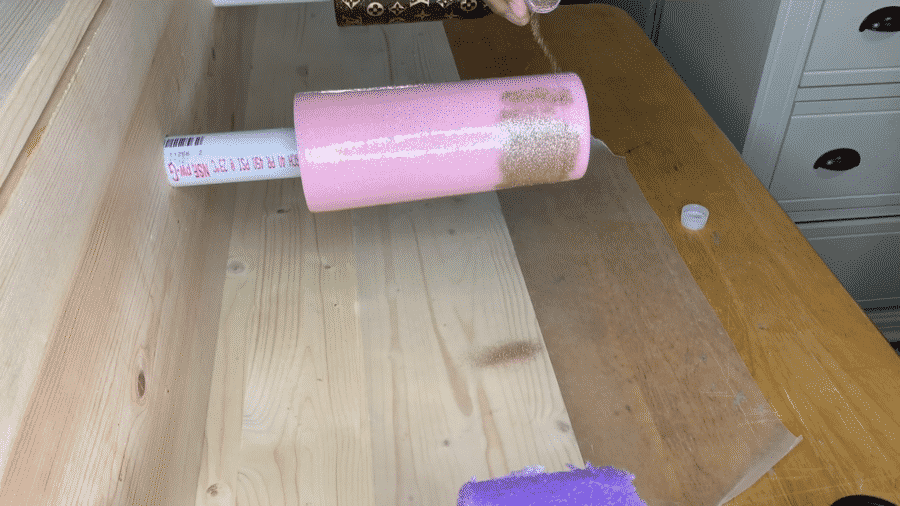
Step 5 – Apply glitter
Now that you have your adhesive of choice coating your tumbler, it’s time to pour on the glitter. A brush is optional for this step.
You’ll want to make sure the epoxy tumbler turner is spinning your tumbler, which will make it a lot easier to get an even coat.
You can choose to do this in a few stages, where you apply glitter to part of the tumbler, let it dry, and then apply another coat of epoxy or spray adhesive to another part, or you can do it all at once.
You’ll also want to practice GLITTER CONTAINMENT. If you have kids (or are a kid yourself, or just LOVE GLITTER) you know that practicing GLITTER CONTAINMENT is of the utmost importance.
GLITTER CONTAINMENT 101:
- Make sure you have something underneath the work area, like a newspaper or drop cloth
- Work in an area where clean up is easy, where there are hard surfaces. Avoid carpet if you can, and working outside or in the garage is great
- Lint-rollers make fast work of fine glitter if you have some spots you need to touch up
- Make sure you seal the tumbler well (we’ll get to this in a bit) so you don’t shed glitter from your project
If you’re having a lot of issues working with glitter, but still love its look, there’s one last option: just use glitter paint! You don’t get quite the same effect, but the clean-up is certainly a lot easier.
With that said, don’t skimp on the glitter, this is a glitter tumbler after all! I usually start with a small amount, pour it over the rotating steel tumbler, and then keep scooping up what falls past it to reapply.
I really don’t like to waste glitter, and whatever is leftover from the final pass I’ll put back into the container.
What I advise against doing is mixing your glitter into the epoxying and applying that directly. It makes it harder to reuse glitter and in my experience, it doesn’t adhere well or shine as much.
Since I like a layered look, what I do is let it dry for around 12 hours, then apply more epoxy to the area I want to cover and add another layer of glitter. If you want to save time, do it all at once.
Step 6 – Optional: apply vinyl decal or more glitter
If you’ve worked with vinyl before, you know that decals stick really well to smooth materials.
So if you’re going to be applying vinyl, even though it does delay things a bit, I recommend applying a layer of epoxy over the glitter, then the decal on top of that.
If you want to apply more glitter to another part of the steel tumbler, this is a good opportunity to do that as well and get that layered look I mentioned above.
You can cut corners here and try applying the vinyl decal right over the glitter layer, but be very careful and delicate if you’re doing it that way.
Also, this probably goes without saying, applying a vinyl decal to a tumbler that’s spinning is really difficult. If you’re a bit sleep-deprived, you might catch yourself doing it. Not recommended!
Step 7 – Apply the final coat of epoxy
Almost done!
This is just like when you applied epoxy in Step 4, you want to have the tumbler on the epoxy tumbler turner and you’ll apply a smooth layer of resin with your finger.
I like to use my index finger and make strokes along the length of the tumbler down toward the base. I do this over and over as it spins and I never have any issues with streaks.
If you applied a decal in the previous step, you’ll want to be just a bit careful around that area so you don’t pull it off.
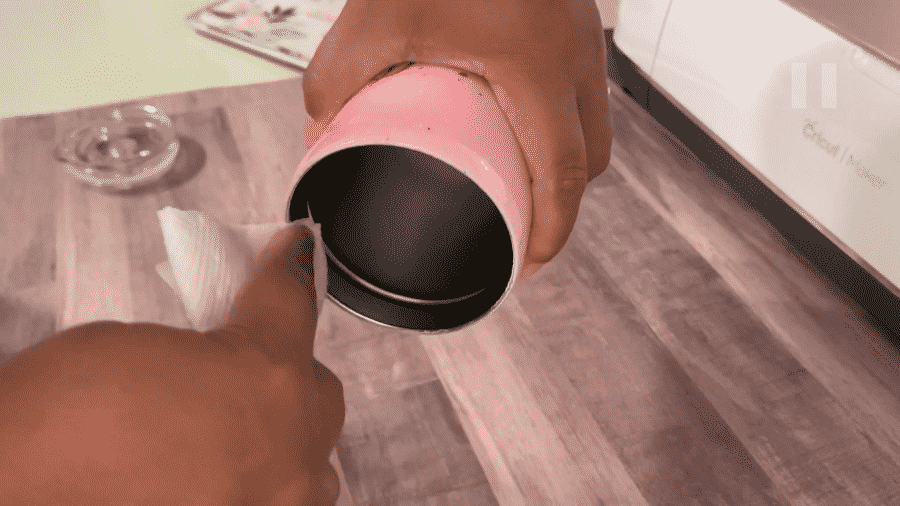
Step 8 – Clean the tumbler and remove the tape
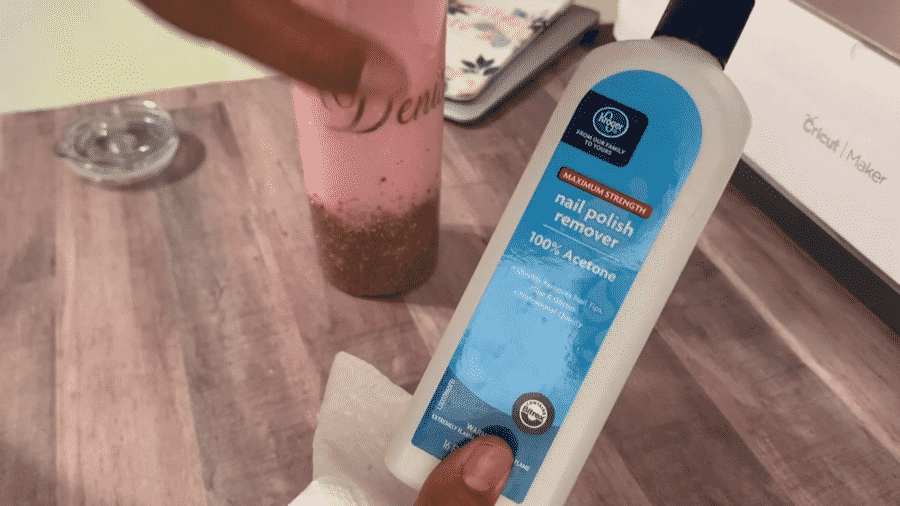
If you used tape you can remove that tape from the tumbler around 45 minutes after your final coat. Peel it slowly but evenly.
If you didn’t use tape, this is where I’d grab some acetone to remove any epoxy or glitter which found its way into the inside of the stainless steel tumbler.
Nail polish remover works great on stainless steel and goes right through the resin, so just apply some to a paper towel and buff those areas out.
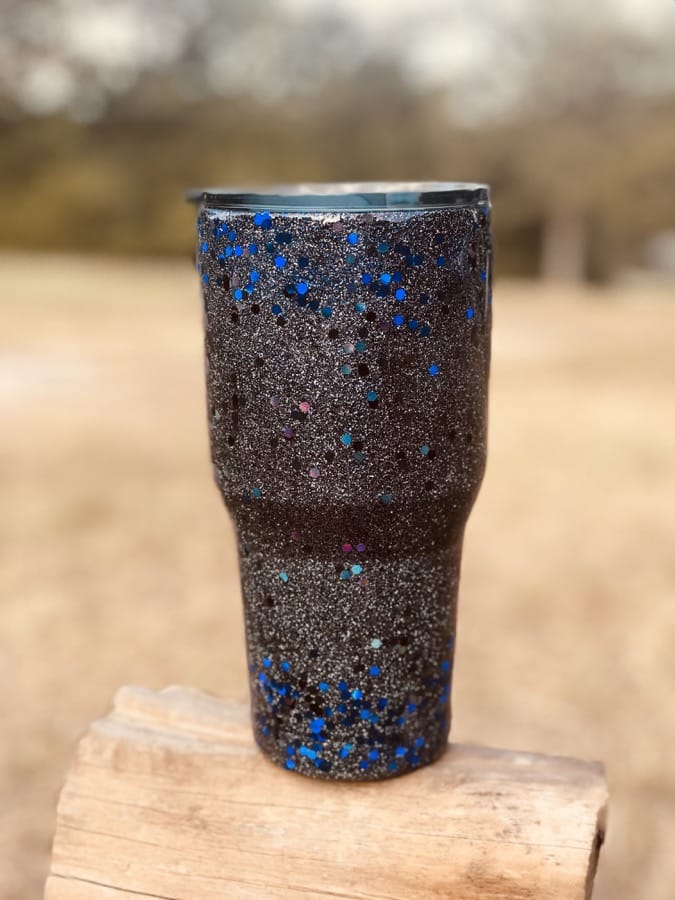
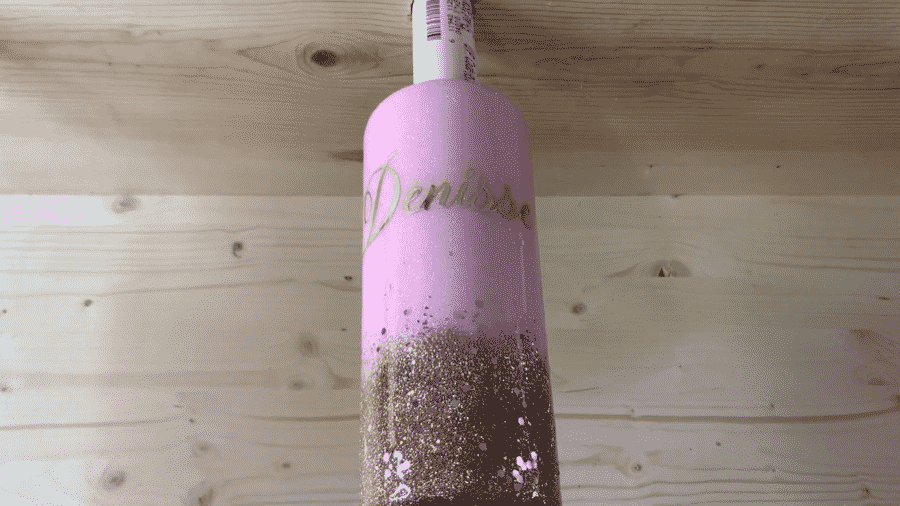
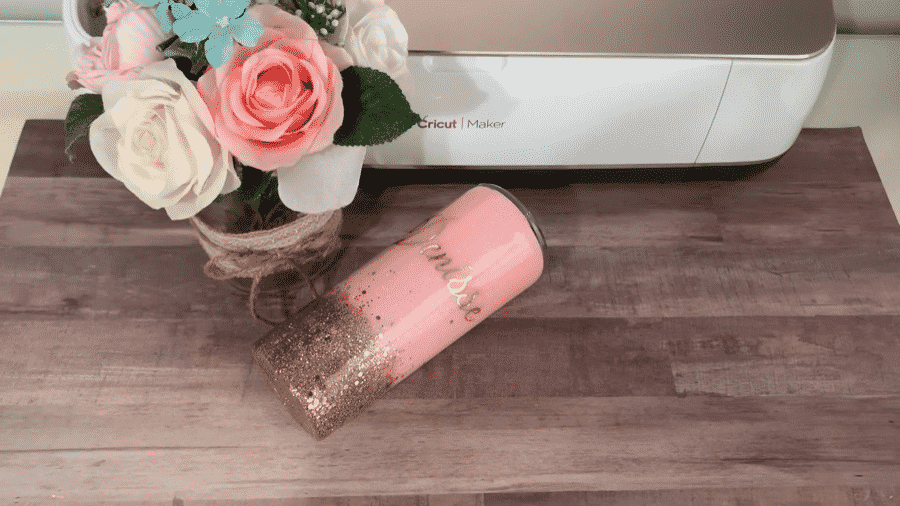
That’s it! You have officially created one DIY glitter tumbler!
How do you get floating glitter in a DIY glitter tumbler?
Creating a floating glitter effect in a DIY glitter tumbler involves adding a layer of glitter between two layers of epoxy, giving the illusion that the glitter is suspended within the tumbler. Here’s how to achieve the floating glitter effect:
- Follow Steps 1-5 in the main tutorial to prepare your tumbler, apply the base coat of epoxy, and add your first layer of glitter.
- Allow the first layer of glitter and epoxy to dry completely, usually for about 12-24 hours, depending on the epoxy used and the climate.
- Mix another batch of epoxy and apply a thin, even coat over the dried glitter layer. This will create a barrier between the first layer of glitter and the next layer of floating glitter.
- Allow the epoxy layer to dry for 2-4 hours, or until it’s tacky but not completely dry. This timing is crucial, as the epoxy needs to be sticky enough to hold the glitter, but not so wet that it causes the glitter to sink.
- Sprinkle a second layer of glitter over the tacky epoxy layer. You can choose to use the same color as the first layer, or a different color for added dimension. Use a lighter hand when applying this layer of glitter, as you want to achieve the floating effect without completely covering the first layer.
- Gently tap or shake the tumbler to remove any excess glitter, ensuring the floating glitter layer is sparse and well-distributed.
- Allow the floating glitter layer to dry for another 12-24 hours.
- Once the floating glitter layer is dry, apply another coat of epoxy to seal in the glitter and provide a smooth, glossy finish. Follow Steps 7-8 in the main tutorial to complete your DIY glitter tumbler.
Now I’ll cover what to avoid along with some tips for care.
What to avoid
I’ll be honest, this wasn’t the easiest project when I tried it the very first time.
I had tried mod podge (and failed), tried sanding the epoxy (which made a huge mess), and had glitter all over the place.
The advice in this tutorial is all about letting you avoid some of those common issues with making glitter tumblers. I want it to look perfect!
So here’s a quick list of what to avoid (with a few tips after):
- Avoid the dishwasher. I know, it’s easy and convenient, but the heat and abrasive water will make quick work of even perfect glitter tumblers. If you want to try it, top-rack only!
- Don’t forget to use a cup turner. If you don’t have one, you can do this by hand with a little bit of work (I’ll show you how below), but I really recommend you use one and make sure to keep it turning. Having a smooth, even glossy finish really takes this project to the next level.
- Don’t apply the vinyl decal directly on the glitter. It does save time doing it this way, but it’ll be bumpy and you’ll have a really difficult time getting it to adhere properly. Plus, you’ll have a lot of issues with what your transfer picks up.
- Don’t sand your stainless steel tumbler before painting. Okay, you can, and it probably won’t hurt, but it’s almost always unnecessary and just takes up time!
- Don’t skimp on the glitter. Look, are we making glitter tumblers or are we making glitter tumblers? You’ve got to go WILD with the glitter. Give in to your inner kid and just cover it. You’ll thank me.
Do:
- Let it dry. Whenever a step encourages you to let it dry, I do tell you how long, but letting it dry longer is always a safe bet, especially if you’re in a cold or wet climate.
- Spray painting is optional but helpful. If you don’t use spray paint, the tumbler should still turn out just fine, but you might have to use more glitter or extra layers. For me it’s a lot easier to just start with spray paint, it’s a pretty fast step.
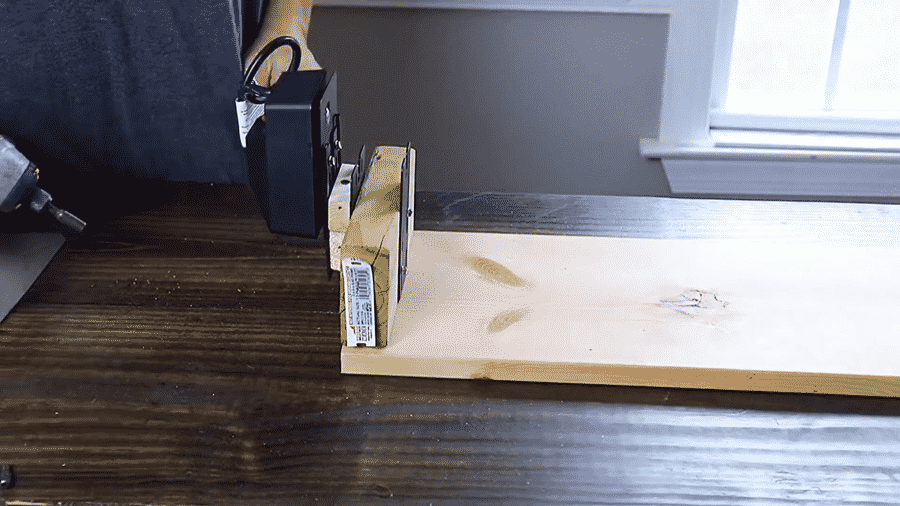
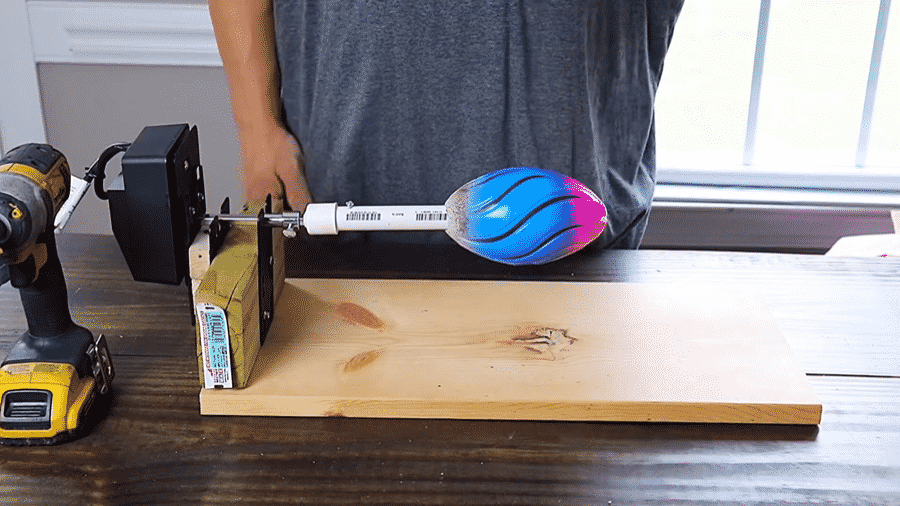
How to make your own epoxy tumbler turner
Bonus tutorial!
So what is a turner? They’re typically used for cups or steel tumblers so whatever you’re applying doesn’t streak. They’re pretty much essential for making a glitter tumbler, and don’t cost too much.
But! If you’re really into making things yourself, I have a tutorial on how to make a tumbler turner.
With the help of Holli, I’ll explain how to make your own cup turner using a rotisserie kit and a few pieces of wood. If you think this is beyond your expertise, I really encourage you to still try it because I think you’ll surprise yourself with what you’re able to achieve.
A lot of simple tutorials are 20-30 minutes with lots of chatting, which I don’t always mind but sometimes I just want to find out how to do the thing! That’s why I love this tutorial.
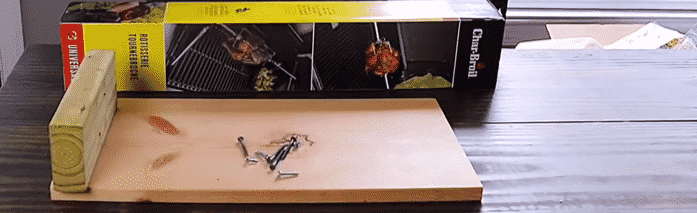
Materials needed:
- Rotisserie kit motor (you can find these at Home Depot or Lowe’s)
- Screws (wood)
- Self-tapping screws
- PVC pipe and end-cap
- Flat board of wood
- Scrap piece of 2×4
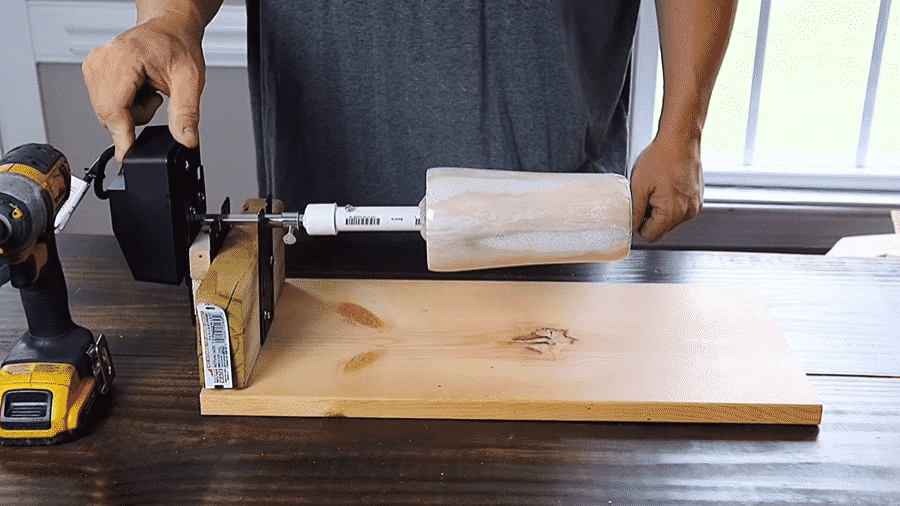
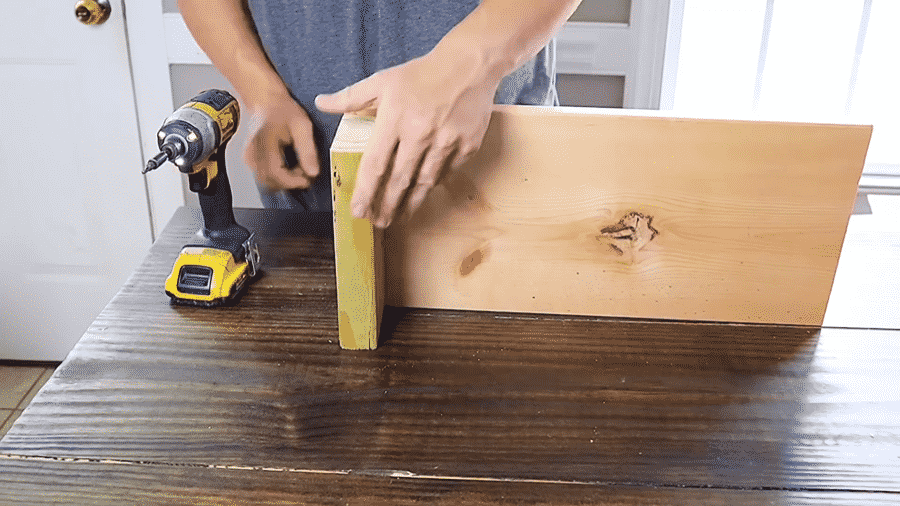
Okay, let’s get started.
1 – Attach 2×4 onto the flat piece of wood with wood screws. If you’re worried about splitting the wood, pre-drill the holes.
2 – Attach the rotisserie motor bracket on to the back of the 2×4.
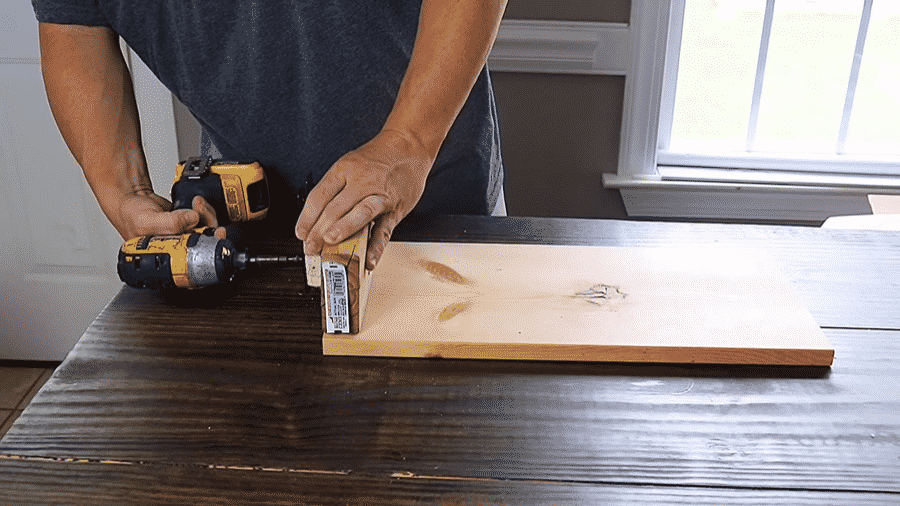
3 – Place your flat rotisserie bracket on the front of the 2×4, making sure they’re aligned.
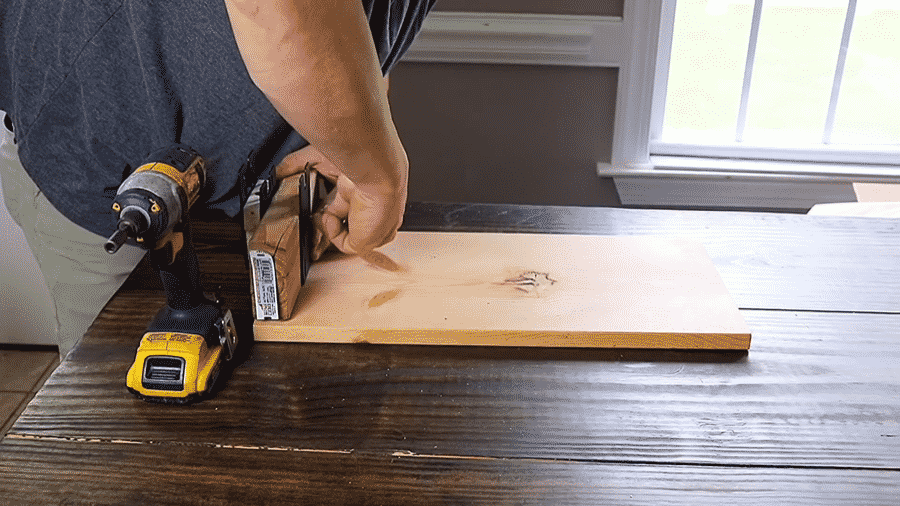
4 – Secure the motor onto the back of the motor bracket.
5 – Cut the rotisserie rod down to 10″ if it’s longer
6 – Cut a hole in the PVC cap to slide the rod through
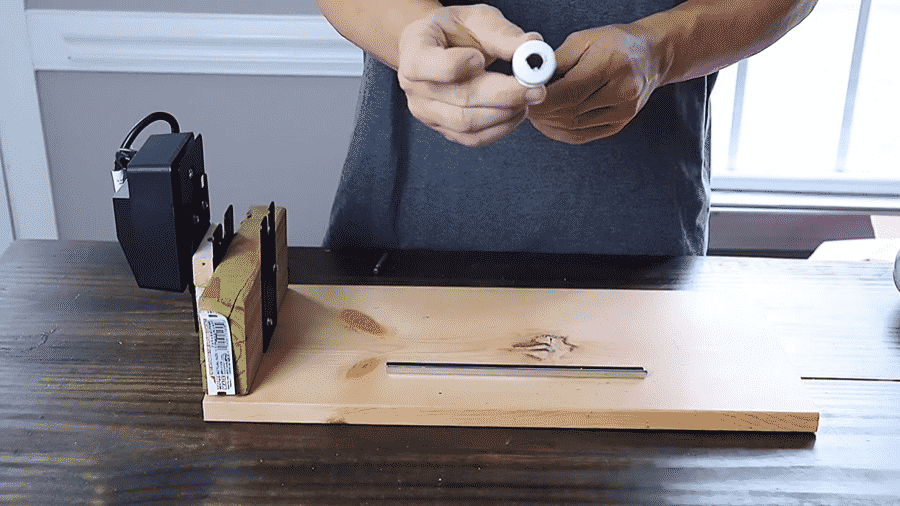
7 – Secure bushing onto the rod so it can turn evenly.
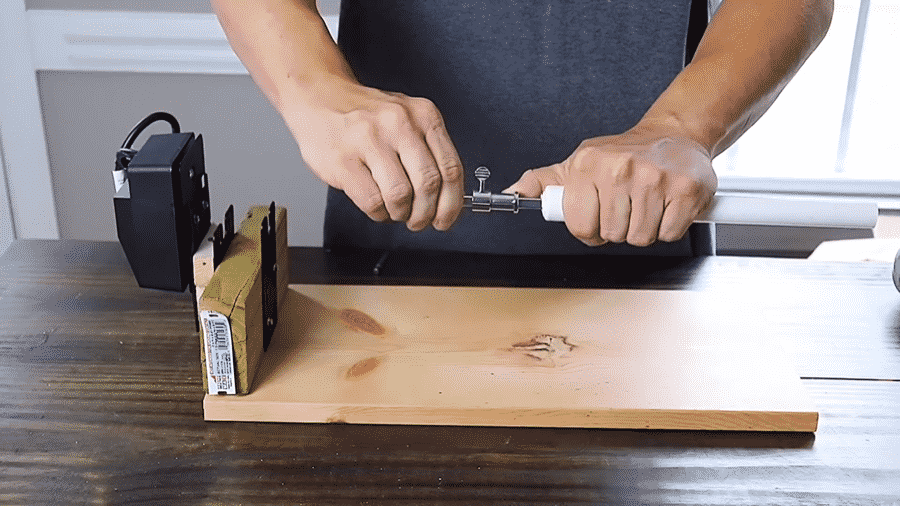
8 – Attach the rod into the motor, and you’re basically set!
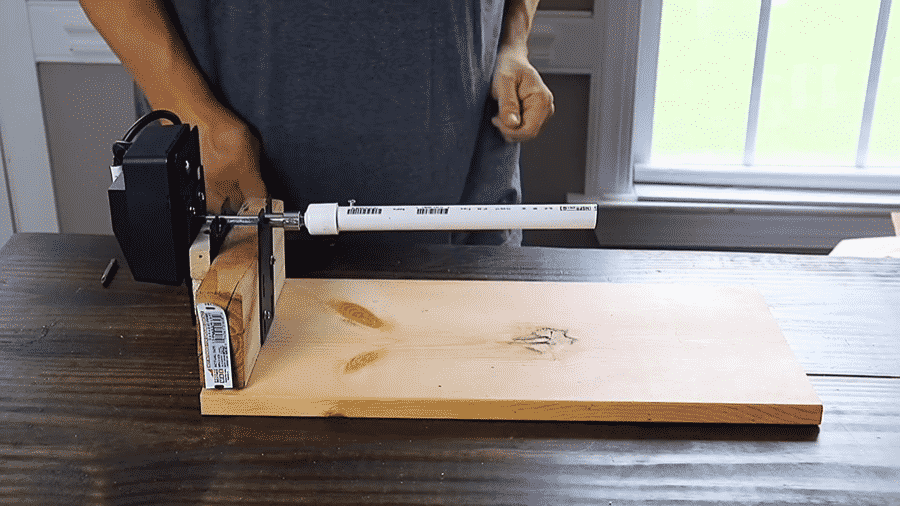
9 – You can attach a foam football on to the end of the pipe so that the tumbler is secured on the rod and turns smoothly and evenly.
Conclusion
That’s it, you should now feel confident about making your own glitter tumblers! I’ll cover some FAQs in a moment but first I’d like to ask you to share what you create with me in the comments!
Some people find making glitter tumblers to be difficult because of all the waiting involved, they haven’t worked with epoxy before, or they don’t have a cup turner.
I look at it a bit differently, whenever you feel like you’re out of your depth that means you’re in a growing phase! You’re about to learn something, even through failure, that you didn’t know before and as you compound and pile up these lessons you’re going to become a more versatile crafter.
So, experiment, and play around with the instructions. Try different kinds of paint and different materials for the tumbler. Work with plastic, stainless steel, coarse glitter, fine glitter, whatever!
FAQ
Can I use spray adhesive instead of mod podge?
Absolutely! I recommend using epoxy for everything, and since you’re already working with it and mixing it shouldn’t be too difficult. But if you’re short on time and want things to go quickly, spray adhesive is much better to use than mod podge. I find the glitter sticks better and overall looks a lot nicer and less streaky.
Do you have to spray paint a tumbler before epoxy or glitter?
No, you don’t have to spray paint a tumbler before epoxy, but it’s recommended because it provides a base color that helps the glitter stand out more. It also ensures better adhesion between the tumbler and the epoxy.
Are glitter tumblers dishwasher safe?
While some glitter tumblers may be able to withstand the dishwasher, it’s generally not recommended. The heat and abrasive water can damage the epoxy and glitter over time. To preserve your tumbler, hand wash it gently with warm soapy water.
How can you spread glitter evenly?
To spread glitter evenly, use a tumbler turner while applying the glitter. As the tumbler rotates, sprinkle the glitter onto the surface, allowing it to distribute evenly across the tumbler. You can also use a soft brush to help distribute the glitter more uniformly.
Does this work for chunky glitter?
Yes, this method works for both fine and chunky glitter. However, keep in mind that chunky glitter may require more epoxy to cover and seal it properly.
What do you do with excess glitter?
Excess glitter can be collected and reused for other projects. Use a piece of paper towel, a tray, or a drop cloth to catch the excess glitter as you apply it to the tumbler. Then, carefully pour the collected glitter back into its container for future use.
Does this work for acrylic tumblers?
Yes, this method can work for acrylic tumblers as well. Just make sure to use a spray paint that bonds to plastic and ensure the epoxy you’re using is compatible with the acrylic material.
Does this work with vinyl decals, too?
Yes, you can incorporate vinyl decals into your glitter tumbler design. Apply a layer of epoxy over the glitter, then carefully place the vinyl decal onto the smooth epoxy surface. Finally, apply another layer of epoxy over the decal to seal and protect it.
Do you need to use epoxy?
Well, yes and no. I think the glitter tumblers look a lot better with at least a coat of epoxy on the exterior. So at the minimum, I’d use one coat at the end, but play around and maybe the rougher texture is something that will make yours unique!
What if I don’t have a cup turner?
I have a quick tutorial above on how to make your own, but you can also use any rod with a toy football stuck on the end. Just make a stand and turn every few minutes. I really recommend buying or making one though!
Can you use matte or glossy paint?
Yup! Both glossy and matte spray paint will work just fine. You can even play around with using glitter spray paint and nothing else!

