
Looking to remove iron-on vinyl from a shirt? Or perhaps the vinyl is peeling off your favorite bag and you can’t bear to get rid of it yet?
Or, let’s be honest here, you messed up your craft project and need a quick fix – it happens.
With our step-by-step guide on how to remove heat transfer vinyl (HTV), it’s going to be okay. I promise.
Adding heat transfer vinyl to a shirt can be easy, yet removing it is a bit trickier. But don’t panic. By the end of this tutorial, you’ll know exactly what steps to take when removing heat transfer vinyl.
(I’ll also let you know what to avoid so that you don’t ruin your project.)
Table of Contents
What Is Heat Transfer Vinyl?
![]()
Heat transfer vinyl, or HTV, is an adhesive-backed vinyl with a heat-sensitive adhesive that makes it perfect for use on fabrics. It comes in a variety of colors, patterns, and textures, and is an irreplaceable choice for DIY t-shirt crafting, bags, jackets t-shirts, jerseys, and anything else you might want to decorate permanently with a vinyl design.
Heatt transfer vinyl is backed by a clear, plastic transfer sheet, also known as the carrier sheet. To use it, you cut out your design, weed out the excess vinyl, flip it over, and iron it onto your fabric. The carrier sheet does the job of transfer tape or transfer paper, so there’s no need for additional materials. Once ironed, the carrier sheet is removed, revealing your completed design.
HTV comes in individual sheets or large rolls and can be found in a variety of styles, including smooth, flocked, glittery, metallic, printable, and even holographic textures. It’s an incredibly versatile and fun material for crafting personalized clothing and accessories. If you’re up for a bit of 80’s nostalgia, heat transfer vinyl is the way to go!
Why remove heat transfer vinyl?
![]()
Sometimes, things don’t go as planned when applying heat transfer vinyl to a shirt. Whether it’s a spelling error, misplaced transfer, or overheated vinyl, removing it can be the best option to save your garment and materials.
Here are a few more reasons:
- You’ve made mistakes and don’t want to scrap the project. Nobody’s perfect, and sometimes mistakes happen. If you’ve made a spelling error, forgotten a letter, or misplaced a transfer, removing the heat transfer vinyl can give you a second chance to correct the issue without having to scrap the entire project.
- You can revamp old clothing. Got an old shirt that you’ve held on to since the 9th grade? What was that old saying? Waste not, want not! Rather than throwing old clothes away, why not give them a refresh? You could end up with a whole new wardrobe without having to break the bank.
- Recycle old materials. If you’re as passionate as us about being a responsible crafter, learning how to remove heat transfer vinyl can save a lot of waste. I’ve had friends who just threw shirts and bags away because of a bad HTV application: I’m here to save those shirts!
- These methods are really simple. Did I mention how easy it is? Really, you don’t need to be a design expert to know how to remove heat transfer vinyl. I’ll walk you through it.
- Overheated vinyl: If the vinyl has been overheated during the application process, it might not adhere properly or may even be damaged. Removing the overheated vinyl and reapplying a new one can save your shirt and make sure the design looks great.
Removing HTV
![]()
There are a few ways you can use to remove vinyl transfers from old shirts, or fabric. Each method has its advantages and is best suited for different situations. Here’s a quick rundown:
- Commercial Vinyl Remover (VLR): A specially designed solvent intended for removing vinyl from shirts and other fabrics. It’s an excellent choice if you want a quick, efficient, and safe method, but it works best for smaller jobs.
- Hot iron/hair dryer: You’re going to warm up the vinyl transfer and gently start peeling it off. If you have an iron at home, this is probably the quickest and most reliable method.
- Rubbing alcohol, Goo Gone, petroleum jelly, or acetone: These and other chemicals like nail polish remover remove vinyl by breaking down the adhesive. Useful on their own or with a flat iron. Typically best used after another approach.
Alright, let’s get go in-depth into each method and get removing!
Commercial Heat Transfer Vinyl Remover (VLR) Method
![]()
I recommend this method for small errors, like minor letter removal or tagless label removal. You’ll need a bottle of VLR (Vinyl Letter Removing) solvent. We recommend this one. These solvents are specifically designed to remove heat transfer vinyl without damaging your material. You’ll also want a pair of gloves and tweezers.
- Flip the material inside out and apply a few drops of VLR to the back of the HTV area. This way, the solvent will work from the inside, helping to loosen the adhesive backing holding the HTV in place.
- Apply VLR to the front of the material if needed. For particularly stubborn HTV or if the material absorbs the VLR, you might need to apply it on the front as well.
- Let the VLR sit for a few moments until the vinyl begins to bead up. As the chemical solvent works to break down the adhesive, you’ll notice the vinyl starting to lift from the material.
- Gently pull the heat transfer vinyl away from the material swiftly before it dries. Carefully removing the vinyl to avoid tearing or distorting the material. If it doesn’t come off easily, apply a bit more VLR and allow it to sit for a moment before trying again.

- If there’s any sticky vinyl residue left after removing all the vinyl, use a cloth to rub it off, sometimes the friction is enough. By doing this, you can ensure a clean surface for applying new HTV or simply leaving the material residue-free.
- Allow the material to dry completely before applying any new HTV or wearing it. This ensures that the solvent has evaporated and won’t interact with the new HTV or cause any irritation.
Hot Iron Method
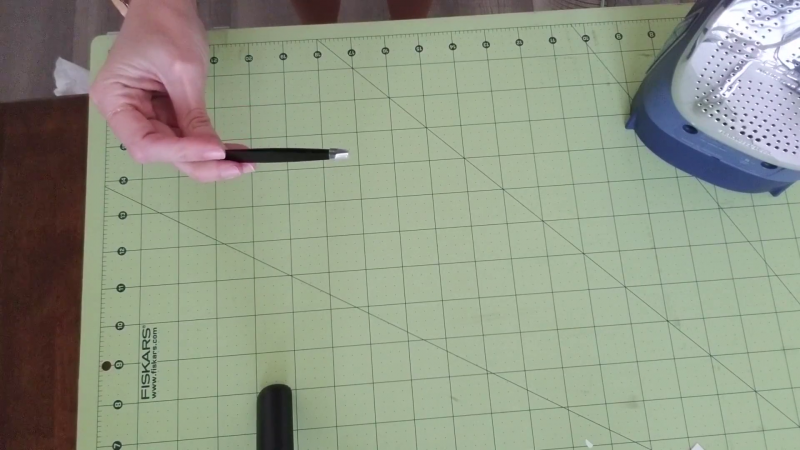
Materials to get started:
- an iron
- tweezers (I recommend using needle nose ones as these are most effective for the job)
- scissors or an X-ACTO knife if you have one
- Set the iron to the cotton level or max setting. The first thing to do is to set the iron to the hottest temperature you can. Make sure to check what heat the material you’re using can handle – unless you plan on checking out ‘how to remove burnt material from an iron’ tutorials!
As a general guide, the following temperatures can be used for these types of materials:- Cotton: 302 degrees F or setting 5
- Linen: 302 degrees F or setting 5
- Nylon: The lowest setting (Note that this material is really easy to burn so take extra care if you’re using Nylon)
- Polyester: 275 degrees F or setting 3 (If you’re using polyester, check out these tips for working with it.)
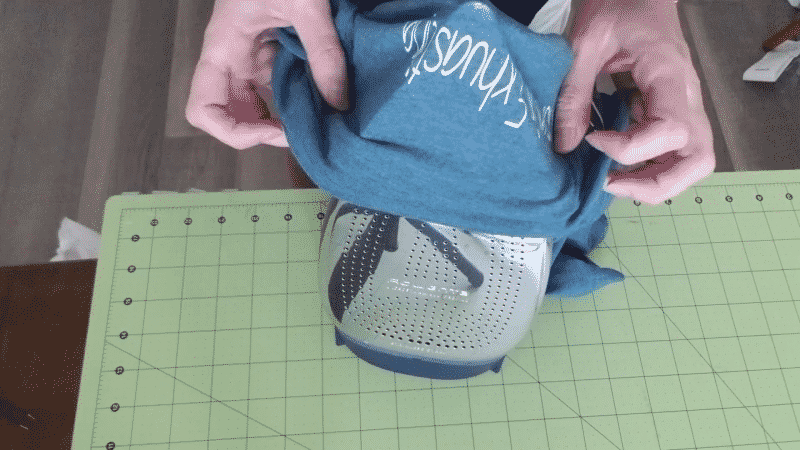
- Place the shirt over the iron. This step seems scary but it’s ok! Make sure you pull the shirt tight too.
- Heat the adhesive side of the HTV carefully, making sure not to burn yourself. At this point, it’s really important not to make the mistake of having the temperature set too hot as not only could it damage your material but will cause the HTV to come off in little bits rather than one smooth piece.It takes a bit of patience waiting for the adhesive to start to melt so that it can be picked off, but it’s not worth cutting corners by turning the temperature up to be quicker. Take your time.
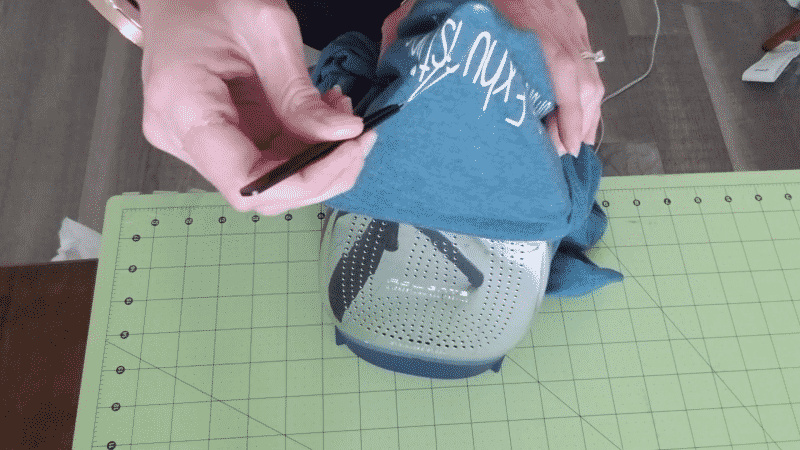
- Once the adhesive starts melting, use a pair of tweezers or an xacto to gently peel off the HTV. Be patient and work slowly, as rushing the process can cause damage to the shirt and lead to vinyl cracking.
While this method is highly effective, if your material is quite dark then it could still leave a mark after you’ve removed the last HTV residue. This isn’t such a problem if you have a lighter material. This is because HTV binds to the material using an adhesive, so while you can remove this, sometimes the adhesive is left behind still.
A small amount of chemical-free vinyl letter remover on a cotton ball can help to remove it, using a circular motion.
Hair Dryer Method
- Warm up the adhesive: Plug in the hair dryer and direct the warm air at the corner of the design you want to remove. This will heat up the glue adhesive, making it easier to lift. Try to focus on the corners first, as these tend to be the most accessible parts of most iron-on transfers.
- Increase the heat and decrease the distance: As the corner starts to lift, gradually increase the temperature of the hair dryer and bring it closer to the design. Work with your trowel, knife, or another thin tool, inserting it under the lifted part of the design and slowly peeling it up. Be patient and gentle to avoid damaging the shirt.
- Once you’ve lifted a significant part of the design, switch your focus to heating the adhesive from the other side of the t-shirt. This allows you to target the adhesive directly and avoids the need to first heat the transfer. Keep using your trowel, knife, or thin tool to lift the design up as you go.
- Repeat the process: Continue to heat and peel the design away from the shirt until it has been completely removed. You may need to reheat certain areas if the adhesive becomes stubborn. Once the design is fully removed, your shirt should be free from the original image.
Acetone (Nail Polish Remover) Method
![]()
Although the methods above are much safer in terms of preserving your fabric, you can use acetone by pouring it onto a cloth, stretching out the material and rubbing vigorously. This method takes longer and could remove the color from your fabric so be extra careful and try a patch test first.
![]()
- Apply acetone to the front and back of the shirt where the HTV is present. Make sure to thoroughly cover the area with the acetone, as this will help to loosen the HTV and make it easier to remove.
- Let it sit for 5-10 minutes. Allowing the acetone to sit for a few minutes will give it time to work its magic and break down the adhesive holding the HTV to the shirt.
- Gently peel off the HTV. After the acetone has done its job, the HTV should start to come off. Carefully remove it with an x-acto knife, being mindful that there may still be some adhesive residue left behind.
![]()
Goo Gone Method
- Lay the t-shirt on a flat surface, making sure the area with the heat transfer vinyl is easily accessible. Ensure you have Goo Gone (it’s sometimes labeled as a chemical-free adhesive remover) and some clean, lint-free cloths or cotton pads ready for use. Keep in mind that adhesive removers should be used with caution and are best for removing residual adhesive after removing HTV with another method.
- Apply the chemical-free remover to the residual adhesive: If your process leaves residue from glue or adhesive, dampen a lint-free cloth or cotton pad with the remover. Gently rub the cloth or pad over the remaining adhesive on the t-shirt, working in small circular motions. You may need to do this a few times, depending on the amount of residue left.
- Wipe and rinse: Once the adhesive residue appears to be breaking down and lifting from the t-shirt, use a clean cloth or cotton pad to wipe away the adhesive remover and residue. Rinse the area with warm water and a mild detergent to ensure all traces of adhesive and remover are gone.
- Allow the t-shirt to dry completely: After rinsing, allow the t-shirt to air dry or tumble dry on low heat.
Rubbing Alcohol Method
With this method, you’re basically going to let the rubbing alcohol soak into the adhesive. You’ll want to apply it from the reverse side of the fabric so that it isn’t blocked by the heat transfer vinyl.
Once you’ve left it to soak, with some adhesives it’ll just come right up after 20 minutes or so. If you’re having to really scrape the vinyl off, it’s likely an incompatible adhesive and you should try another method.
Trust me, don’t spend hours scraping at your shirts with a butterknife, not that I speak from experience…
Dryer Method
If you have no other method for removing HTV or heating up your shirt, the dryer can be a last-resort option. However, be aware that we don’t really recommend this method, as there’s a risk of the HTV coming off and sticking to the inside of your dryer.
- Prep the shirt: To start, lay the shirt flat on a stable surface with the HTV side facing up. Make sure the shirt is clean and dry.
- Place the shirt in the dryer: Once you’re ready, fold the shirt carefully so that the HTV section is on the inside. This will help minimize the risk of it sticking to other parts of the dryer. Put the shirt into the dryer and close the door.
- Use a timed setting: To effectively heat up the HTV, set the dryer to a timed cycle instead of using an automatic dry cycle. Most dryers will detect that the shirt is already dry and may not provide enough heat to loosen the adhesive. Choose a moderate heat setting and set the dryer to run for a short duration, around 5-10 minutes.
- Check the HTV: Carefully remove the shirt from the dryer and unfold it, placing it flat on a stable surface. Gently lift an edge of the HTV with a pair of tweezers or your fingernail. If it’s starting to peel away easily, continue removing heat transfer vinyl slowly and carefully. If it’s still firmly attached, return the shirt to the dryer for another short cycle before attempting to remove it again.
- Clean up: Once you’ve successfully removed the HTV, check the inside of your dryer for any stray pieces of heat transfer vinyl that may have come off during the process. Wipe down the interior to ensure no residual adhesive remains that could cause issues in future cycles.
Use this method as a last resort: we recommend trying other methods of HTV removal first, such as using an iron or VLR, as they tend to be more controlled and reliable.
Removing adhesive with petroleum jelly
Some of these methods can leave leftover adhesive, which is super inconvenient to work with. can be quite stubborn to work with. Petroleum jelly can be an effective and gentle method for removing the adhesive.
- Apply petroleum jelly on the area with the leftover HTV adhesive. Make sure to cover the entire stain, and don’t be afraid to use a generous amount.
- Using your fingers or a soft cloth, gently rub the petroleum jelly into the adhesive stain. This action will help the adhesive to ball up and come off the fabric. Be patient and continue rubbing the area until you notice the adhesive starting to lift from the shirt.
- Once you’ve removed the adhesive from the shirt, promptly wash it with detergent to remove any leftover petroleum jelly and adhesive residue.
Things to avoid
Make sure you pay attention to these points as it could save you from making a mistake that could ruin your fabric.
- Be careful when using Goo Gone – Make sure your material has fully cooled before spraying Goo Gone on it. Also, don’t use Goo Gone on leather or silk as it will damage the fabric.
- Don’t use a heat press – It just won’t work as well.
- Be sure to wash the garment first – it will loosen the HTV and make it easier to remove.
- Over-saturating the garment: Be cautious not to apply too much removal solvent to your garment, as this may cause damage. Also, avoid applying HTV remover to areas of the design you want to keep.
- Be careful with the dryer – Check what temperature you should use for your material as otherwise, you might end up with a miniature version of your shirt!
- Reusing the shirt: Be aware that it is not always possible to reuse a shirt after removing the heat transfer vinyl. If the shirt is for a client, or if glue residue is still visible, it’s better to purchase a new shirt. However, if the shirt is for personal use, you can still reuse it.
FAQ
Is it possible to remove Iron-On Transfers?
While most iron-on transfers are permanent, there may be some hope. You’ll want to use an adhesive remover and a bit of heat. If you can find it, Vinyl Letter Remover (VLR) is great at loosening up transfers.
Using a flat iron can also do the trick. Place a thin cloth (such as a cotton dishtowel) over the HTV design and set your iron to a medium setting. Carefully apply heat and pressure to the design, then gently lift the cloth to see if the vinyl begins to peel away. You may need to repeat this process a few times to ensure the design is fully removed.
What is the easiest way to remove vinyl from a shirt?
The easiest way to remove heat transfer vinyl from a shirt is definitely a commercial heat transfer vinyl remover (VLR), but these really work best for small lettering and designs. For any larger design you should use a hot iron.
Does this work to remove Iron on vinyl from Cricut?
Absolutely, although keep in mind that Cricut Iron-on vinyl is designed to be pretty long-landing and secure, so it might take a bit more work.
Is glitter vinyl removed the same as other HTV?
Yup! Glitter heat transfer vinyl can be removed in a similar way as regular HTV. While both types have heat-sensitive adhesives, glitter vinyl tends to be thicker, which requires a bit more patience and effort during removal.

