
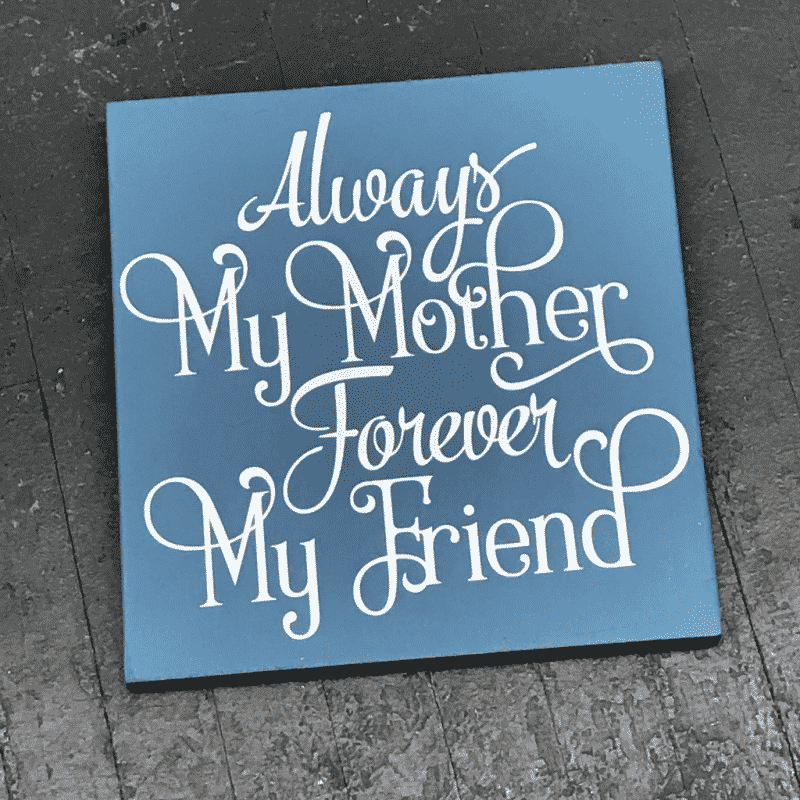
I absolutely love working with wood! It comes in so many varieties, each type of wood takes a different approach, and there are actually a lot of ways to work with both vinyl and wood.
In this tutorial, I’m going to cover how to apply vinyl to wood. That means if you want to make signs with permanent adhesive vinyl (or heat transfer vinyl), you’re in the right place!
Can vinyl stick to wood? Are you kidding me?! I’ll teach you how to make it look like it’s painted on!
Let’s get to it and make our own wood sign with vinyl!
Table of Contents
Why put vinyl on wood?
So, what’s the big deal about vinyl and wood anyway? I think what a lot of crafters have realized is that many outdoor signs, the kinds you see outside quaint little shops on Main Street, those aren’t actually painted (or they haven’t been for a while).
There are a lot of reasons why we’ve seen this trend toward vinyl over paint, and they’re the same reasons crafters have been turning to it for their projects too.
Putting vinyl on wood lets you:
- create an effect just like paint if done right, but without the mess and time
- choose loads of color, style, and font options
- work with a unique look
- get your design perfect in your software where mistakes are cheap
- make the same design over and over, at the same high quality
So the same perfection that professionals want to achieve with wood signs can now be grasped by us mere mortal crafters!
What can I make?

With vinyl and wood you can make:
- wood signs (either stained, untreated, or painted wood)
- upcycle old furniture like chairs, tables, or desks
- stacking blocks and toys for a nursery
- jewelry
- stencils
and a lot more!
But will vinyl stick to wood?
Yes! It will stick! And STAY STUCK!
(With a few tricks.)
How to put vinyl on wood: Making a wood sign
For this tutorial, we’ll be using either your standard permanent adhesive vinyl (like an Oracal 651 or 751) but I’ll also cover how to use heat transfer vinyl as well.
That’s right! Two tutorials for the price ($0.00) of one!
I’ll be putting vinyl on wood signs for this but if you want to work with a different material (ideally flat) or project, you’ll still be able to follow along and get a lot of help from the guide.
By the end of this, you’ll know exactly how to get vinyl to stick to wood.
(If you’re interested in learning how to stencil on wood, I have a tutorial on that technique as well.)
Materials:
- Wood
- Oracal 651 vinyl (any adhesive vinyl will work) or Siser HTV
- Transfer tape
- Sandpaper (150 grit should work)
- Cutting machine (Cricut/Silhouette)
- Weeding tool
- Squeegee (or any piece of hard plastic/credit card to burnish the vinyl)
- Teflon paper
I really prefer using adhesive vinyl for a starter project, because it’s a little bit easier and there’s less that can go wrong, but if you’ve been hearing a lot about putting heat transfer vinyl on wood, there’s good reason!
With HTV, you can get an almost painted effect. I really recommend you try out both, and in the future, you’ll know which to use for each project because they’re both great ways of applying vinyl to wood.
So like I said above, I have two techniques. The first few steps are absolutely the same, and then we’ll deviate a bit when it comes to how we’ll stick the vinyl to the wood.
Step 1 – Sand down the wood
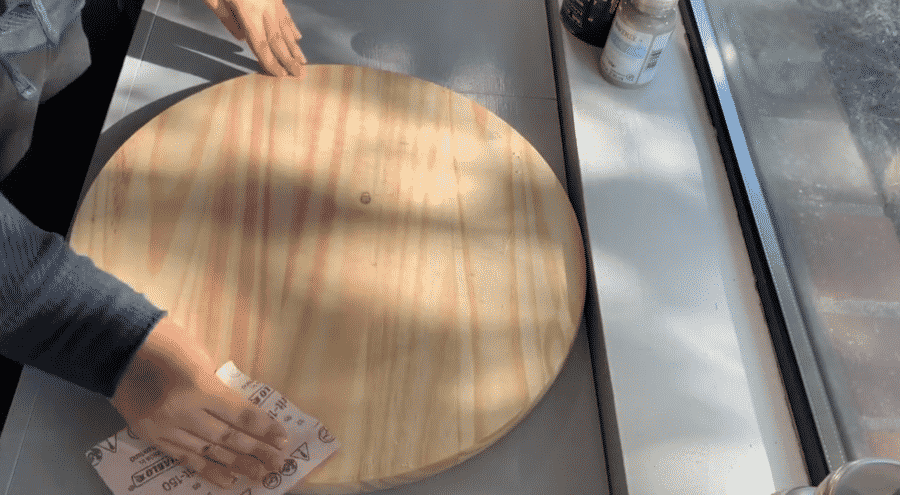
(If you’re working with adhesive or heat transfer vinyl, this section is the same)
If you’re wondering how to get vinyl to stick to stained wood, it really comes down to how well you sand the surface. Even if you’re planning on painting it first, you’ll still want to do a thorough job standing it first to let that paint soak into the wood’s pores.
So with 150 grit sandpaper (slightly finer works well too, or you can start coarser if you have very rough wood), sand the surface until it feels smooth to the touch. You’ll want to brush any dust off before applying the vinyl or paint, so get it nice and clean after this.
Step 2 – Treat the wood
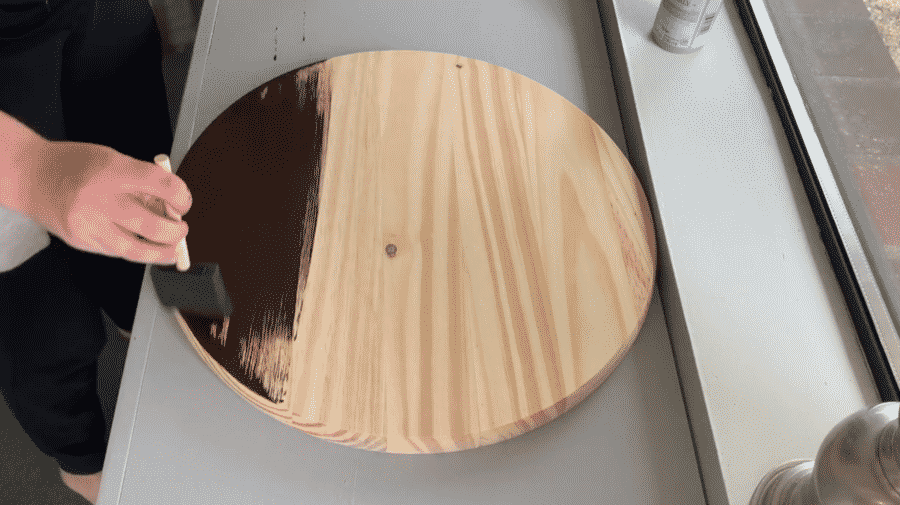
(If you’re working with adhesive or heat transfer vinyl, this section is the same)
Like I said before, vinyl loves to stick to a smooth/flat surface, so it’s important that the wood not only be smooth but have a coat of paint on it.
You have a few options:
- Polycrylic
- wood stain
- acrylic paint
- chalk paint
If you do go with acrylic or wood stain, consider giving it an extra coat of Polycrylic on top, but I’ve had luck without it. If you’re using chalk paint, you should have nothing to worry about.
After you paint the wood make sure to wait at least 24 hours to let it dry. I know, you want this wood sign to be finished already!
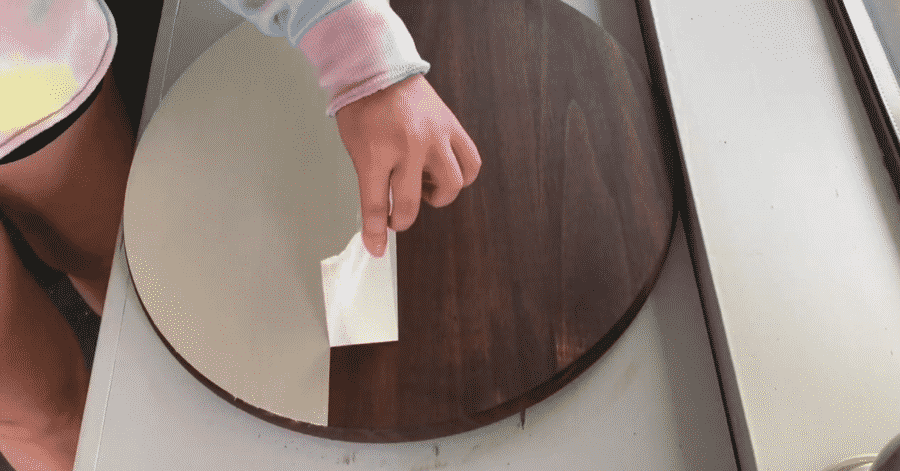
But we’re making something that will last years and years (651 is rated for 6 years outdoors, many, many more years indoors).
If you’re really stubborn (it’s okay if you are!) and working with adhesive vinyl, it’s okay to skip some of this waiting period, but the results will be a lot more varied.
You could stick a fan on the wood for a bit or leave it near an open window (very advanced pie-cooling technology at work here), but I really recommend waiting the whole 24 hours.
Step 3 – Apply the vinyl
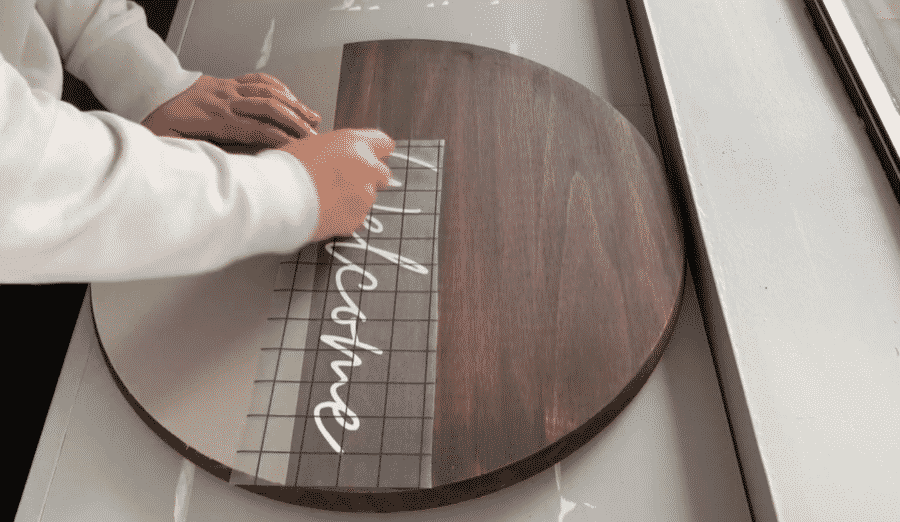
This is where our techniques will differ a bit, so I’ll go through each separately. If you haven’t worked with adhesive vinyl yet, I have a tutorial on how to cut vinyl on Cricut.
If you aren’t sure what transfer tape is, or how to use it, I’d definitely check out that above tutorial while you wait for some paint to dry!
Applying adhesive permanent vinyl
First, make sure you’re using the right adhesive vinyl. For a first project, I recommend Oracal 651 as it’s pretty inexpensive and really easy to work with.
If you’ll be making outdoor signs in the future and need them to last as long as possible, or if you’re applying vinyl to wood with a naturally bumpy or complex surface, Oracal 751 will work even better.
You’ll treat wood like any other surface. Apply the vinyl, burnish (press down evenly and across the vinyl with your squeegee or credit card), and then pull the transfer paper up!
If the lettering looks like it’s pulling up as you pull the transfer off, go a bit more slowly and re-burnish the vinyl. You might find using a credit card to be difficult, this is where a Cricut scraper can come in handy!
Applying heat transfer vinyl
Depending on the thickness of the wood, you should be able to use your heat press (my full tutorial here). If it’s a funny shape or too thick, a regular iron will work great.
- Make sure your design is mirrored
- Set your iron (or heat press) to 300 degrees F.
- With your design cut out and weeded, you’ll place it on the wood with liner side facing you
- Cover your design with a silicone sheet (or Cricut Iron-On protective sheet)
- Press for 35 seconds with medium pressure (so press down firmly and evenly over the design)
- Let it cool for a few seconds and then peel off the transfer film
That’s it!
Optional – Apply a sealant
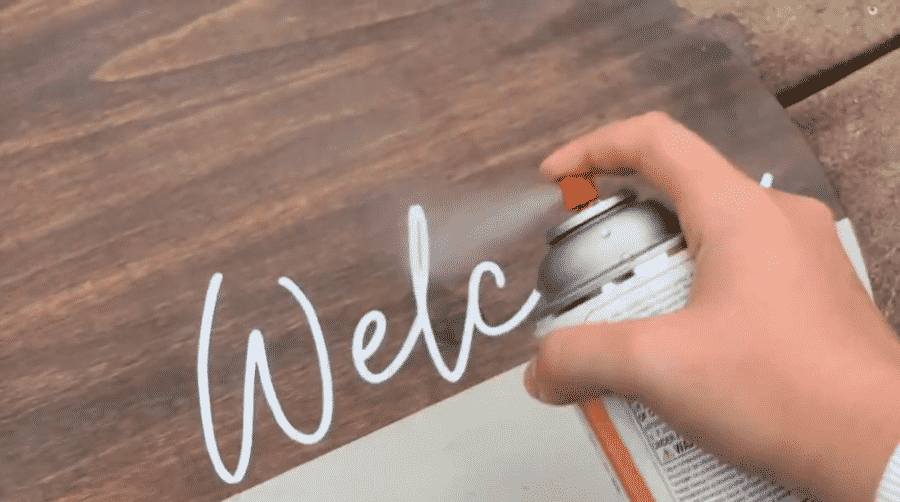
This isn’t normally a step I take for my projects, but if you know your sign will be exposed to the elements or handled a lot, you can make it a bit more durable by applying clearcoat after you’re finished.
You can use your choice of clear coat (I like either Krylon or Mod Podge), and I recommend using a spray because it’s a lot easier to work with and you’re likely to get a more even application.
What to avoid
So if you follow the above you’ll have a really good chance at success your first time working with painted wood.
However, if you want to make sure to get everything just perfect, here are some tips for what to avoid:
- Don’t sand your wood if it’s already smooth. If your wood is already treated or feels very smooth to the touch, you don’t need to sand it because you’ll likely make it rougher. Vinyl is different than paint, you don’t need to open up the pores for it to adhere well, in fact, you want to apply it to as smooth as a surface as possible.
- Don’t use rough wood that’s unsealed or low-quality plywood. Making your project look great is going to start with the wood you pick. If you only have access to rough unsealed wood or very inexpensive plywood, treat this as an experiment because it might not work out. A lot of plywood stays rough even as you sand it, so painting it is going to be very important.
- Don’t apply vinyl directly after painting. If your vinyl won’t stick or slides, this is probably the issue. You want to wait at least 24 hours after painting before applying vinyl to your wood sign, and if your climate is cold or wet, it could take longer.
- Be careful using Polycrylic. A lot of crafters swear by it, but depending on the vinyl you use it can release some of the color and cause bleeding, so always test first.
- Watch out for sap! If you’re using untreated wood, or wood you’ve just lightly stained, you can sometimes draw out sap by applying heat for too long.
Conclusion
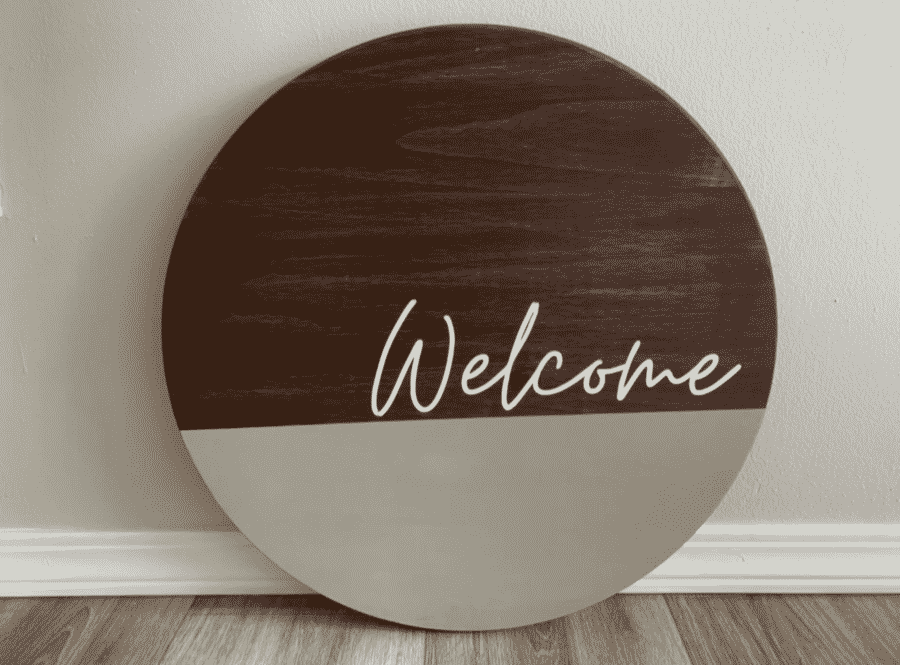
I absolutely love making wood signs, and I’ve made so many I can basically do it half-asleep, but don’t be discouraged if your first project is a bit more difficult than it looks online. If you make mistakes, that’s totally expected!
Please let me know in the comments what worked for you, and share the lovely wood projects you made! Just below I’ll cover some of the questions I hear the most.
FAQ
How do I get my vinyl to stick on wood?
Well, following the above! This whole tutorial is designed to make sure that vinyl isn’t going to slide or peel off at the edges. In short: sand well, take your time, and make sure to press firmly when you’re applying it.
Should I coat my vinyl?
I think it’s unnecessary for almost all purposes, but you can apply Polycrylic if you’re worried. Just make sure to test a small amount of it with your vinyl to make sure it doesn’t bleed the color. If you’re thinking about using Polyurethane, keep in mind it has a tendency to tinge yellow after a month, so definitely don’t use this with white paint or it’ll look yucky pretty fast.
Should I use the same amount of heat for each type of wood?
In my experience yes, 300 degrees almost always work if you apply it for 25 seconds. You won’t discolor the wood. If you want to burn the wood a bit, you can apply heat first to get a bit of a scorched look, but that’s another tutorial completely!
Will vinyl stick to wood?
Absolutely, vinyl will stick to wood if you properly prepare the surface and apply it correctly. To make sure it sticks you’ll need to sand the wood surface smoothly, apply a coat of paint or sealant, and let it dry for at least 24 hours. Then apply the vinyl using adhesive permanent vinyl or heat transfer vinyl according to the steps outlined in the tutorial above. With patience and attention to detail, you can create beautiful and long-lasting wood signs using vinyl.
Will Cricut vinyl stick to painted wood? What about raw wood?
Absolutely! I actually encourage you to paint it because I find it works a lot better with some acrylic paint or stain on it. Raw wood is tricky, the important point would be to sand it really well at a higher grit so that it’s absolutely smooth.
Is it better to make a vinyl stencil?
Vinyl stenciling will give you a pretty different effect. I love vinyl stencils, but they just give you a very different look, it’s hard to say if either is better.
What vinyl should I use on wood for outdoor use?
I’d go with Oracal 651, it’s rated for up to 6 years outdoors. If you want to spend a bit more to get a more durable outdoor vinyl, you may want to check out Oracal 751 instead. I have a comparison of them here.


Step 2 says treat the wood. I’m using a stain. Do you mean stain and then poly and then vinyl?
This helped me to much! Thank you!
One question if it is a tray that will need to be wiped from time to time should I seal after applying vinyl? What about the clear Wax for chalk paint? My tray is painted with chalk paint I did not apply the clear wax coat on it yet since I was not sure if HTV would stick to it but planned on applying it after either that or mod podge. Thanks