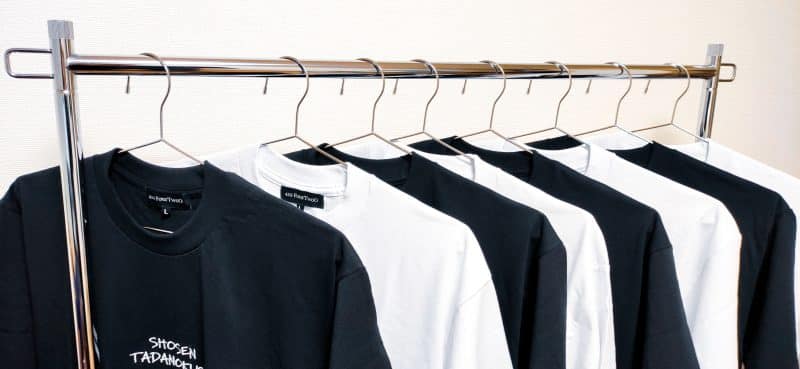
If you’re like me, you have trouble sometimes remembering what size decal to make or purchase for a shirt.
I can make a shirt one day and the next I’m wondering what looks best.
Should HTV be a different size? What about onesies?!
I’ve studied just about every shirt and onesie I’ve ever made, and then I sent photos out to my designer friends, asking them for feedback.
What follows are my decal size tips for the ideal decal size for a shirt.
Oh, and because I don’t want you to have to read an essay on something with a pretty simple answer, I put it all in a single shirt decal size chart. For those who want the essay… well you know me, it follows.
(Feel free to bookmark my HTV size chart for easy reference!)
Table of Contents
How Big Should a Decal Be on a Shirt?
All shirts are made a little bit differently, the measurements of one Youth Large shirt might be completely different than another, but for the most part, they’re pretty similar.
So, for 99% of your shirts you’re thinking of putting vinyl on, this Cricut shirt size guide will work.
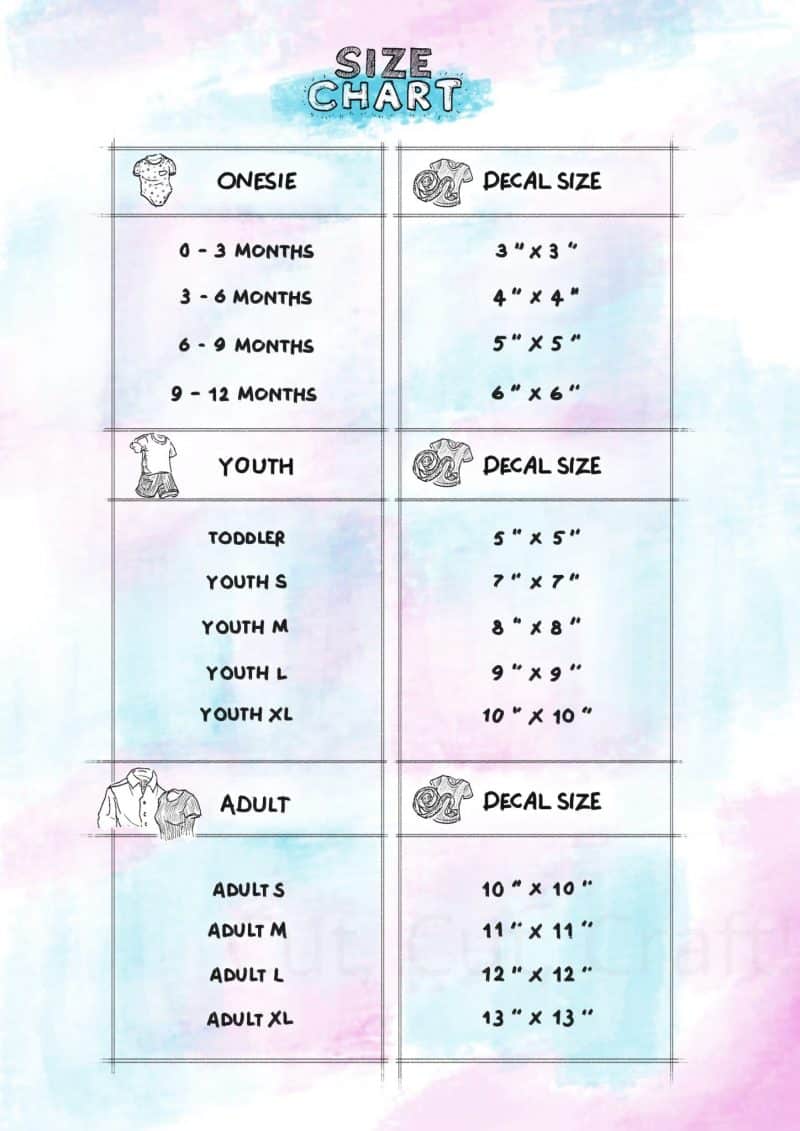
Vinyl Decal Size Chart for Shirts
That being said, while it’s helpful to have an HTV size chart handy, I’d recommend not necessarily using a rule of thumb as the sole method for figuring out the right decal size for shirts.
What you should do is what I recommend with a lot of crafting: reverse-engineer what already looks good!
Grab your favorite shirts and just measure how large the designs are on them. Note the size of the shirt and the dimensions of the HTV design. Also take down how far from the neck the top of the design starts, and whether or not it’s centered.
You can make your own chart like the above (that’s how I made mine) and update it over time as you get more experience. We all have a personal preference for decal placement, so check out some other garments (kids shirts, adult shirts, really just grab everyone’s favorite T-shirt design).
Some design sizing does call for more blank space, so it’s not a one-size-fits-all approach, but you do get a pretty good indication of how T-shirt designs will look when you use the same shirt sizes.
If you still want more size tips, I’ll offer a load of them below!
Visualizing Your Design Sizing for T-Shirts
If you’re thinking about visualizing your designs before sending them to your vinyl cutter, I think you absolutely have the right idea.
Different designs might require more blank space around them, and being able to quickly get a sanity check on an idea can save you a lot of time (and vinyl for shirts!).
Instead of explaining at length how to visualize, let’s… visualize it together! I have a great video for you to watch, and if you use Cricut Design Space and haven’t done this before… you are in for a treat.
If you aren’t comfortable using Cricut Design Space or if you’re using a transfer, you can always just print out your design on regular printer paper first. Then hold up that paper to your T-shirt blank to get a good idea for the right vinyl size for shirts you’re making.
If you have different software like Adobe Illustrator, Silhouette Studio, or even Photoshop, you can make use of the same size grid lines and center point to make sure you’re looking at well-aligned designs.
Heat transfer vinyl (HTV) can be a bit expensive, so I really suggest if you’re going to be resizing over and over that you use the least expensive material you can, usually printer paper.
So next time you’re getting ready to cut some iron-on T-shirt decals, take a moment and lay it out real fast!
Make sure to keep your T-shirt flat
Not just when applying a shirt decal but also when measuring, you really want to have your shirt flat and wrinkle-free. Wrinkles and folds in the fabric aren’t just a problem when you’re adhering the design but also when trying to establish the right vinyl size for shirts.
A few tips:
You can wash and dry your shirts first, but make sure that if they shrink in size that this is something you’re willing to do for all of the shirts you’re going to be making.
Use a hard surface like a table or a heat press to work on. If it’s a really wrinkled shirt you can iron it first before measuring the shirt decal size.
Heat Transfer Vinyl Shrinking
Heat transfer vinyl (HTV) can shrink slightly when exposed to high heat during the application process. However, the shrinkage is typically minimal and should not significantly impact the design’s overall appearance.
To account for potential shrinkage in both the HTV and the shirt size, we have some tips:
Preshrink the shirt: If you’re working with a shirt that is prone to shrinkage, such as 100% cotton, wash and dry the shirt before applying the HTV. This can help minimize any future shrinkage that may affect the design.
Choose a high-quality HTV: Invest in a high-quality heat transfer vinyl that is less prone to shrinkage. Higher-quality HTV tends to have better heat resistance and will maintain its shape and size more consistently during application.
Apply the HTV correctly: Follow the manufacturer’s instructions for applying the HTV, including temperature settings, pressure, and application time. Using the correct settings can help minimize shrinkage and ensure a successful transfer.
Test a small piece: If you’re concerned about shrinkage, test a small piece of HTV on a scrap fabric similar to your shirt material. This will give you an idea of how the HTV reacts to heat and whether shrinkage is likely to be an issue.
How far down should a logo or design be on a shirt?
If you’re using a standard-size design on a regular t-shirt, you typically want the top of your design to start 3″ from the neck of an adult shirt.
If you’re working with a youth t-shirt, you should place the top of the design 2.5″ from the neck.
Keep in mind which blanks you’re using for custom T-shirts, and if you change them, you’ll want to resize them. (An obvious example would be going from crew neck to v neck shirts.)
As I mentioned above, reverse-engineering the placements of what you already like is the absolute best way to get your sizing for shirts perfect.
What size should a name or number be on the back of a jersey?
If you want it to look like a standard jersey, this is fortunately pretty easy.
Youth sizes:
Name: 2″
Front number: 3″
Back number: 6″
Adult sizes:
Name: 3″
Front number: 4″
Back number: 8″
You can always lay them out with the video above and make sure they look right.
Tips: Adult T-shirts
Consider the wearer’s body shape: When designing adult shirts, take into account the various body shapes that your target audience may have. Ensure that your design looks appealing and proportional to different body types.
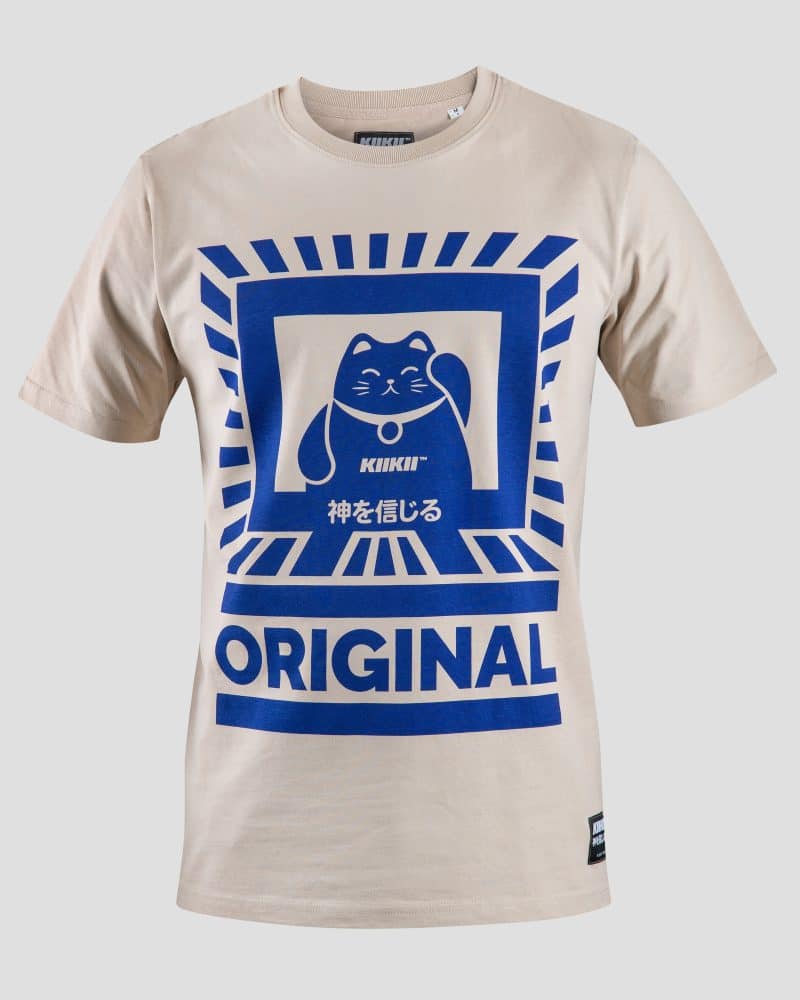
Choose appropriate design sizes: For adult T-shirts, decal sizes usually range from 9-12 inches wide. However, this can vary depending on the shirt’s size and style. Be prepared to adjust the design width and size to fit the specific shirt.
Adjust placement for different shirt styles: Adult shirts come in various styles, such as crew neck, V-neck, and scoop neck. The decal placement may need to be adjusted depending on the shirt style to ensure it looks balanced and aesthetically pleasing. As you’ve seen me say a few times, proper sizing and proper placement are both so subjective, so really trust your eyes.
Consider the shirt’s purpose: When designing for adults, keep in mind the shirt’s intended purpose. Is it for casual wear, a promotional event, or a sports team? The design’s style, size, and placement should reflect the shirt’s purpose.
Tips: Youth T-shirts
Choose child-friendly designs: When designing for youth T-shirts, opt for age-appropriate and child-friendly designs. Consider the interests and preferences of the target age group when selecting themes, colors, and styles.
Select smaller design sizes: Decal sizes for youth T-shirts generally range from 5-9 inches wide, depending on the shirt or garment’s size. Be prepared to adjust the design size to fit the specific shirt and ensure it looks balanced on smaller garments.
Consider durability: Children’s clothing often undergoes more wear and tear than adult clothing. Choose a printing method that offers long-lasting results and can withstand multiple washes without fading or peeling.
Factor in growth: Children grow quickly, so it’s important to consider the shirt’s lifespan when designing for youth T-shirts. Avoid overly tight or restrictive designs that may become uncomfortable as the child grows. Instead, opt for designs that can easily adapt to changes in size.
How can I make sure the vinyl is centered and aligned on a shirt?
Really important question!
If you have time for a quick video, our friend ElleBee has a really great technique for putting heat transfer vinyl on shirts and making sure it’s aligned:
What I recommend doing is the following:
Fold your shirt in half horizontally, if you’re using a heat press give it a quick press to make a line. If not, just keep track of the line you make from folding it.
Unfold the shirt, and grab your design. You want to now fold your design in half.
Take a ruler, and lay it over the width of the t-shirt, aligning your design along the top so that it’s completely horizontal.
What size design should I use on a bag or tote?
This will be perhaps an unsatisfying (and often repeated!) answer: reverse-engineer it! Find a tote you love, measure it, and see how far away from the edges the design starts and how large it is.
If you’re working with a similarly-sized tote or garment, you should be fine using the same design and details.
Designs can just vary so much, and what a good placement might be for one would make another look… pretty bad. So I’m really reluctant to give a one-size-fits-all answer to these sorts of questions. It’s always good to do your own research.
Conclusion
To sum it up, definitely use the above chart if you’re looking for a good place to get started. But if you’re still looking for a bit of a deeper look, keep reading on through the FAQ at the end.
What I really recommend doing though is going through your favorite clothes and just measuring them, seeing exactly how far the placement is from the collar and how large they are.
If you’re ready to get started but don’t know what machines or vinyl to use:
Do your best to visualize your design in any way that you have available (drawing, scrap paper, in your cutting software), especially if you’re going to be making a large number of shirts. Stick to the rules of thumb above, and feel free to share this article if it helped you!
I’d love to hear about your own personal preferences and findings in the comments.
FAQ
What is the average size of a logo on a t-shirt?
For this, you should just consult the chart above! These aren’t quite the average sizes because, let’s be honest, some shirts don’t look that good.
These are however the average sizes of well-designed shirts!
What vinyl size for shirts should I use if I can only pick one?
If you can only choose one vinyl size for shirts, opt for a versatile size that works well on a variety of shirt sizes and styles. A decal size of approximately 9 inches wide is a good starting point, as it tends to look proportional on both adult and larger youth shirts.
Keep in mind that while a 9-inch wide design may be a good compromise, it may not be the ideal size for every shirt or design. It’s always best to adjust the design size to fit the specific shirt size and ensure the most visually appealing result.
Our Expert
Ali Fields
Ali Fields is a DIY enthusiast and the founder and editor of Cut, Cut, Craft!, a DIY crafting blog.
She's a mechanical engineer by trade and the mother of two delightful kiddos.