
Ready to dive into the world of Cricut Infusible Ink? With its vibrant colors and professional finish, Infusible Ink is a fantastic tool to level up your crafting projects.
Infusible Ink has become my favorite tool in my craft arsenal, allowing me to create stunningly vibrant, seamlessly smooth, and long-lasting designs.
(Sorry, HTV!)
Whether it’s unique t-shirts, colorful coasters, or personalized tote bags, it’s really what I turn to time and time again.
In this guide, I’ll walk you through everything you need to know, from choosing the right materials to the proper techniques for transferring the ink. By the time you’ve finished, you’ll be ready to take on any Infusible Ink project with more than a little bit of confidence and creativity!
So, are you ready to explore the exciting realm of Cricut Infusible Ink? Let’s jump right in! Remember to scroll through to the end for a detailed, easy-to-follow tutorial, perfect for your first Infusible Ink project.
Table of Contents
Cricut Infusible Ink: Getting Started
What Is Cricut Infusible Ink?

If you haven’t worked with Cricut’s Infusible Ink before, I’m actually so excited for you because it is a game-changer!
Infusible Ink lets you create stunning, seamlessly smooth designs by permanently infusing ink into your blanks. Unlike traditional iron-on vinyl, there’s no peeling, cracking, or wrinkling. The results of using Infusible Ink are bright and flawless, with no visible texture on the surface of your project.
As the ink infuses into the fibers of compatible materials, you’ll create long-lasting and vibrant designs.
Infusible Ink becomes part of the fibers of the base material when high heat is applied. That means permanent transfers that are long-lasting and fade-resistant. But how exactly does it achieve these impressive results?
Let’s dive into the magic of Cricut Infusible Ink.
How does Cricut Infusible Ink work?

Let me take you on a brief journey, and I promise I won’t get too much into the physics behind it.
Infusible Ink operates through a process called sublimation, which allows solid colors to transform directly into gas, skipping the liquid phase altogether. This is the secret behind the permanent bond Infusible Ink forms with the base material.
Unlike iron on vinyl, Infusible Ink embeds itself into the material, leading to vivid and permanent results that won’t crack, fade, or peel. The downside? Cricut Infusible Ink only works with compatible materials.
But why?
Well, we need what are called Infusible Ink compatible blanks. These are materials designed for use with Cricut Infusible Ink as they allow the ink to bind properly. 100% cotton materials just don’t work, they need to have at least some polyester. So, always make sure your materials are compatible with the ink before you start crafting.
If a material is listed as compatible with a sublimation printer, it will work with Infusible Ink!
Infusible Ink vs Iron-On/Heat Transfer Vinyl
Infusible Ink’s real value comes from how long it lasts and how easy it is to use. Because it infuses directly into the fibers of the material, the design becomes an intrinsic part of the fabric, rather than merely being stuck onto it. This not only ensures durability but also allows the design to move and stretch naturally with the fabric without cracking or peeling.
Infusible Ink just appears more vibrant to me and doesn’t fade or dull as much over time, and it’s applied in a completely different way. Like, I can just freehand color, something not available with HTV.
Cricut Infusible Ink is not a one-size-fits-all solution, like I mentioned above you’ll need specific materials for it to work effectively. The ink requires a high polyester content in the fabric or a suitable polyester coating to bond correctly, which does limit options when selecting blanks.
Infusible Ink also looks best on white or very light-colored base materials. If you are looking to work with darker fabrics or a broader color palette, the results might not be as impressive or vibrant as expected.
Iron-On or heat transfer vinyl shines where you want to use a wide range of different finishes like you get with glitter or holographic vinyl. However, since the vinyl rests on the surface of the material, they are more prone to wear and tear over time.
Material Options
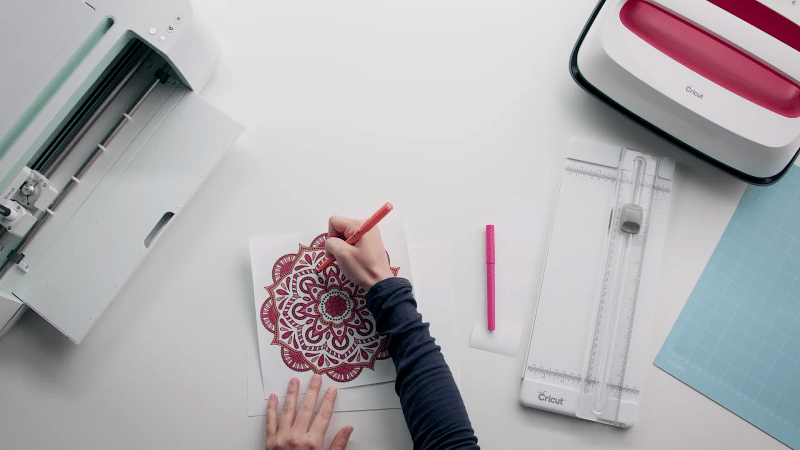
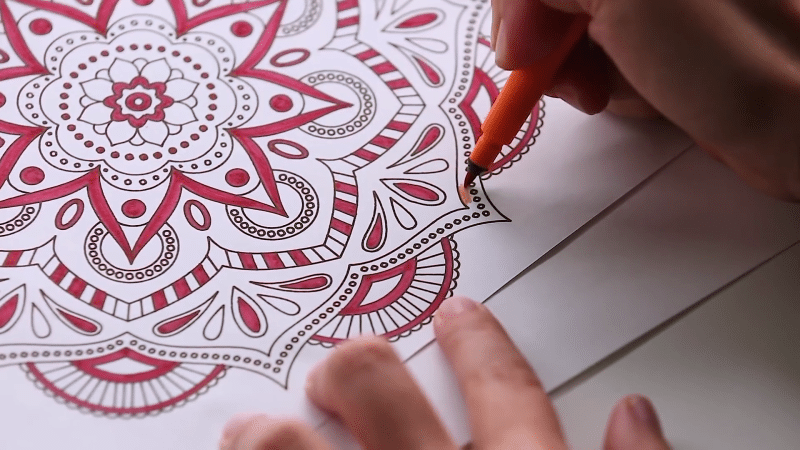
Infusible Ink comes in two formats: transfer sheets and pens/markers. Transfer sheets are pre-designed, ready-to-use patterns and colors that can be cut and applied to your project. Pens/markers, on the other hand, allow for more creativity and customization as you can draw or write your own designs onto a compatible material before transferring it.
If you’re not sure what to pick out, here are a few sublimation blanks we recommend:
Let’s explore each category now.
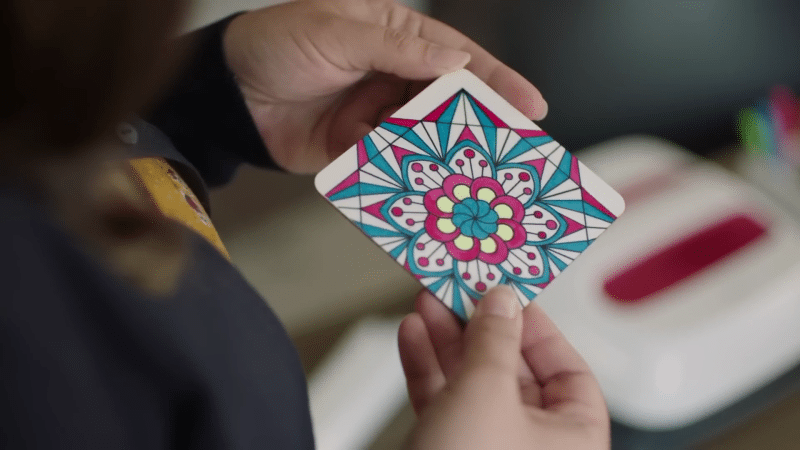
Infusible Ink Transfer Sheets
Cricut Infusible Ink transfer sheets come in a wide variety of colors and patterns. Keep in mind these sheets are light-sensitive and can be damaged by contact with any liquid, so it’s important to store them in a dark and dry place.
To use these sheets you’ll cut out your design with a Cricut Maker (or another cutting machine), weed away any excess material, and transfer the design to your base material using a heat press, regular iron, or your Cricut EasyPress.
Infusible Ink Pens & Infusible Ink Markers
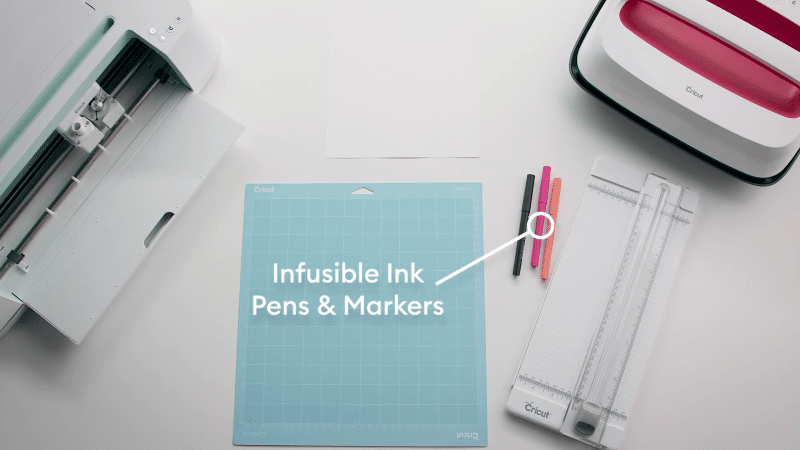
Cricut Infusible Ink markers and pens can either be used in your machine or by hand to make your artwork a permanent part of the item you’re working on. Personally, I love using Infusible Ink pens in my machine with laser printer paper, and then I color in the designs with a marker. You can take this paper, press it against a compatible material with a bit of heat, and that ink becomes permanently bonded.
Compatible Infusible Ink Blanks
There is a compatible line of Cricut products, that provide compatible base materials, like tote bags, coasters, and more. They’re all specifically designed and tested to work with Infusible Inks. This means that your designs will be bright, vivid, and near-permanent.
It’s crucial to note that Infusible Ink designs will only work with base materials that contain polymer or polyester.
However, if you’re looking to experiment with non-Cricut brand materials, make sure they’re labeled as “sublimation-compatible” and test them out before committing to a larger order.
How to Use Cricut Infusible Ink: Step-by-Step Guide
Okay, let’s get crafting.
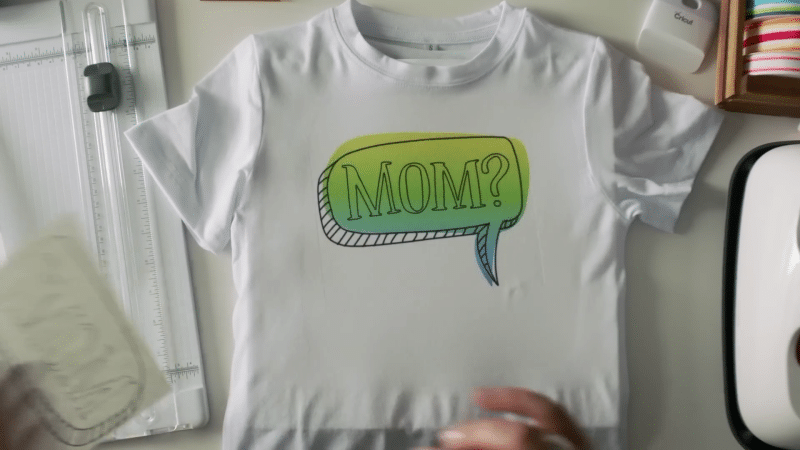
In this tutorial, I’ll take you through each step of using Cricut Infusible Ink for a variety of projects. We’ll cover making custom shirts with Infusible Ink pens and markers, but the same technique works with Cricut Infusible Ink sheets and with mugs, totes, and ceramic coasters. So no matter what you want to make, we’re going to cover the basic principles as well as the specific steps you’ll need to take.
Before we dive right in, let’s gather all the necessary supplies you’ll need to get started with your Cricut Infusible Ink project:
- Cricut cutting machine. You can use a Cricut Maker, Cricut Joy, or Cricut Explore 3 for your Cricut Infusible Ink projects. We have a full comparison of all of these machines here.
- Cricut EasyPress 2, heat press, or regular iron.
- Infusible Ink products. Such as tote bags or ceramic coasters, specifically designed to create permanent transfers with Infusible Ink sheets.
- Cricut Infusible Ink transfer sheets or Infusible Ink pens. These contain the ink that will be transferred to your blank.
- Heat-resistant tape. This tape keeps your design in place during the heat transfer process. Don’t use regular tape!
- Butcher paper, white cardstock, or thick paper. These protect your project from direct heat and prevent any ink bleed. I really recommend this butcher paper, and many Cricut Infusible Ink products will come with a sheet to use.
- Laser copy paper. This is what we’ll use with Infusible Ink markers and pens because they can withstand a lot of heat. We’ll be drawing directly on to it, and using it to hold that ink for the transfer.
(A lint roller, measuring tape or ruler, and brayer tool will all come in handy.)
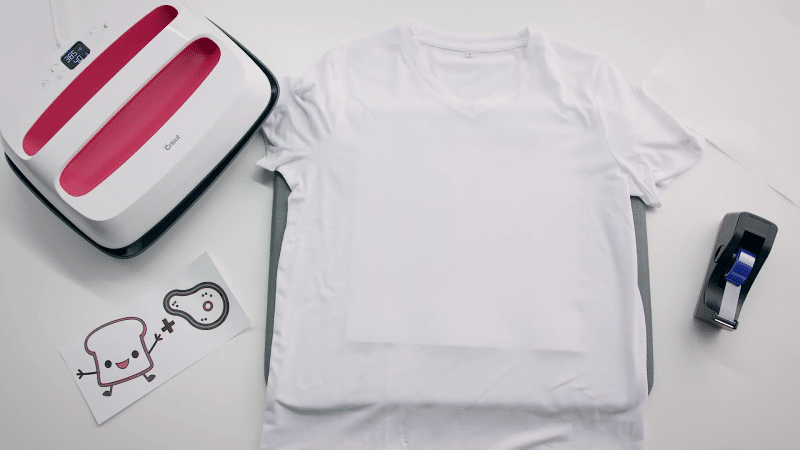
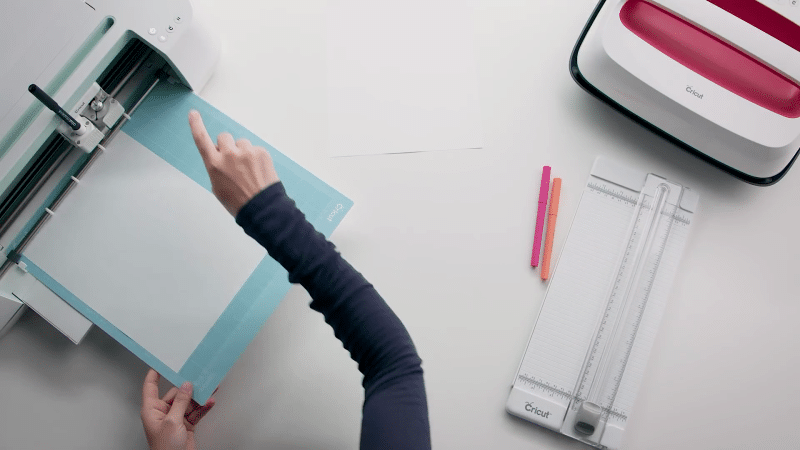
Step 1: Pick your materials
Decide on your method: Infusible Ink transfer sheets or Infusible Ink pens and markers. The transfer sheets are great for solid designs, while the pens and markers allow for more intricate and personalized creations.
Select an Infusible Ink compatible blank: Choose a blank that best fits your project. Options include tote bags, pillowcases, coasters, or baby onesies. Ensure your blank is made from a material that can handle the heat required for the Infusible Ink transfer process. If you’re working with pens/markers, you’ll want laser copy paper.
Step 2: Using Cricut Design Space
- Open Cricut Design Space and start a new project.
- You can choose a design from the Cricut Access Library, upload an SVG cut file, or create your own design using the tools on the Canvas screen. Select images and size them appropriately for your project. Remember, images should be single-layer shapes without any “fill” as Cricut Infusible Ink pens and markers can only draw the designs. You can always fill after.
- Select Infusible Ink from the materials settings list and load the fine-point blade into the machine. This ensures that your machine is set up correctly for cutting Cricut Infusible Ink transfer sheets or drawing with Infusible Ink pens/markers.
- On the Prepare screen, ensure that the Mirror toggle is enabled. This is crucial when working with heat transfers, as it will reverse your design so it appears correctly once transferred onto your blank. If you have any text in your design, this is essential.
- Set all line types to “Draw” and choose the specific color of Cricut Infusible Ink pen or marker for each line or shape. This will make sure that your design is drawn accurately with the correct colors.
- Click the green “Make It” button to proceed with cutting or drawing your design. Always double-check that your design is set to mirror before continuing.
Our tips:
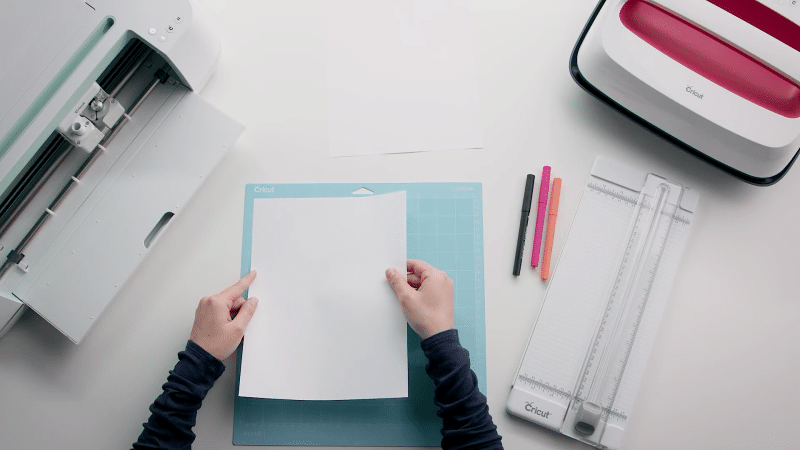
- When working with Infusible Ink transfer sheets, always place the sheet with the ink side facing up on the green cutting mat to ensure a clean cut.
- If using Cricut Infusible Ink pens or markers for the first time, try practicing your design on a scrap piece of paper to get a feel for how they work before finalizing your project.
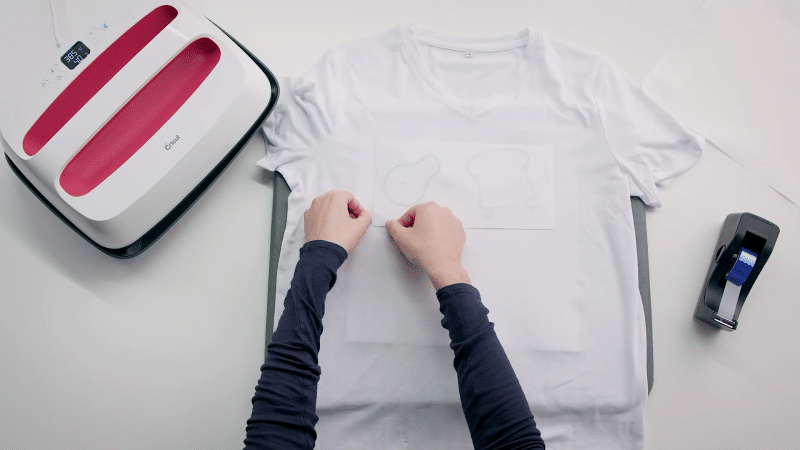
Step 3: Cut your Infusible Ink project
Place the Infusible Ink sheet onto the mat, ensuring the shiny side is facing down and the inked side is facing up. This will help provide the correct orientation for cutting your design. If you’re using laser paper with pens, you’ll want to use the blue light-grip map.
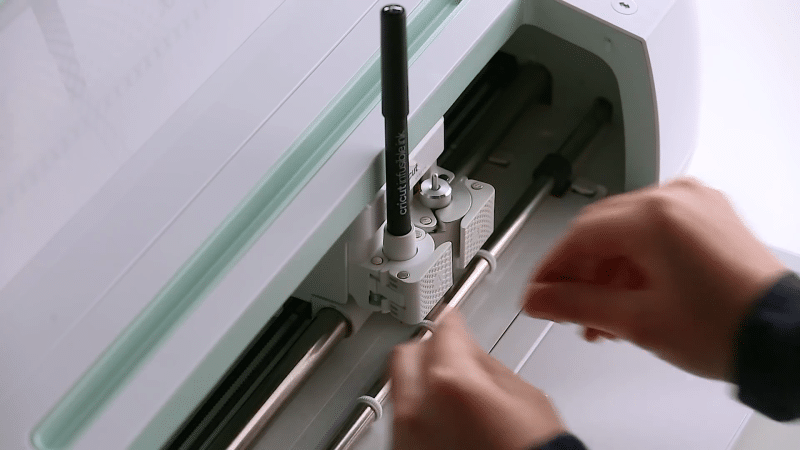
Insert the mat into the Cricut machine by loading it carefully and making sure it is secure. Make sure you load your pen in the pen slot and that it’s the correct color. You’ll have to make multiple passes if you’re using multiple colors.
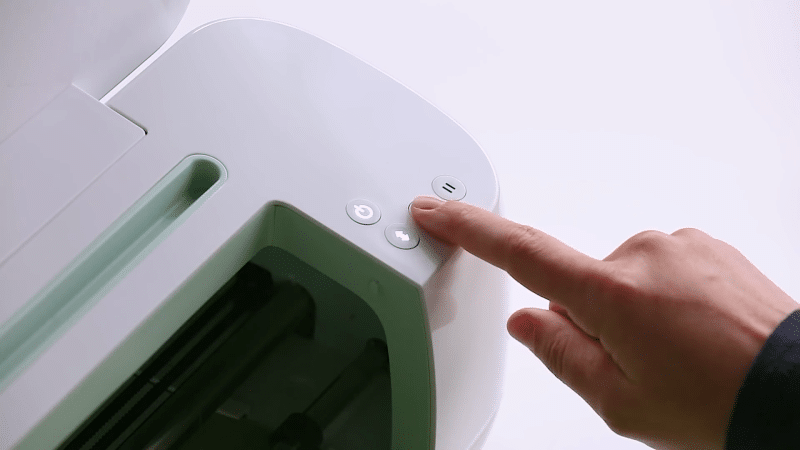
Once loaded, press the Go button to start the cut. The machine will work its magic, precisely cutting your Infusible Ink transfer sheet according to your design and drawing with your pen if using an Infusible Ink pen.
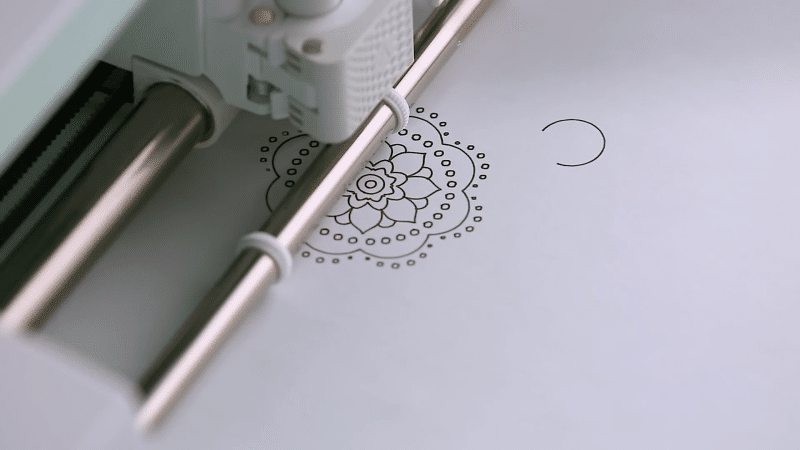
Unload the mat after the machine has completed cutting your design. Carefully remove the transfer sheet from the mat to avoid any damage to your design. It’s best to think of it as peeling the mat away rather than peeling the paper off, and it helps to give it a bit of a bend.
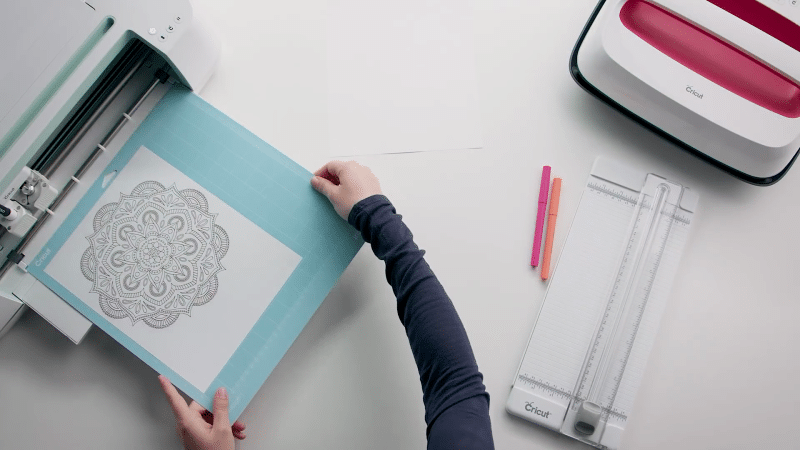
Weed the design by bending or rolling the transfer sheet, using your fingers to remove the excess Infusible Ink. This step will reveal your final design, making it ready for transfer.
Our tips:
- For weeding Cricut Infusible Ink, use hooks to minimize the risk of damaging the design or getting ink on your fingers.
- Be patient during the weeding process, as rushing can lead to mistakes or damage to your Infusible Ink design.
Step 4: Getting your material ready
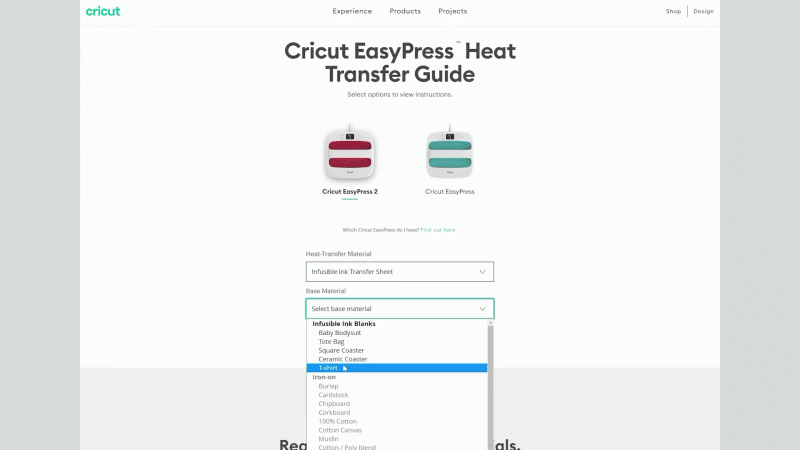
Prep your Cricut EasyPress 2 by setting it to the appropriate temperature and time for your project, as stated in the Cricut Heat Guide. For a coaster, set the temperature to 400 degrees Fahrenheit and the timer to 240 seconds. For a tote bag, set the temperature to 385 degrees Fahrenheit and the timer to 40 seconds. Ensure that your EasyPress is preheated and ready for use.
Clean the surface of your blank, removing any lint with a roller. Make sure you let the surface dry completely to ensure proper adhesion of the Cricut Infusible Ink transfer sheet.
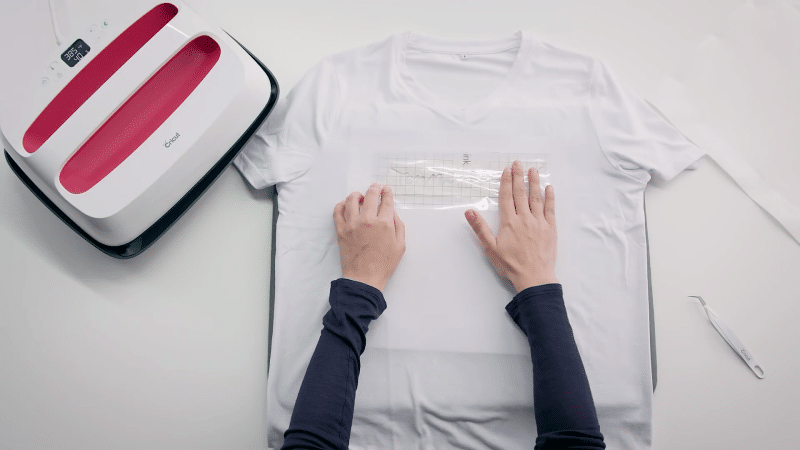
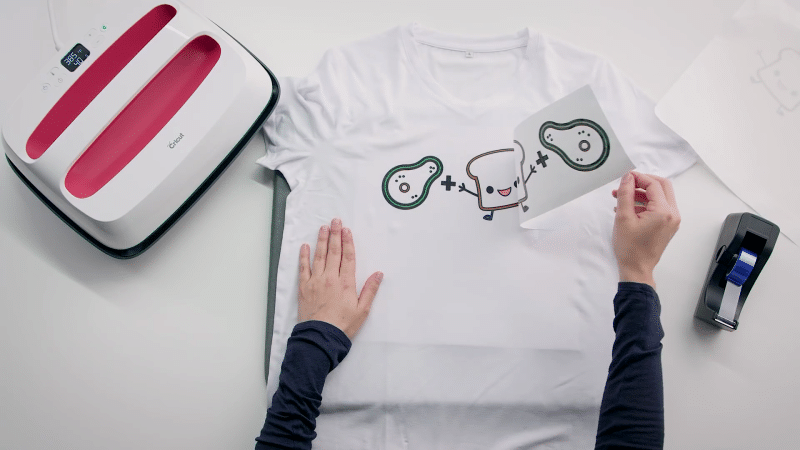
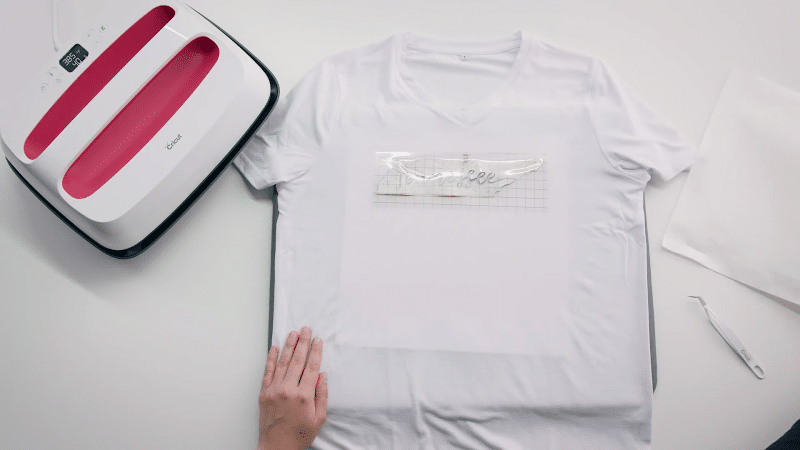
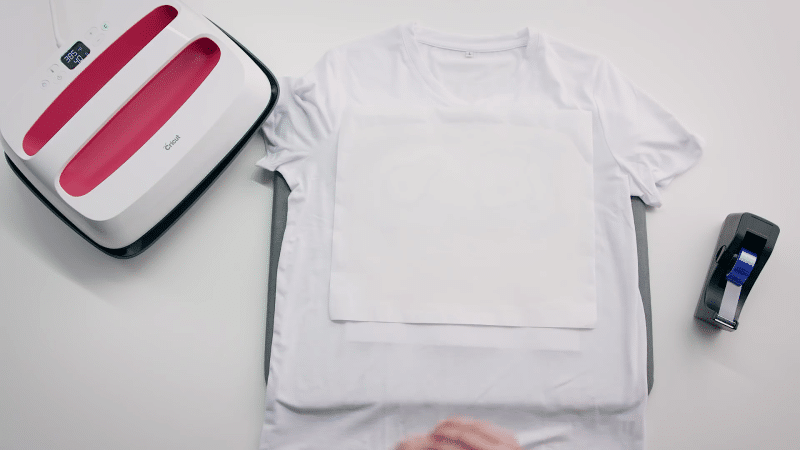
Place the transfer sheet on the blank with the ink side touching the surface. Be sure to align your design properly and then secure it in place using heat-resistant tape to prevent any shifting during the heat transfer process.
Now that your materials are prepared, you’re ready to apply the Infusible Ink transfer sheet to your project.
Our tips:
- Always refer to the Cricut Heat Guide for accurate temperature and time settings. This will help ensure a successful transfer.
- Practice weeding on scrap pieces of Infusible Ink transfer sheets before attempting your main design, especially if you’re new to the process.
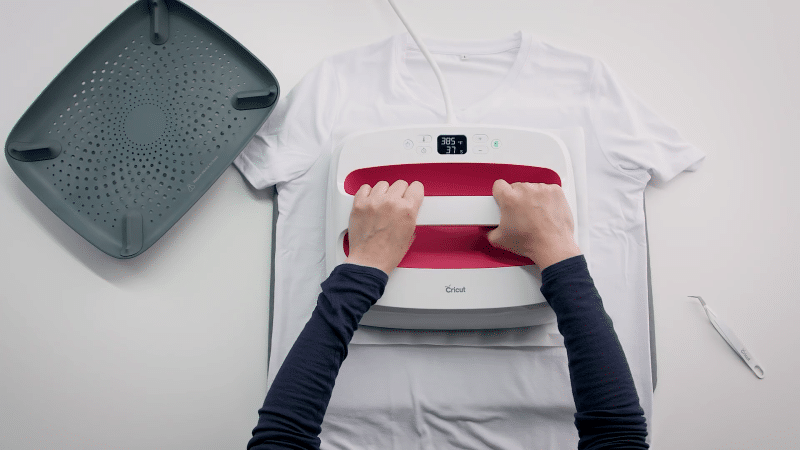
Step 5: Applying heat
I’ll cover two methods — one for a coaster and another for a T-shirt. You’ll want a preheated EasyPress or heat press, transfer sheet (if not using pens/markers), butcher paper, heat-resistant tape, and your Cricut Heat Guide.
For a coaster: Begin by placing the EasyPress mat, white cardstock, and decal on the shiny side of the coaster. Secure them with heat-resistant tape. Place the coaster upside down and cover it with butcher paper. Position the preheated EasyPress on top of the stack, and let it heat for the specified time according to the Cricut Heat Guide. After the heating is complete, allow the coaster to cool before removing the transfer sheet.
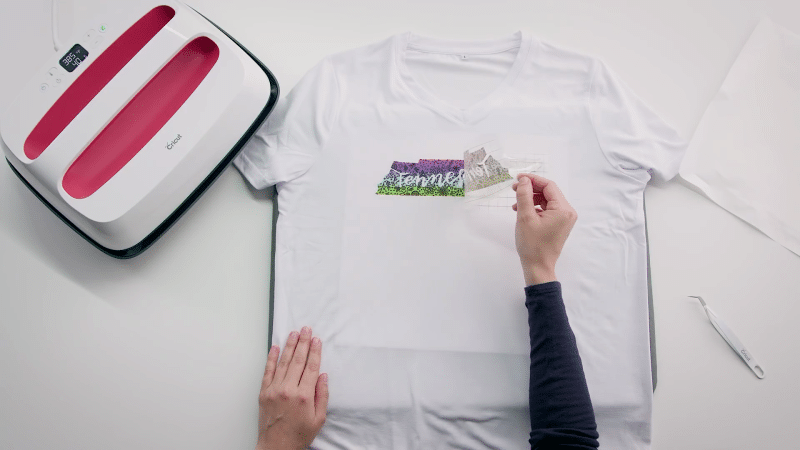
For a shirt: You’ll want to start by pressing your shirt at a low temperature to remove any moisture and wrinkles. Use a lint roller to eliminate debris on the surface. Place the transfer ink side down on the shirt and cover it with butcher paper, I usually use 3 sheets. Position the preheated EasyPress on top of the stack and let it heat for the specified time according to the Cricut Heat Guide. Allow the shirt to cool before removing the transfer sheet.
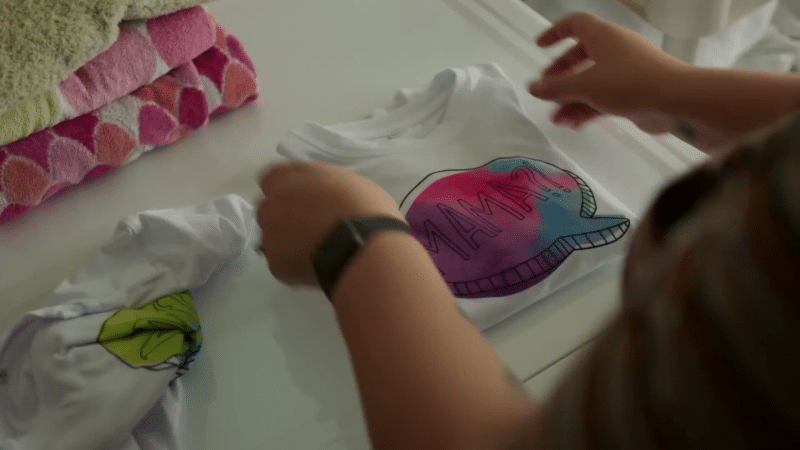
Once your project has cooled, carefully remove the butcher paper. Then, remove the transfer sheet using tweezers if needed to maneuver the paper layer without causing damage. You’ll now see that the image has transferred onto your shirt and should look super vivid and bright!
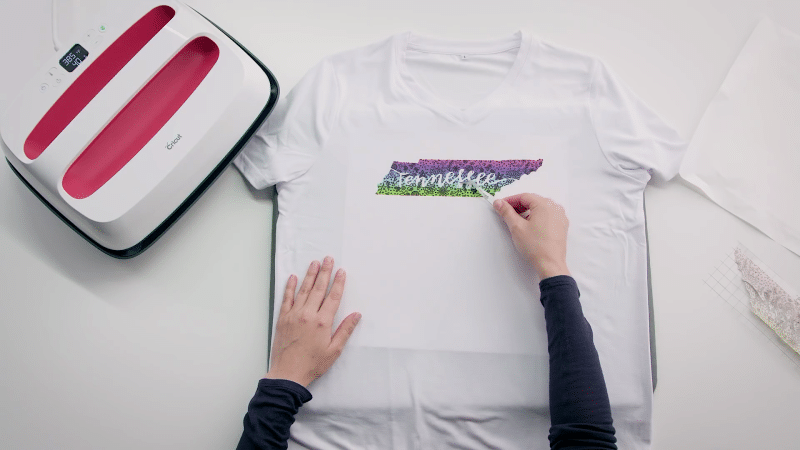
If you notice any small errors, you can carefully weed them now with tweezers.
Our tips:
- Always follow the temperature and time settings recommended in the Cricut Heat Guide for optimal results.
- Ensure your working surface is clean and free of debris to avoid any imperfections in your finished project.
- Practice on a scrap piece of material before applying Cricut Infusible Ink to your main project to familiarize yourself with the process
Taking Care of Your Project
Turn the garment inside out: Before washing your Infusible Ink project, turn it inside out to protect the design from direct contact with the washing machine’s agitators. This prevents any unnecessary wear and tear on the design, helping maintain its vibrancy.
Wash in cold water: Use cold water when washing your Infusible Ink projects. Cold water prevents colors from fading and is gentler on the design. In addition, use a mild detergent to avoid any harsh chemicals that might damage the Infusible Ink.
Avoid using fabric softener: While using fabric softener is a personal preference, it’s recommended to avoid it when washing your Infusible Ink projects. Fabric softeners can potentially affect the Infusible Ink’s adherence to the fabric, leading to a diminished design over time. This means avoiding dryer sheets, too!
Dry gently: After washing, either line dry or tumble dry on a low heat setting. High heat can cause the Infusible Ink to deteriorate over time, so it’s essential to keep the temperature low when drying your projects.
Our tips:
- Remember to machine wash inside out without dryer sheets.
- Always follow the care instructions on the garment’s label to avoid damaging the fabric and the Infusible Ink design.
- Consider using a color-safe detergent to further maintain the vibrancy of your Infusible Ink project.
Common Issues With Infusible Ink
Preparation is key: Before starting your project, ensure your work area is clean and lint-free. Any dust or debris on your surface could interfere with the Infusible Ink transfer, leading to less-than-perfect results.
Choose compatible materials: For successful Infusible Ink transfers, make sure to use Cricut-compatible blanks, such as shirts, tote bags, or coasters made specifically for use with Infusible Ink. These materials will have been tested to work well with the product and provide the best results.
Consider using a lint roller: To remove any potential lint, hair, or dust from your material before applying Infusible Ink, gently roll a lint roller across the surface.
Preheat your material: Before applying the Infusible Ink transfer sheet, preheat your base material using your heat press. This helps to remove any excess moisture and can improve the adhesion and vibrancy of your design.
Mirror your design: When using Cricut Infusible Ink transfer sheets, remember to mirror your design before cutting it out with your Cricut. This ensures that the final transfer will be the correct orientation, and this is especially important with text.
(We’ve all made this mistake at least once!)
Use a heat-resistant surface: When applying Infusible Ink, always use a heat-resistant surface, such as a Cricut EasyPress mat, to protect your work area and ensure even heat distribution.
Check your settings: Be sure to use the correct heat settings for your specific material, as indicated in the Cricut Heat Guide. Different materials require different temperatures and times for successful transfers.
Peel off the transfer sheet while it’s still warm: After pressing, let your project cool for a few seconds, but peel off the Infusible Ink transfer sheet while it’s still warm. This helps to prevent any cracking or peeling of the design.
Troubleshooting common problems:
- Faded or uneven color: If your design has faded or uneven color, make sure you’re using a compatible material, your heat press is set to the correct temperature, and your material is clean and lint-free.
- Design not adhering well: If your design isn’t sticking well to your material, check your heat settings, ensure your material is preheated, and double-check that you’re using a compatible Cricut blank.
- Cutting issues: If you experience problems cutting your Infusible Ink transfer sheet, make sure your Cricut machine is set to the correct cutting mode and that your blade is sharp and clean.
What should you do if your projects are coming out blurry?
To fix a blurry or smeared image, make sure that your design sheet, butcher paper, and EasyPress are secure and stay put during the application process. Use Heat Resistant Tape to hold your design in place on the blank, preventing any movement while you press with the EasyPress. Uniform heat application is also crucial in avoiding ghosting, so pay close attention to that aspect.
Ensure your pressing surface is flat and smooth before beginning your project. Preheat your material to remove any wrinkles and be cautious around overlapping seams or zippers. If the blank has bulky seams, insert a small pressing mat inside the material to lift it slightly and guarantee complete contact with the EasyPress.
Double-check that your EasyPress 2 is set to the correct temperature and time for the best results. After applying heat, remove the EasyPress mat from under the garment to help it cool down faster.
Make sure you’re preheating the material to get rid of any wrinkles, and carefully arrange your image transfer to avoid overlapping seams or zippers. If your project includes bulky seams that can’t be avoided, simply insert a small pressing mat inside the material can help with getting even pressure during the heat transfer process.
FAQ
Can you use Cricut Infusible Ink on any material?
The simple answer is no, you cannot use Cricut Infusible Ink on just any material. Infusible Ink is specifically designed to work with compatible materials that allow the ink to form a permanent bond.
These materials generally need to have some polyester content, as 100% cotton materials just won’t do the trick. So before you dive headfirst into your crafting project, make sure you’re using materials that are compatible with Infusible Ink. Remember, if a material is listed as compatible with a sublimation printer, it will work with Infusible Ink!
What is the difference between Cricut infusible ink and sublimation?
While both Cricut Infusible Ink and sublimation are based on the same process of transferring solid colors directly into gas (skipping the liquid phase), there are some differences between these two crafting methods.
Sublimation involves the use of a sublimation printer and its own unique ink to print images onto transfer paper, which can then be heat-pressed onto compatible materials.
Does Cricut infusible ink work on vinyl?
Cricut Infusible Ink is not designed to work with traditional adhesive vinyl. Infusible Ink actually embeds itself into the blank material, creating a permanent bond that won’t crack & peel – unlike iron-on vinyl.
However, if you are looking to use Infusible Ink with vinyl-like materials, consider using it on “Infusible Ink compatible” heat transfer vinyl (HTV) that has a polyester coating, which should allow the ink to bond effectively.
What materials does Infusible Ink work on?
Infusible Ink works best on materials specifically designed to be compatible with it. These materials typically have a polyester content, as the ink requires this to form a permanent bond. Some examples of compatible materials include:
- Polyester-based t-shirts and apparel
- Tote bags with a polyester blend
- Polyester-coated ceramics, like mugs and coasters
- Heat transfer vinyl (HTV) with a polyester coating
Always make sure to double-check the compatibility of your materials before starting your project, as using incompatible materials may lead to disappointing results. If you’re ever in doubt, look for materials labeled as “sublimation compatible” – these should work just as well with Infusible Ink!


