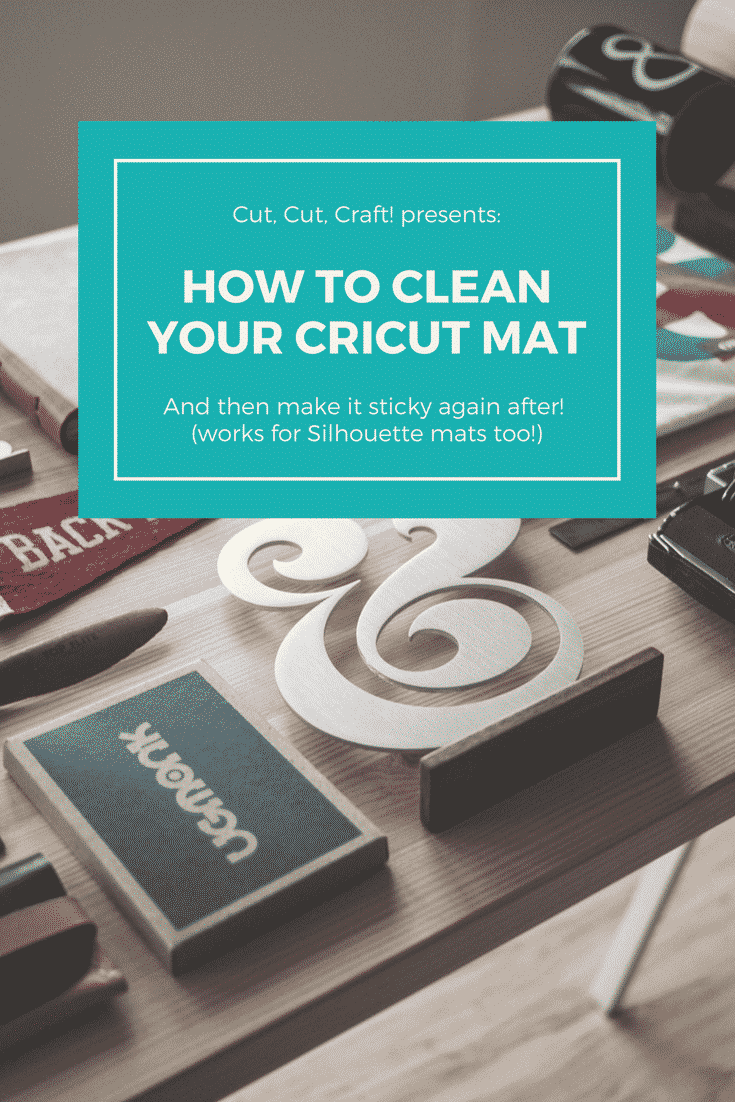
We’re going to teach you how to clean a Cricut mat and make it sticky again.
Then once you have a perfect cutting mat we’ll make sure you know how to maintain its lovely tacky surface.
We all know how frustrating it can be when you start a project, and your material won’t stick to the surface of your cutting mat.
The questions I get the most are about cleaning and resticking cutting mats, especially after they’ve been used to cut felt.
I’ll explain how you can get rid of all the built-up gunk when you clean a Cricut mat.
We’ll go over resticking your cutting mat when it’s no longer working and end with some tips and answers to your frequently asked questions.
Let’s get sticky…I mean… started!
Table of Contents
How To Clean Cricut Cutting Mats
Let’s get right to our guide on how to clean your Cricut cutting mats! We know just how important a well-maintained cutting mat is for making your crafting projects shine, so we’ve updated this tutorial with everything we’ve learned in the past few years, with a few new techniques.
It’s hard to keep your Cricut mat in perfect shape, so let’s explore two methods to clean your Cricut mats: the ‘Gentle Cycle‘ for everyday care and the ‘Heavy Duty‘ cleaning method for those times when your Cricut mat might need some tough love.
Throughout this tutorial we’ll share step-by-step instructions and highlight our essential tips to make sure your mat stays with you for many projects to come. From using a sticky lint roller for everyday tidying, to tapping into the power of adhesive remover for a deeper clean, we’ve got your back.
So, grab a cup of tea (or two) and let’s take a look at a Cricut cutting mat and see how we can get it clean… so that we can get that Cricut mat sticky again right after if we need to.
If projects are slipping, materials aren’t just held, and you’re worrying that your Cricut mat just isn’t sticky anymore and can’t hold your materials… it’s time to clean a Cricut mat!
As your mat accumulates grime and debris with your loving use, move down our list to more potent cleaning methods.
(Be gentle with your mats, and they may even last you through multiple rounds of holiday parties.)
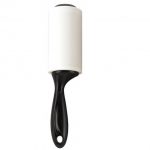
1 – Sticky lint roller
Run a sticky lint roller (or loop of masking tape) across the entire surface of your Cricut mat to remove dust, fibers, bits of paper, and hairs.
This can be done every day, between projects, when you forget to cover your Cricut mats overnight, or simply whenever you notice bits and fibers accumulating on your mat.
It’s a great way to remove any remaining slivers or bits of paper, instead of trying to go after them all with tweezers. When the lint roller or masking tape is stickier than the mat, it pulls all the offending hairs and bits of paper right off the mat! It works especially well on the less-tacky cutting mats.
Safe for the pink Cricut Fabric Grip mats!
2 – Baby wipes
Gently wipe down your Cricut mat with unscented, alcohol-free, bleach-free baby wipes. Lotion-free, cornstarch-free. You want the absolute plainest baby wipes you can find, so you aren’t coating your cutting mats with additional lotions, oils or solvents that could interfere with the stickiness or break down the adhesive.
Use the in a circular motion over the surface of your Cricut mat. You’ll likely need more than one baby wipe, but I have loads of them because we have toddlers.
Let the entire surface dry before using. Baby wipes can hold a lot of moisture, so really be patient. You’ll want to let the Cricut mat air dry completely so that you don’t have to start all over again.
Avoid using a paper towel to get it to dry faster, you’ll pick up a lot of debris pretty quickly.
3 – Soap and warm water
You can 100% clean a Cricut mat with soap and warm water.
Dish soap is the best to use, and again you want to use soap that is free of lotions that could gunk up your mat.
Gently scrub with a cloth, soft brush, soft sponge, or magic eraser, and rinse well.
Let your Cricut mat air dry completely before using.
Warning: Do not use very hot water, as heat has been known to warp Cricut mats, making it so they won’t fit well in your Cricut machine or they’ll buckle making your cuts inaccurate.
The Results
Often enough, simply washing your mat will be enough to rejuvenate its original sticky glory! After your cutting mat has completely dried, test out its stickiness with a scrap of the material you’ll be using for your next project, or a clean finger.
If your mat has weathered enough seasons of projects, or been washed and scrubbed one too many times, you’ll need to turn to something a bit stronger if it won’t stick anymore.
Clean a Cricut mat: Heavy Duty Method
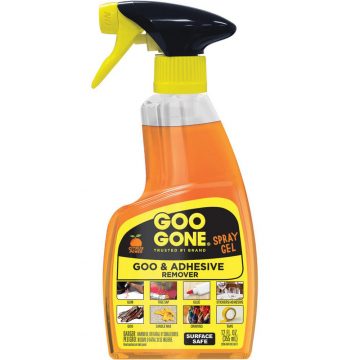
If those gentle cleaning methods don’t restore your cutting mat’s functionality, you can try breaking out the big guns and use adhesive remover to thoroughly clean your mat.
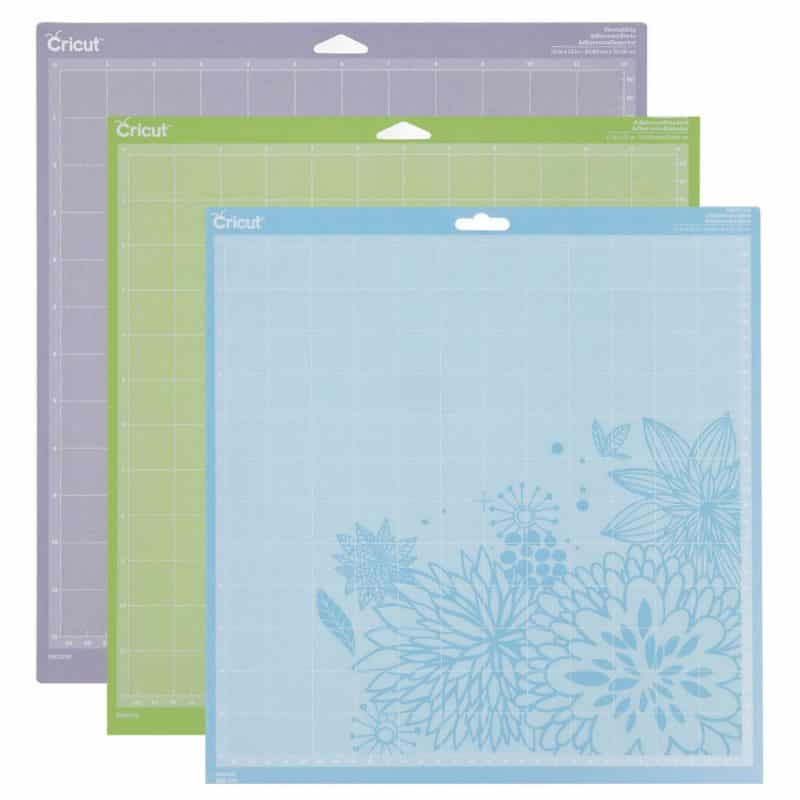
The cleaning methods found on this page are not for the pink Cricut Fabric Grip mat. They are for the blue, green, and purple Cricut mats. Don’t put anything wet (including water) on your pink fabric mats.
What is adhesive remover?
They are strong solvents that will dissolve almost all the adhesive (the sticky glue) on your mat, helping you remove all the gunk that is stuck to it.
Warning: This process will strip your cutting mat of adhesive, so you may have to reapply adhesive to restick your mat. Don’t worry, I’ll walk you through it and you’ll be back to having sticky cutting mats in no time!
Which adhesive remover should you use?
I recommend using Goo Gone as it has been repeatedly and reliably used by the Cricut and crafting community. But you don’t need to buy a whole new product for this! If you have any sort of adhesive remover lying around that you’re comfortable with, it will likely work just fine.
Other options are:
70% Isopropyl (rubbing) alcohol
De-Solv-it Universal Stain Remover & Pre-Wash
LA’s Totally Awesome Spray: All Purpose Concentrated Cleaner
How to use adhesive remover to clean your Cricut mat
Read the directions of your adhesive remover, and adapt as necessary.
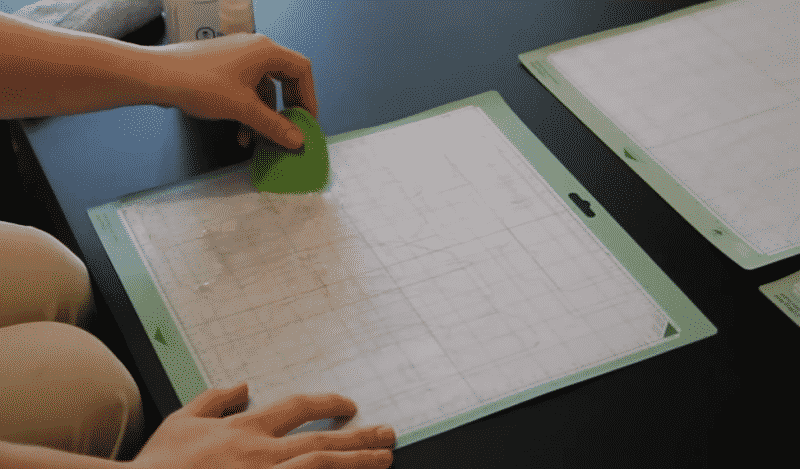
Pour or spray a small amount onto your Cricut cutting mat.
Spread it around with a scraper, or any stiff piece of plastic like an old credit card.
Let the solvent sit and work its magic. The longer you let the it sit, the more stuff it will remove. The exact duration will depend on which solvent you use, so read the directions on your bottle. If this is your first time, I recommend just it sit for a few minutes to remove the dirty surface layer of adhesive. (If you have already restuck you mat a bunch of times and are ready for a fresh start, you can let it sit for up to 20-30 minutes.)
Use your scraper to scrape the dirty adhesive off your mat. You can also wipe it off with a cloth. Paper towels aren’t ideal.
Wash with soap and warm water to remove any leftover residue.
Let the mat dry completely.
Here’s an easy video showing how well this can work to make your mat sticky again:
How To Restick or Retack Your Cricut Mats
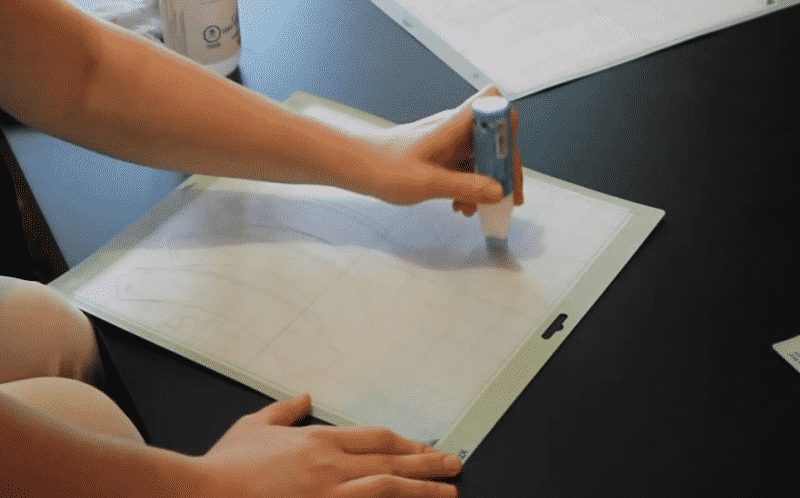
Okay, so how can we actually make a Cricut mat sticky again now that you know how to clean it? Simple: just add another layer of glue!
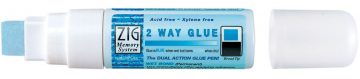
My favorite way to restick a Cricut cutting mat is to use the Zig 2-Way GluePen (with the Jumbo tip). This is, by far, the easiest method of resticking your mat.
The glue comes in pen form, so it’s incredibly easy to apply. There’s no need to tape the edges of your mat, like with adhesive sprays, because you can control exactly where the glue goes.
Also, the glue goes on blue and turns clear as it dries, which makes it super easy to make sure that you have applied an even layer to your entire Cricut mat.
When you first open up the pen, you may need to prime it, to make sure that the glue is flowing through the sponge at the tip. You do this by pressing or dabbing the tip of the glue pen against a scrap surface, until you can see the tip turns blue from the glue.
Follow these steps to restick your Cricut mat:
Apply the glue to the inner, gridded portion of the cutting mat. Use broad, even strokes that go all the way across the mat. Try not to get any glue on the edges of the mat. If you do, just wipe it off immediately.
Allow the mat to dry for 20 to 30 minutes. The glue should turn clear.
If your mat seems too sticky for cutting delicate materials, you can use a clean shirt or piece of fabric to condition it. Repeatedly press the fabric against all sticky areas of your cutting mat. This will pull off some of the excess adhesive, and coat your mat with a bit of lint to tone it down a notch.
Wait a few hours before covering newly glued mats with the clear film cover, so it doesn’t get completely stuck to the surface of your mat.
(Warning: Do not get any glue on the edges of the Cricut mat, as this can get onto the rollers of your Cricut or Silhouette, and jam your machine.)
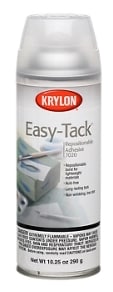
Restick your Cricut mat using spray adhesive
You can use other spray adhesives or tacky glues suitable for mats. Because these methods are way messier than the glue pen, you should cover the edges of the mat with masking tape to protect them from the glue.
Best choice for spray adhesive:
Krylon Easy Tack Repositionable Adhesive Spray
Best choice for tacky glue:
Aleene’s Tack it Over & Over
Tips for Taking Care of Your Cricut Cutting Mats
If you take good care of your cutting mats, they’ll take good care of you, and your wallet. Here are some general care tips for your Cricut cutting mats:
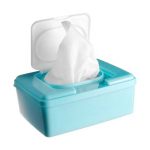
Cover your mats when not in use.
Keep the clear film cover that came with your cutting mat, and replace the cover as soon as you are done using it. This will prevent dust, hairs, and fibers from accumulating on the sticky surface of the mat.
It may help to take a sharpie and mark “TOP” on the top side of the clear acetate cover, so it’s easy to replace correctly.
Don’t manhandle your mats.
Avoid excessively touching the sticky surface of the mat with your hands, as this can wear away and damage the adhesive over time. (This is especially true for Cricut’s pink Fabricgrip mat!)
Use the proper tools: spatulas, tweezers, and scrapers to remove cuts and scraps from your cutting mat. This will protect your mats, as well as prevent your finished cut projects from curling and tearing.
When you do need to touch your mats, use clean, dry hands that are free of lotion.
Regularly clean your mat.
I know, this one might sound a bit silly but if you clean a Cricut mat when it first gets messy you really won’t have to invest quite as much elbow grease in the future. Clean Cricut mats are a pleasure to use, and you’ll really look forward to using them.
Get into the habit of using a sticky lint roller and baby wipes to clean the surface of your cutting mats. This will keep them clean and fresh for each project, just like you have a new mat.
Tips for Drying Cutting Mats
Let your mat dry completely by hanging it up, or simply setting it upright in your dish rack. After you’ve washed it, you want to make sure both sides can get dry, so don’t just leave it sitting on your counter.
Do not use heat, as heat may cause your cutting mat to split or warp, making it no longer fit in your Cricut machine. This means no hair dryers!
If you need to speed up the drying time, you can aim a fan at your mat to increase air circulation. I suppose using a hair dryer on the “Cool” setting should be fine, as long as you can trust yourself to not use any heat to speed up the process. No use destroying your last mat just to get a job finished faster! (Though I think you should always have a couple extra mats around.)
F.A.Q.
My mat is too sticky, what do I do?
When you first get your mat, or after you restick your mat, it will probably be too sticky, especially for light- or medium-weight materials. You can condition or prime your cutting mat to make it less sticky.
Using a clean t-shirt or sheet, repeatedly press the fabric against the sticky portion of your cutting mat. This will pull off some of the excess adhesive and coat your mat with a bit of lint to tone it down a notch.
Some people use their hands (instead of a shirt) to condition their mats, but I think it’s best to avoid getting your skin’s oils all over it.
Should I restick my cutting mat?
If you have clean Cricut mats and material still won’t adhere to your cutting mat, it’s a good idea to restick it. Signs that your cutting mat isn’t sticky enough include: vinyl that pops up in the middle and material that simply gets pushed instead of held in place and cut.
Do I have to use adhesive remover before resticking my cutting mat?
Nope! If you want to cut out a few steps of this process, you can go straight to resticking your mat without the heavy duty cleaning step. You should scrape off any bits of material stuck to the surface of your mat, as this will soon be under the adhesive, and will mess up your future cutting jobs.
I personally prefer using adhesive remover first, in order to ensure a clean, flat surface for the layer of glue.
If you do this enough times, the layers of adhesive can build up and actually reduce the thickness of the material you are able to cut with your blades. Eventually, you will want to break out the Goo Gone and scrape off all those layers of accumulated glue and goo.
What happens if you get glue on the edges?
If you get glue on the edges of the mat, it can get onto the rollers of the machine. This can cause odd bumps as the rollers feed the material through, or can even jam and break your cutting machine itself. You want to keep those rollers rolling as smoothly as possible so you have the most accurate cuts.
You can always use a bit of adhesive remover on a q-tip or bit of paper towel to remove any glue you accidentally got on the edges of the mat.
Marian from “Seams To Be Sew” (I love that name!) recommends putting painter’s tape over the edges of your mat so that you’re sure to protect them (and the surrounding surface).
If you’re using a table you’d rather not get sticky, consider putting an old towel or t-shirt to protect the surface, especially if you’re using the spray!
How do I clean a pink Cricut fabric mat?
Hey Let’s Make Stuff has a great article on cleaning pink Cricut mats. Check it out!
Does this work for Cricut Maker cutting mats?
Yes…because… they’re the same cutting mats! If you’re interested in other details about the Cricut Maker, we have this full review: cutcutcraft.com/cricut-maker-machine-review.
Do you prefer Cricut or Silhouette cutting mats?
I really think the Cricut mats are the best and actually a great reason for going with Cricut over Silhouette. I go into depth on cutting mats and the differences between Cricut and Silhouette in this article: cutcutcraft.com/silhouette-cameo-3-vs-cricut-explore-air-2.
Which cutting mat should I use?
Cricut has an informative article on the different uses for each kind of cutting mat.
Our Expert
Ali Fields
Ali Fields is a DIY enthusiast and the founder and editor of Cut, Cut, Craft!, a DIY crafting blog.
She's a mechanical engineer by trade and the mother of two delightful kiddos.
3 thoughts on “How to Clean a Cricut Mat (And Make It Sticky After)”
Thanks for this excellent article! I’ve read a few whilst wondering whether to buy a Cricut Maker and this is by far the best 😊 I saw a suggestion somewhere to use contact paper (or sticky backed plastic as we call it in the UK), stick it to the mar with the sticky side up and just replace when it loses it’s stickiness. I’d love to know your thoughts on this idea!
What about cleaning a piece of vinyl? I cut out a design recently but haven’t gotten anything to iron it to yet, so now it’s kind of dusty. Do I just have to recut the design?
What can be used to cover your mat if you no longer have the film that came with it?