I’m so excited about today’s post!
Not only are these guys super easy, fun and inexpensive to make, they’re going to a great cause. I first came up with the idea to make monsters dolls out of colorful socks for Charlotte’s 3rd birthday party. Earlier this year, I read about Julie’s Monster Project, and it was meant to be! I interviewed Julie yesterday about her cutie Olivia, and how the Monster project came to be. So go read it if you missed it yesterday. I’ve got the easy tutorial below for you. If you want to make some monsters to donate to the Monster Project, you can contact Julie for more information.
Here’s what you’ll need to make a sock monster of your own:
- Colorful socks (I find great ones in the dollar section at Target or Michaels)
- Scissors
- Felt scraps
- Tread (any color)
- Eyeball with shank
- Embroidery floss (any color)
- Needle
- Polyfill (not pictured)
- White adhesive-backed felt (not pictured)
- Cutting Machine (Optional, but I’ll use a Cricut Maker)
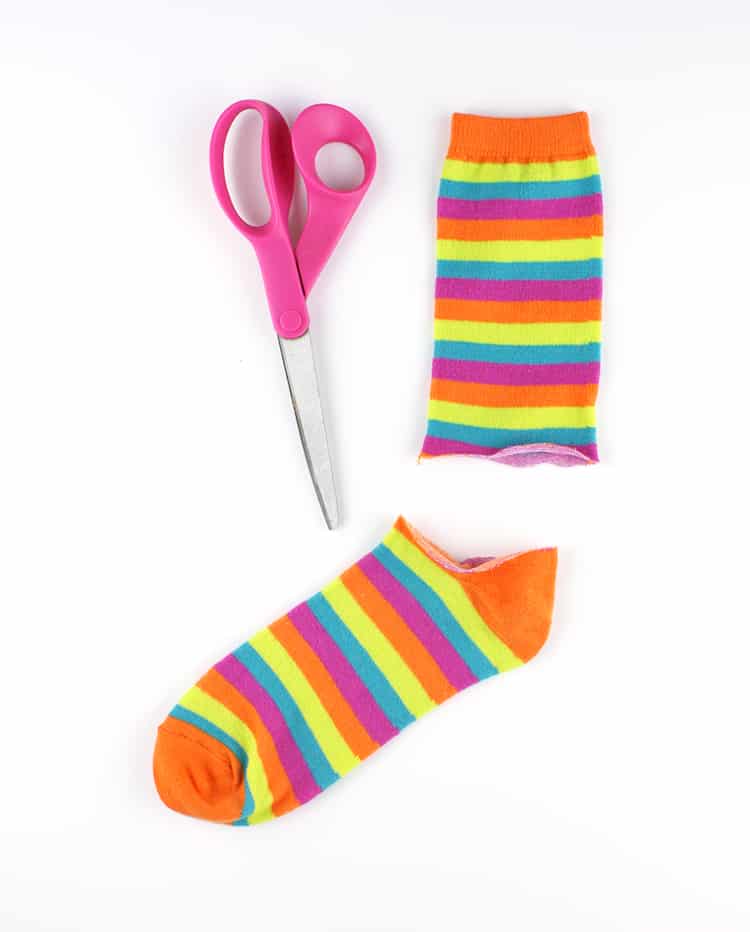
Step 1: Cut the sock in half. I usually aim for right above the heel to keep a straight edge. NOTE: The other section of the sock can be used for another monster – just cut the heel part off and start at step 2.
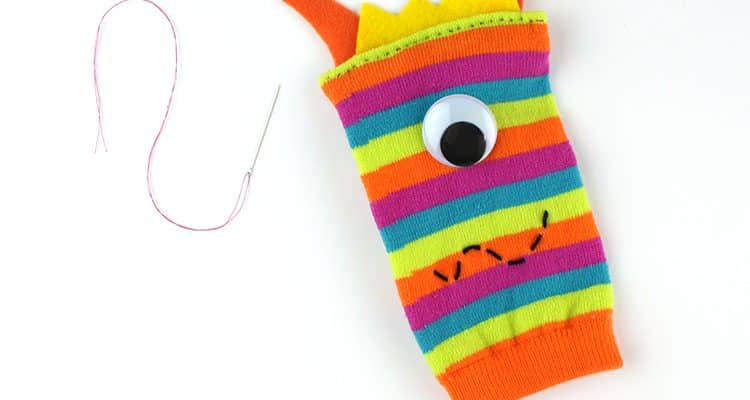
Step 2: Sew on the eye with the thread; and a mouth with the embroidery floss. Just freehand. If your stitching is uneven, it makes the monsters look more scary.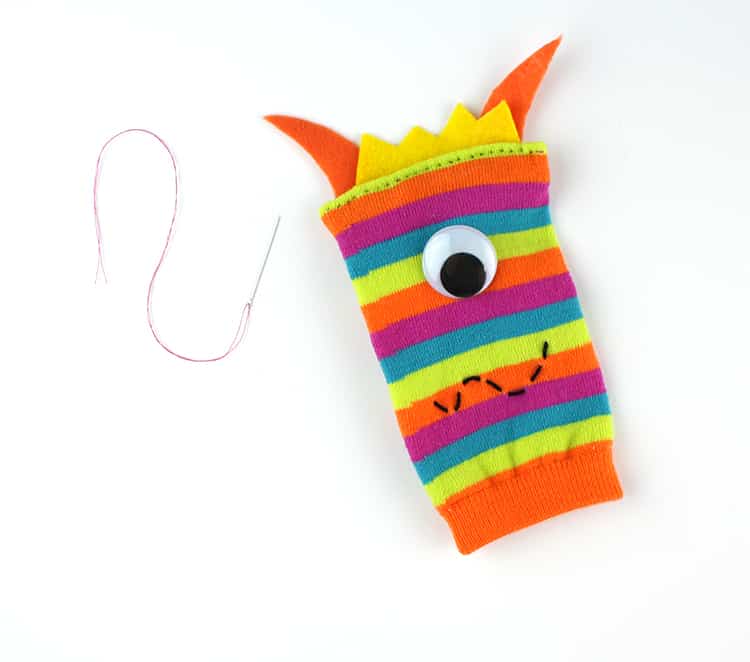
Step 3: Cut your felt scraps into hair/horns, etc. Fold the cut edge of the sock inward 1/4″ and sandwich the felt scraps between the opening. Double your thread and hand-stitch across the top.
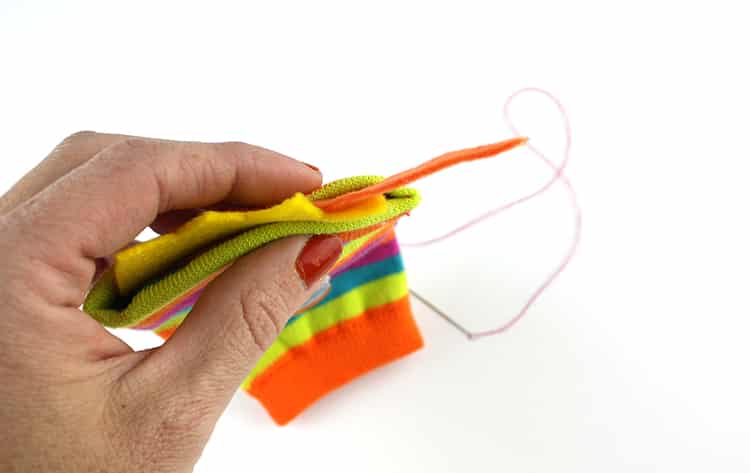
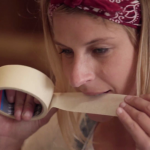
This is what it looks like when you’ve got your edges folded inward and the felt sandwiched in there. Apologies for my hands. These are the real-life neglected hands of a DIYer. Usually, I’ve got paint spatters all over my nails, so this is actually pretty impressive. But I really should treat myself to a manicure one of these days.
Step 4: Fill your Sock Monster with polyfill, and tie the bottom shut with embroidery floss. If you’ve got some handy, cut small triangles out of the adhesive felt and stick them on. Done!
Step 5: Repeat! Get creative! Make some with horns, spikes, eye patches, hair, etc. If you’re using the toe end of the sock, your finished product will look a bit different, so work with what you’ve got, and have fun!
Now you can make a whole gang of these guys; some to keep for yourself, and some to make the day of kiddos staying at Primary Children’s and Seattle Children’s Hospitals. This is such a great way to teach our kids about helping other kids. I know that the nicest thing anyone can do for me is to do something nice for my kids. So these monsters are bound to bring a lot of smiles. Help us spread the word about the Monsters & Leggings projects! Tweet + Share + Pin away, and let’s make some kids smile!