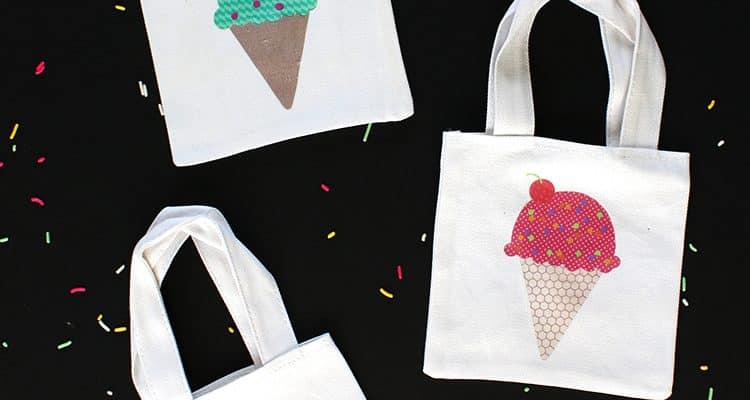
I’m back with a fun new project! Remember when I introduced you to my new Sprout by HP? Just to refresh your memory: HP sent me one so I could show you some of the fun things it can do. Since it’s arrival, the kids and I have had so much fun creating new things. My 5-year-old wanted to make some bags, so here’s what we came up with:
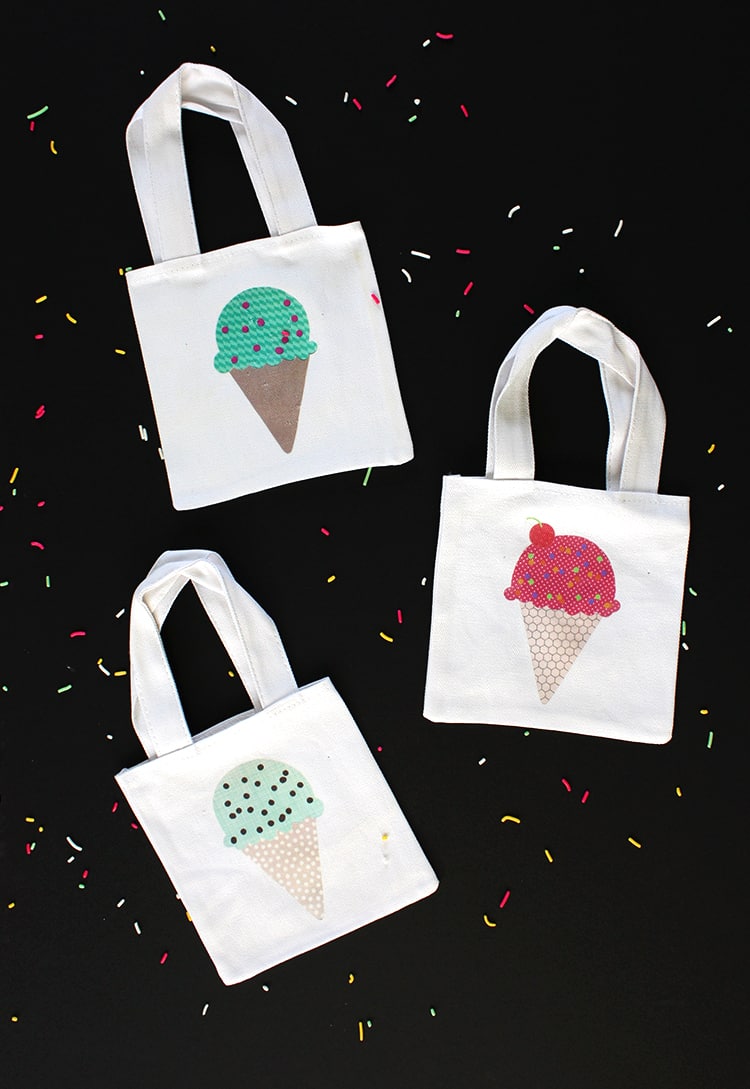
I haven’t worked with scrapbook paper forever. Probably because I don’t scrapbook. ButI do have an obscene amount of paper. So it was great to use some of the paper that’s just hanging around in my laundry room. One quick stop at the craft store for some mini totes and we were ready to roll. We drew simple ice cream shapes on a variety of paper and cut them out.
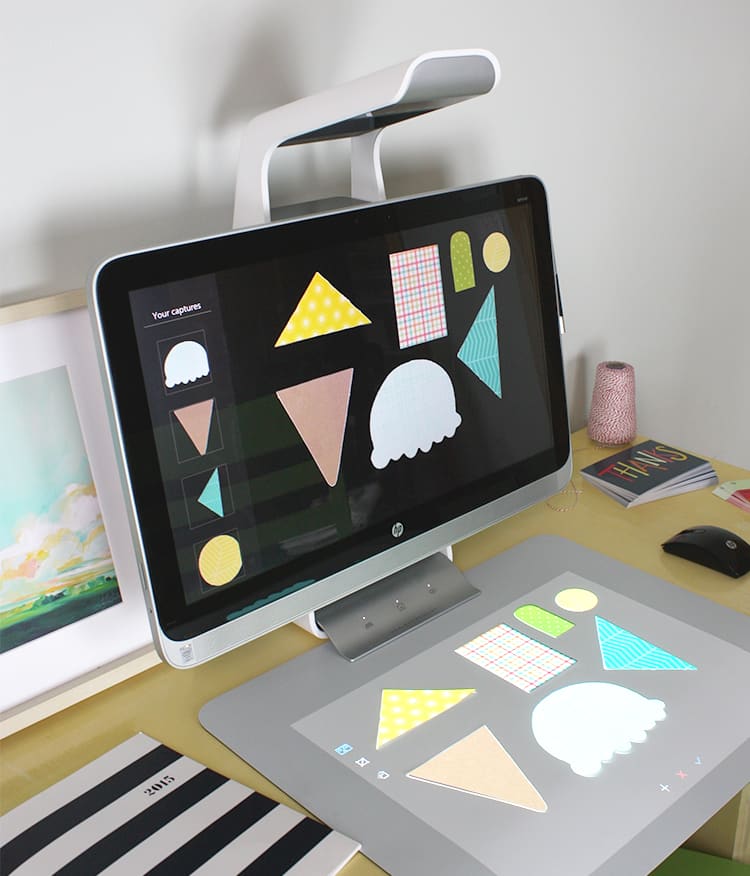
I scanned all the pieces into my workspace on the Sprout. We played around with different scoop and topping combinations until they looked good enough to eat. The best part is that I didn’t even have to make the cut shapes proportional…I could resize them once they were scanned into the Sprout; so I didn’t have to measure or agonize over anything at all!
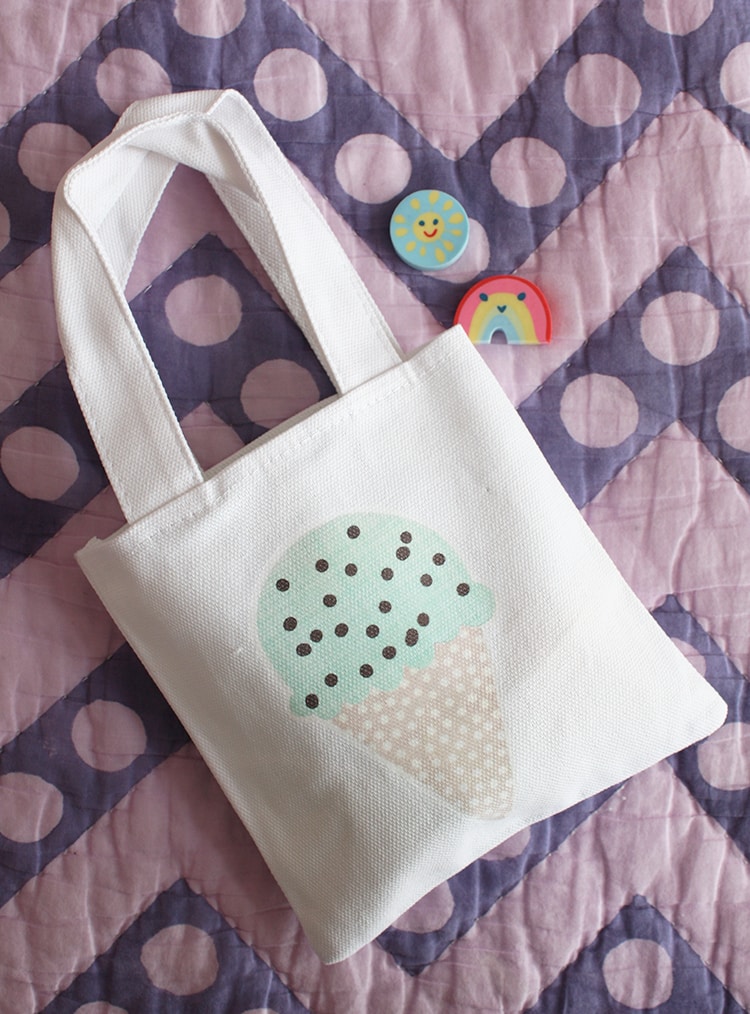
Once we’d finished designing our ice cream, I printed them out on transfer paper and ironed them onto the totes. Easy peasy. Except for that one bag I scorched. Oops. Then my little doll loaded up her goodies and headed for ballet class.
If you haven’t used transfer paper, it’s super easy. You just print your design on to it, and then use a heat press or iron to apply to, well, basically any fabric! I’ve got an entire tutorial on how to use a heat press if you need any help.
Wouldn’t these be fun as party favors or summer camp activities? I’m giving you our ice cream creations so you can play around with them, too. I wish I could give you all a real-life ice cream cone; but for now, hooray for digital ice cream!

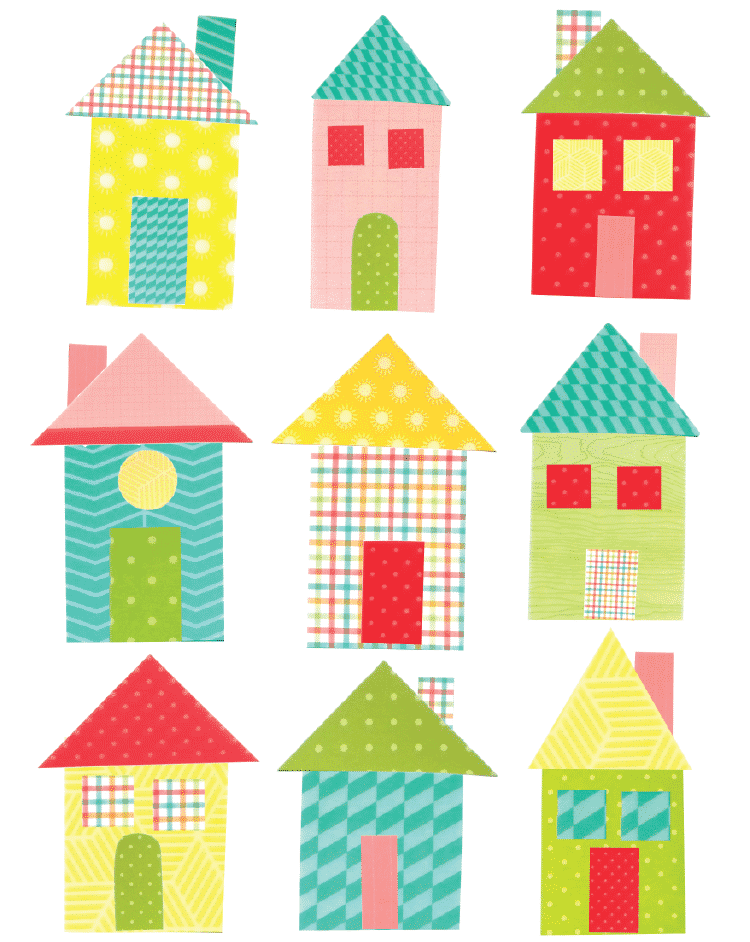
I couldn’t leave myself out. I’m always in need of a good tote bag. They’re perfect for hauling all those (overdue) library books back to where they came from. I decided to get even more simple with my shapes (squares, rectangles, circles and triangles) and see what I could make with them. Before I knew it, I had a whole village of colorful houses.
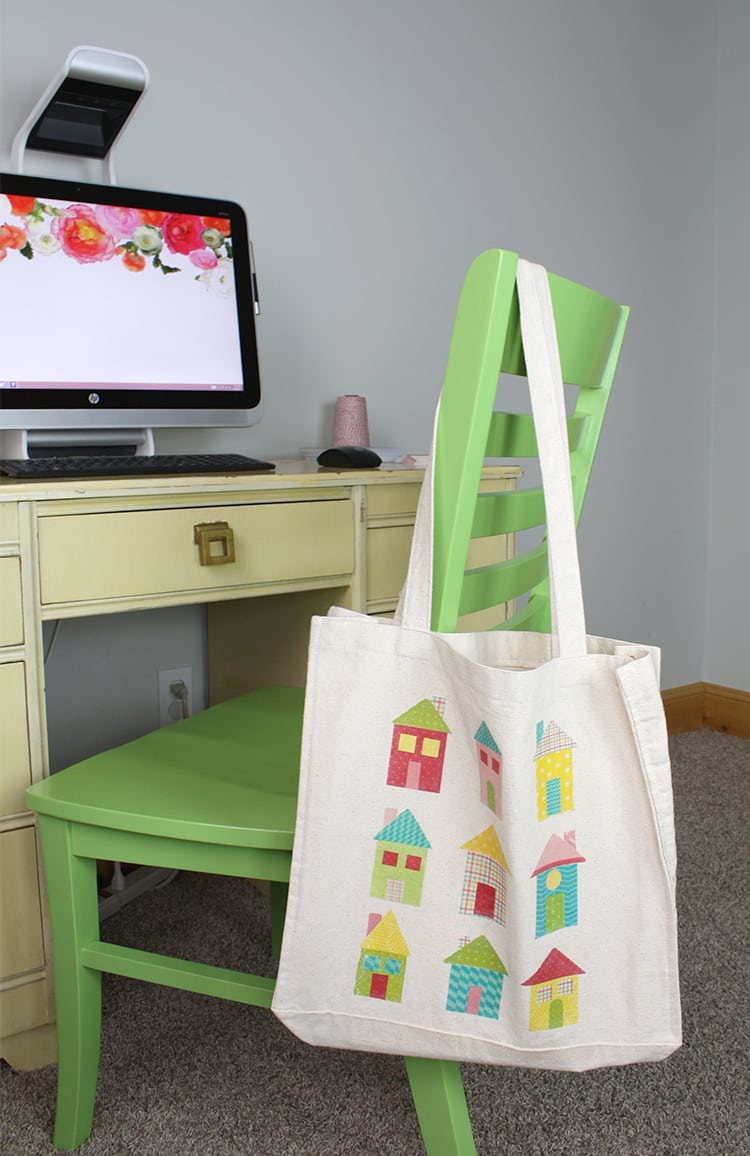
I printed the houses out on transfer paper and ironed them onto my tote. It took a couple tries to get it just right…a little scorching, some swearing and an incident with a drippy iron. When they say “NO WATER” they really mean it. I recommend practicing a bit before going for the real deal. I cut and ironed each house on individually so I didn’t have a lot of the extra transfer paper surrounding the houses.
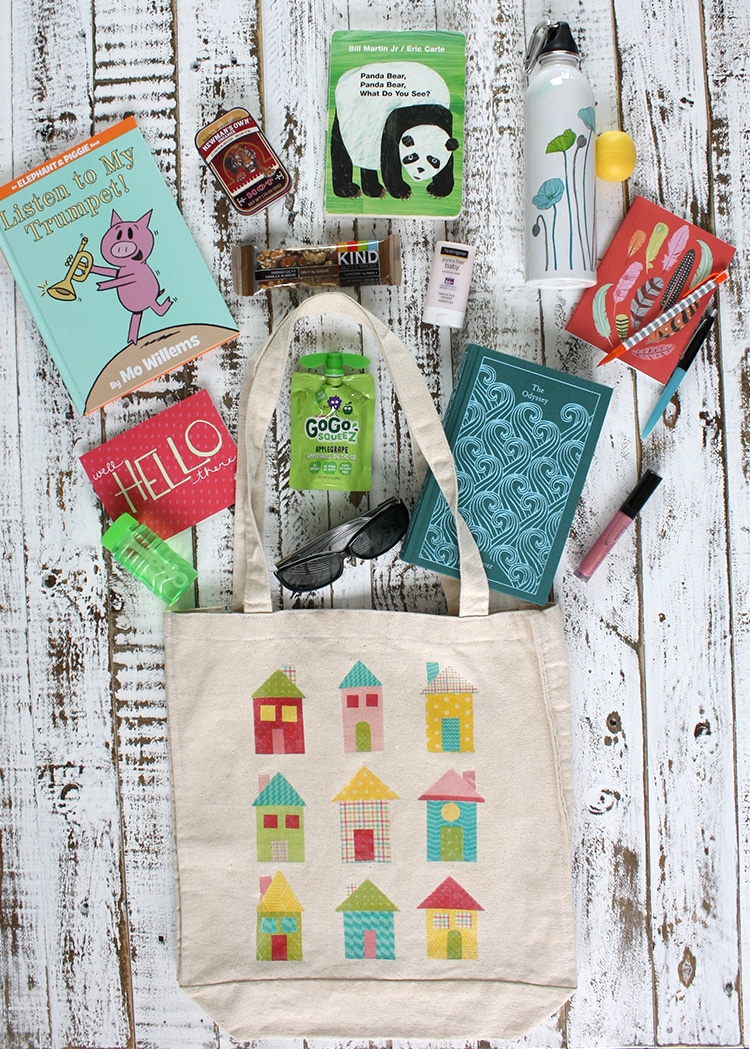
Baseball season just started here; so here’s a look at what’s in my bag these days (minus all the crumbs and garbage). I usually pack a survival kit before every game/practice. Some snacks and entertainment for the little dudes; and a few goodies for myself. Honestly, though, it feels like somedays my bag is nothing more than a portable garbage can–candy wrappers, crumpled receipts, tiny socks, and an assortment of crumbs. At least if I’m hauling around everyone’s crap I can do it in a cute bag, right?