
If you want to learn how to make stickers with Cricut, you’ve come to the right place!
Maybe you’re looking to start a custom vinyl decal business. Maybe you just want to make stickers for your friends and family…and…yourself!
I’m going to teach you my favorite method for making stickers with your Cricut machine.
These stickers can have any complex or colorful design that you want. They’re easy and quick to place (without weeding or transfer tape).
That makes them perfect for selling on Etsy, promoting your Instagram, or as gifts for friends and family.
At the end I have a bonus tutorial for how to turn this into a business you can run from your own home.
(I just completely updated this article in April, 2023 with new techniques!)
Table of Contents
Making stickers with your Cricut machine

What are custom stickers good for? Pretty much anything you want to personalize, label, or advertise.
There are two kinds of stickers you can make with your Cricut machine:
- vinyl decals (using printable vinyl)
- regular stickers (using Cricut’s Printable Sticker Paper)
We’re going to use Cricut Print Then Cut. If you’re new to using your machine, don’t worry, this is a great first project and is actually one of the easiest you can take on. If you have a different cutting machine (or don’t have one), you can still read along.
(If you’re not sure what a Cricut machine is, that link will take you to our introduction to all things Cricut)
Cricut Print Then Cut lets you create stickers that look like, well, the classic stickers you’re used to. They don’t require weeding, you really just let the Cricut machine do all the work.
This is our recommended method and it works for both materials.
If you aren’t familiar with printable vinyl, you’re going to love it. Just like you can print on paper in a desktop printer, there’s a vinyl designed to be printed on directly, which is a great way to make your own vinyl decals that are also a bit more durable than stickers.
What kinds of stickers can you make with your Cricut?
Whether you’re thinking of selling stickers and decals on Etsy, or just want to wow your friends, here are some ideas of what you can do with DIY vinyl decals and printable vinyl.
You can:
- personalize water bottles, mugs, and tumblers
- decorate pencil boxes, lunch boxes, and lockers
- organize your kitchen and cleaning supplies with custom labels
- stickers for your band
- decorate your phone and laptop
- vinyl wall decals to liven up your workspace & home
- start a side business with custom vinyl car decals or bumper stickers
Let’s start with exploring the real star of this show: sticker paper. We’ll also talk about what printable vinyl is and why it makes the perfect material for cheap, colorful stickers.
What is Cricut’s Print Then Cut?
When you design with Print Then Cut, you don’t need to cut out the insides of letters or the centers of objects to make them visible. Hear that? No weeding! No transfer tape! We’re talking stickers here.
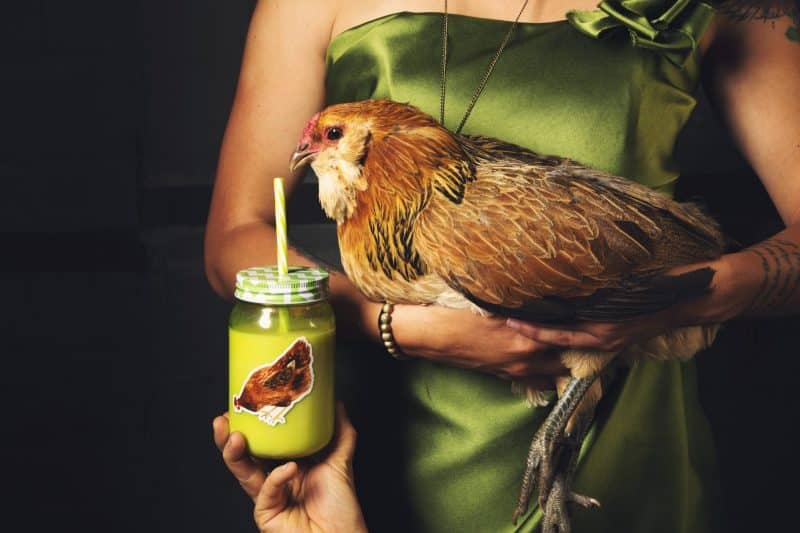
Suddenly you can make decals with cartoon animals, anime characters, logos, and even pictures of your cat or…your chicken?
And when you’re working with your Cricut you can make lots of these stickers without any extra effort. Whether you’re selling them, giving them as party favors, or handing them out at craft fairs to advertise your business, being able to mass-produce these babies is fantastic.
Printable vinyl stickers or sticker paper?
We’ll start with Cricut printable sticker paper.
For most projects, you’re going to start with printable sticker paper. It’s pretty thin, super affordable, and it comes either precut for labels or as a completely full sheet for more… interesting projects.
The full sheets are what we want, and this is my favorite brand.
Next, let’s cover printable vinyl sticker paper.
Printable vinyl is just like normal adhesive vinyl that you’ve worked with except that you can print colorful designs on it and then cut it with your Cricut machine.
The magic is in the printing. One side has a normal adhesive backing, the other side is a special material so that you can print on vinyl.
Some benefits of using printable vinyl:
- Easy to make complex, colorful designs. Unlike normal vinyl where you have to layer color after color, with printable vinyl you can get your colors perfect in one pass with your printer.
- Test different designs. On a single sheet, you can try out different colors, shapes, and fonts, making it easy to quickly pick a winning design without loading multiple rolls of vinyl or fussing about with layers.
- You can make really cute stickers and labels with your Cricut.
- Working with printable vinyl requires no prior experience. Honestly, the types of projects you can make are only limited by your imagination.
But… what about regular vinyl? It doesn’t quite work.
If you try printing on regular vinyl, it won’t soak into the vinyl. It just pools and runs off the page. It looks horrible!
Instead, you could try painstakingly laying six different colors of vinyl on your transfer tape. The final product can be absolutely stunning, but the process of weeding, and layering, and transferring can be…a bit of a chore. (To say the least!)
Or you could just use printable vinyl, it comes with a special coating on one side that can be printed on beautifully.
You can get color effects and details that are impossible with regular adhesive vinyl, like watercolor, shading, and intricate line work.
Better than regular paper stickers, printable vinyl can actually be made waterproof by adding a layer of clear vinyl on top. If you try this with regular sticker paper, it won’t last on mugs and tumblers, on your bike or mailbox, or survive a cup of spilled coffee.
If you want stickers that really last you definitely want to use printable vinyl.
How To Make Stickers With Cricut & Design Space
Alright, enough talk, time to get crafting.
![]()
First, I’ll take you through the necessary equipment for making DIY stickers. Then, I’ll show you how easy it is to make your own custom-printed decals: from designing to cutting to applying.
After the tutorial, I’ll teach you exactly how to transform that demand into your own money-making business. If you want to skip ahead to setting up your business, just click here.
Materials to get started:
- A cutting machine. For this tutorial, I’ll be using a Cricut Maker.
- Design software. I’ll be using Cricut Design Space, but your software of choice will work, too as long as it has a Print Then Cut feature.
- An inkjet printer. For the custom stickers we’re making today, you’ll need to use printable vinyl and a color inkjet printer. (If you only have black & white, you’ll have to make black and white stickers, like that dinosaur up there.) This is my favorite.
- Printable vinyl or sticker paper. I’ll be using Expressions Vinyl Inkjet Printable Vinyl in this tutorial. It comes in 8.5″x11″ sheets to easily fit in a regular desktop inkjet printer. You can also use Cricut Sticker paper available here.
- Clear vinyl laminate. (optional) Regular printable vinyl is rated to last one year (outdoors) without a laminate. With a clear laminate, that outdoor durability extends to 4 or 5 years! I recommend a precut sticker sheet of Oraguard 210 Economy Vinyl Laminate, so you don’t have to buy a whole roll.
- Application tool. This is a hard, straight edge for helping burnish vinyl, sealing it into place. A plastic scraper, or something like an old credit card, will work.
If you don’t have a cutting machine and aren’t sure what exactly they are or how to use one, I have a complete guide to die cutting that quickly explains exactly what they are and how they can be used to cut vinyl, paper, and other materials.
Got it all together? Let’s get started!
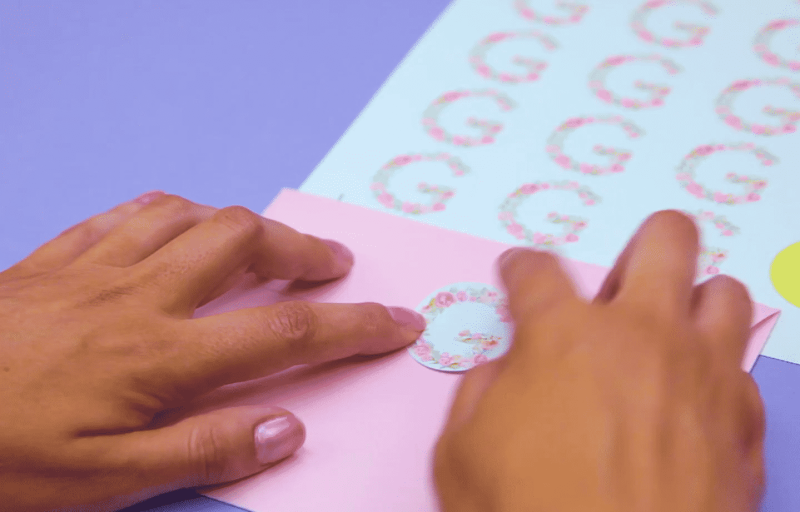
Step 1: Prepare and print your design
I’ll be using a Cricut Maker and Design Space, but the process will be the same for other machines. We’ll be making own our custom stickers in this tutorial so that we can label some jam.
Open up a new design in Cricut Design Space.
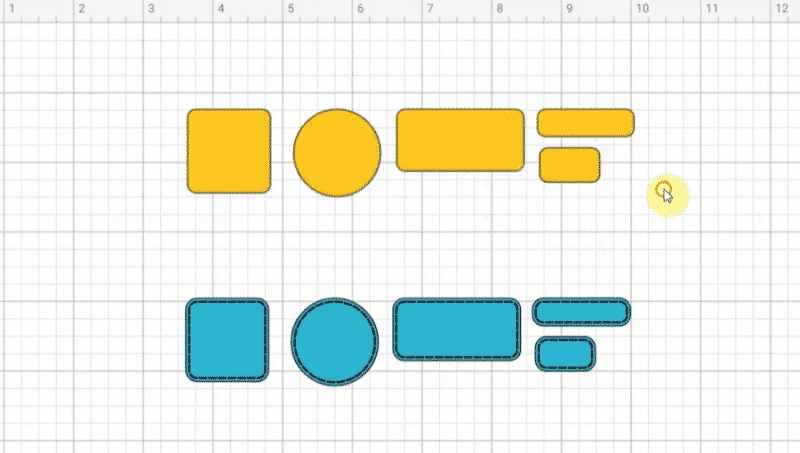
Go to Design Space and choose ‘New Project,’ and then add a shape. Start simple. Choose a circle. Once your circle is in place, click on it to select it. You can leave the shape black, or change the color. (I have a template of different shapes I import into a new project like this.)
The next step is to change the size. Do this by typing your desired dimensions into the size area.
Now that we have our size, we need to add words to our design. Click on the text icon on the left and type out the word for your first label.
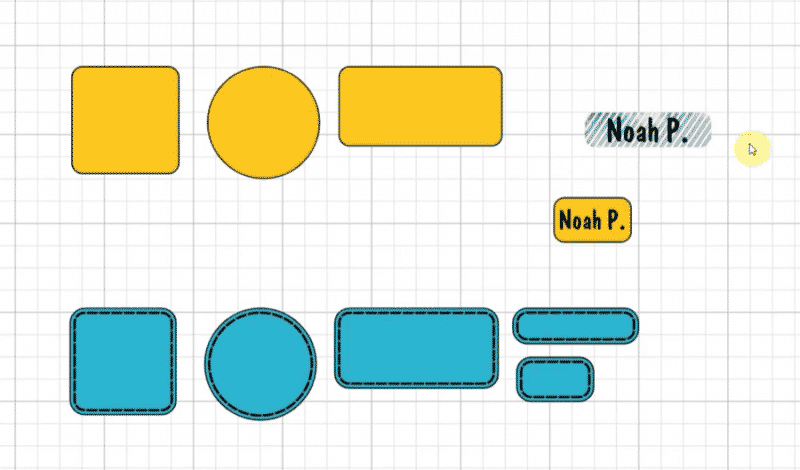
Your word will probably come out far too large. To resize the text click on the resize button on the bottom right of your text area and drag the text to a smaller size and position it where you’d like in the circle.
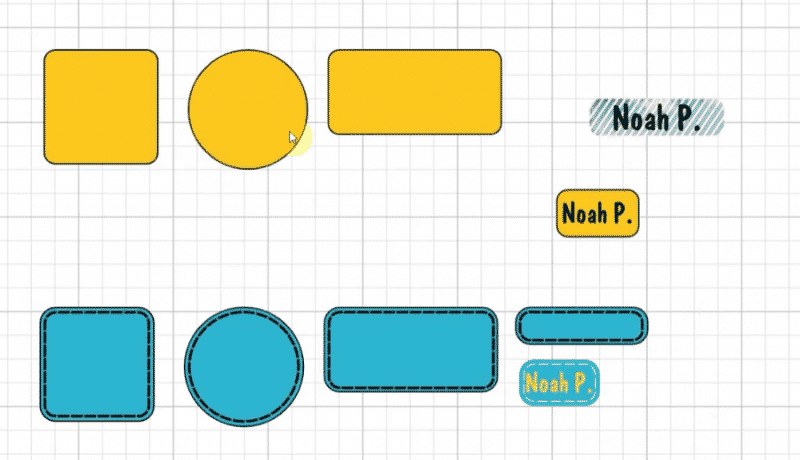
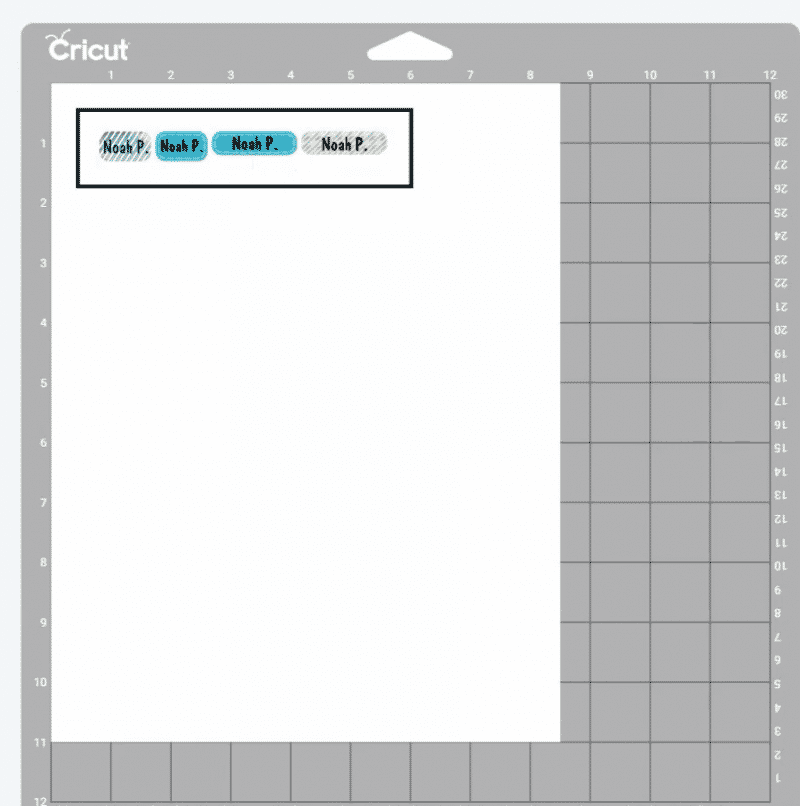
Repeat this step for the number of different labels you want to try out. Be sure to line up all labels within a printable area so they don’t overlap each other.
With all projects, you need to know Cricut’s printable area, which is 6.75″ x 9.25″. When working with multiple designs, it’s important to line up all your labels, vinyl decals, cleaning labels, or other designs within these dimensions.
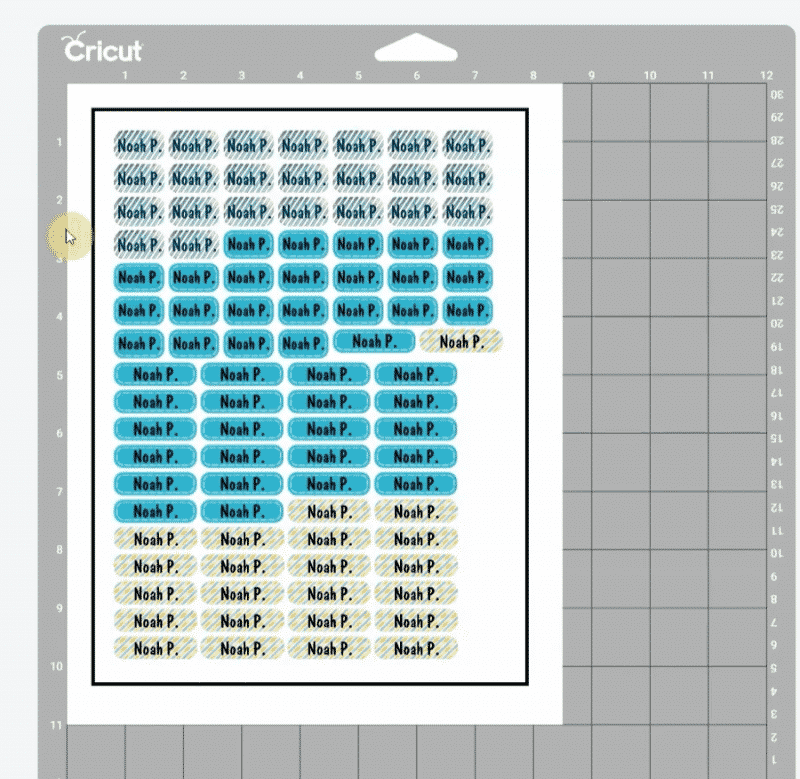
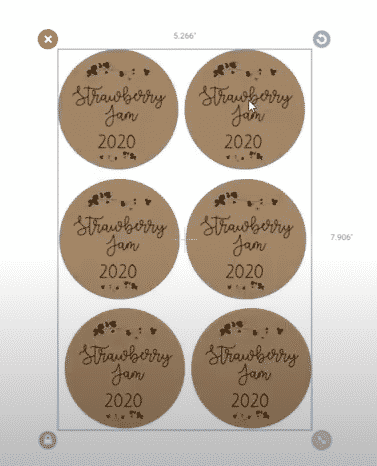
But don’t worry, Cricut’s got it covered after you create your project:
Just play with the number of copies on the left until they fill your project area:
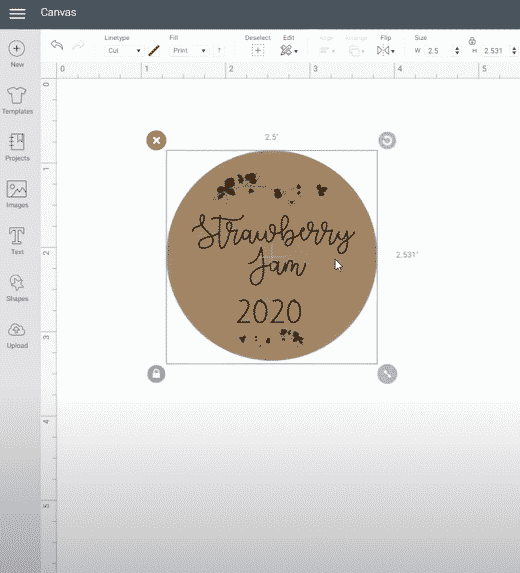
Alternatively, you could also upload an image and add it to your label, like Christy Cain does with this strawberry design below.
To do this, click on the upload button on the left-hand menu and browse until you find an image you like. After the image is uploaded, you’ll need to shrink the image the same way we did with the words.
We’re almost finished! Our next step is to select all our labels and then click the button on the bottom right that says ‘Flatten’. This makes sure you’re cutting out the label as one solid piece, as opposed to cutting out the letters or the image as well.
Click the green ‘Make it’ button on the top right.
Step 2: Send to the printer
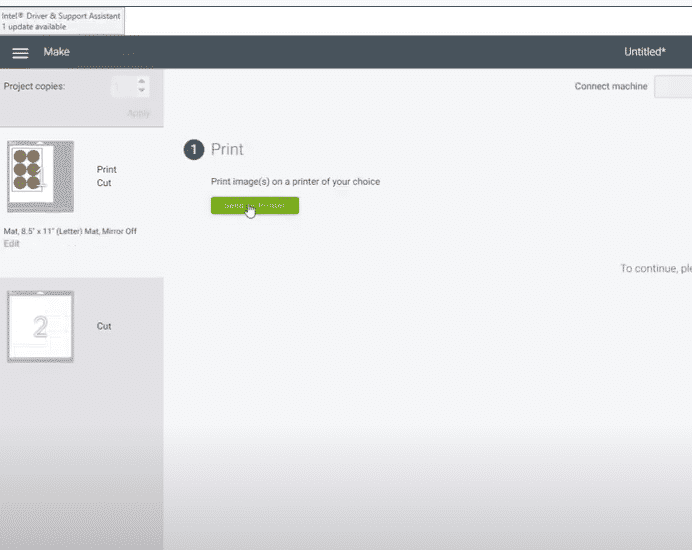
After you click the ‘Make it’ button, you’ll be taken to the print screen. Click the green ‘Send to Printer’ button.
Pause here for a moment to load the printable vinyl into your printer. Print on the matte side of the vinyl, not the glossy side. For many printers, the correct way to load the printable vinyl would be liner side down but always double-check your machine.
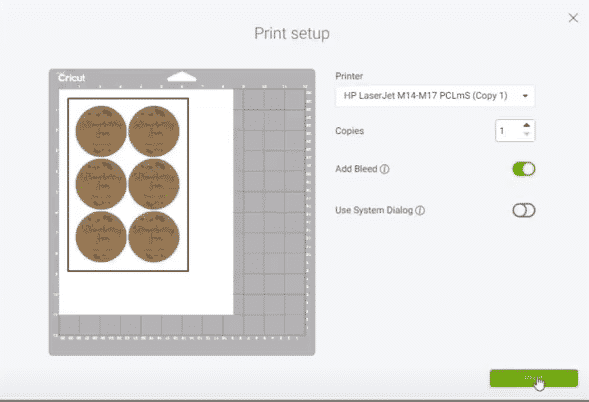
Once the vinyl is loaded properly, go back to the screen. Make sure ‘Bleed’ is on, and then click on the print button.
Step 3: Apply vinyl laminate (optional)
The top printable layer of this vinyl is a little more delicate than regular vinyl. On its own, the stickers will last for about a year and won’t be very water-resistant. But if you protect them with a clear laminate, then they can last for up to 5 years and withstand being washed.
- Once your design is printed, place it on a hard, flat surface.
- Starting from one edge, begin to peel the backing off of your clear vinyl laminate. Only peel off an inch or so to start.
- Line up the edge of the laminate with the edge of your paper, and press it down smoothly so there are no creases or air bubbles.
- Using a ruler or scraper, smooth the laminate onto the printed page as you pull the paper backing away.
- Use that same tool so burnish the laminate onto the printed vinyl. This helps the laminate stay in place and helps get rid of any air bubbles.
Check out this awesome video from Persia Lou to watch how to apply the clear laminate overlay:
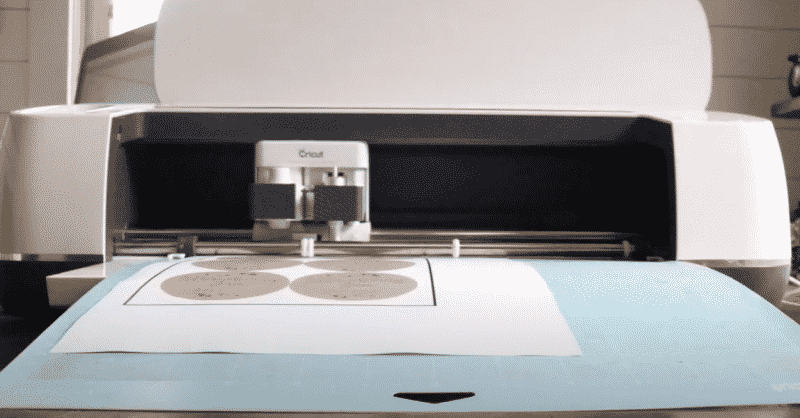
Step 4: Place it on the mat
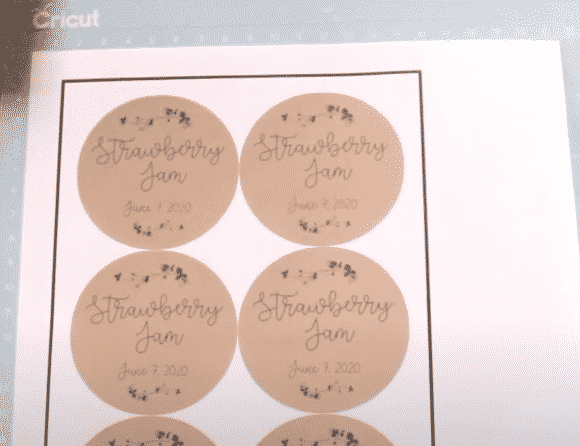
Congratulations! You’ve printed your beautiful vinyl labels and they should be looking great! All we have left to do is cut them out.
Place the printable vinyl sticker sheet on your cutting mat and align the top left corner. Smooth it down. Make sure to position your printable vinyl design on the mat the same way your design appears on the Design Space screen.
Step 5: Cut the labels
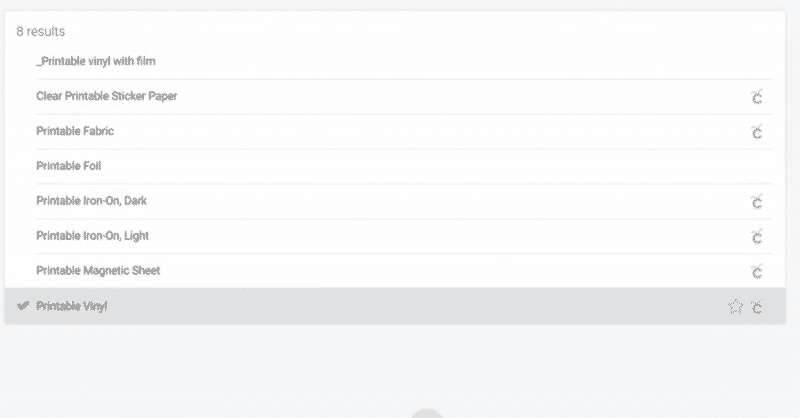
Back at the Cricut Design Space screen, choose ‘Browse all Material’, type in printable vinyl and select it. Some machines might have a manual dial on the Cricut machine where you can select the material.
Load the mat with the printed vinyl into the Cricut. Double-check you have the fine point blade equipped in your machine.
Back at the Design Space screen, choose ‘Fast Mode.’
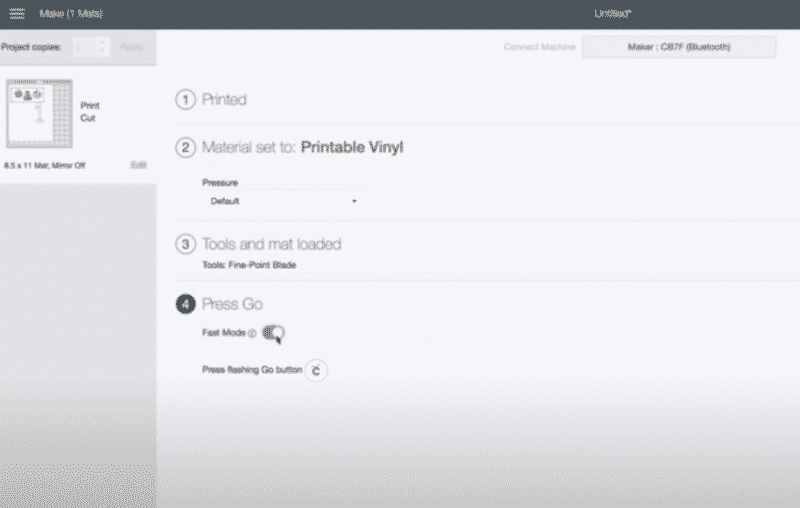
Click the flashing Cricut button on your machine.
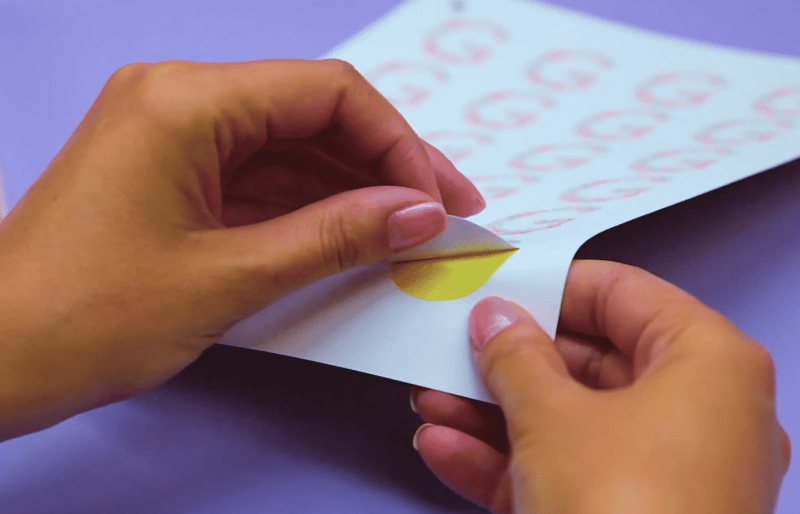
Step 6: Peel ’em and place ’em
When finished, click ‘unload’ and remove the mat, along with your printable vinyl labels. Peel the printable vinyl labels off the backing with your fingers, or use a Cricut weeding tool, or a pair of tweezers.
- Peel ’em off.

- Stick ’em on.

- Smooth ’em out. For long-lasting results, use your application tool to burnish the sticker in place and smooth out any air bubbles or wrinkles.
Step 7: Apply!
Apply your labels to the object of your choice. Smooth out the printable vinyl if needed to remove any tiny wrinkles.
The more familiar you become with your machine, the more you’ll discover what you can do. Changing the font, separating letters, squishing letters together, and adding unusual shapes are all possible.
Play around. Find things that work for you, and definitely try out different fonts. One of my favorite things about crafting is how personal it can be!
Tips, tricks, and advice
- Don’t remove the backing paper. If you’re gifting a set of DIY vinyl decals, or a homemade vinyl sticker book, leave the project on the backing paper.
- Be careful with your ink. Allow the ink to completely dry on inkjet printable vinyl before working with it.
- Avoid using a laser printer. Some printable vinyl is compatible with a laser printer, but the heat generated from its operation will often melt the vinyl or activate the adhesive backing too early. I really recommend starting with an inkjet printer, or using printable vinyl that’s specifically designed for laserjet use.
- If you notice your ink running when you place the laminate or acrylic spray, let the page dry for up to a day to let the ink fully set. Some types of ink take longer to set.
- If your printer keeps jamming, you’ll want to use a printer that can handle heavier-weight paper. These printers will have a “straight path” instead of a “U-shaped path” so the paper doesn’t need to be bent.
Okay, now that we’ve talked about how to make our own stickers with Cricut Print-Then-Cut, let’s start thinking about taking it to the next level and making… a bit of income!
We’ll also cover which materials you should use when making Cricut stickers and how to come up with sticker designs.
How To Start Your Own Vinyl Decal Business from Home
Wouldn’t it be great to be able to make money while making the sort of crafts you love? It’s a dream a lot of people have, from everyone at your local crafts fair to almost 2 million sellers on Etsy!
Don’t let that number intimidate you though. It can be a competitive market, but as long as you keep your startup costs low you aren’t risking very much by selling your work.
In this second half of the article, I will guide you through how to start a sticker and decal business from your very own home. We’ll go through making a name for yourself, selling to your local community, and starting an online shop.
I’ll go over all the materials you need to get a vinyl sticker business started. After that, I’ll discuss how to expand your business to other sorts of vinyl, like removable vinyl decals and heat transfer vinyl for t-shirts.
How to get started selling vinyl decals
Okay, so how do you actually get started turning your DIY crafts into a business? And how do you get customers?
I’ll give you some advice, so you can take advantage of best practices and avoid tricky pitfalls. It starts with making a name for yourself.
Branding and social media
Whether you are selling your stickers on Etsy, or just to people and businesses in your neighborhood, you will absolutely benefit from developing a brand identity and having an online social media presence. People need a way to find out about your work, look through your designs, and contact you if they want to hire you or buy your products.
Your brand starts with picking a name. You want something descriptive and catchy that isn’t already being used.
- Check with the US Patent and Trademark Office to make sure your potential name is not already trademarked.
- Use a WHOIS lookup to make sure it’s available as a domain name for your future website.
- See if your name candidate is available on Instagram, Facebook, etc.
I recommend setting up a personal blog, as well as starting social media accounts with this name. WordPress is a super accessible platform, and they have an easy guide for setting up your blog.
You’ll be filling your site with pretty examples of your work. You’ll also have a way for potential customers to see your work and ask questions. Always try to be very responsive to potential inquiries, especially when you’re first getting started.
Pinterest is the main social media site for vinyl crafters and you absolutely should be on there, but it’s a good idea to make accounts on Instagram, Facebook, and Twitter. The more places you are, the more easily you can be found, and the more people you can reach.
So where’s the best place to start selling, local or online?
Begin selling locally
Before you go through making an online shop or posting your items on eBay, the easiest way to validate your business idea is by approaching your friends and family. Make them put their money where their mouth is!
If you find success among friends and family, it’s time to branch out to the rest of your community. Make sure to ask your friends and acquaintances to pass along word of anyone in need of custom vinyl decals, stickers, labels, signs, cards, or party accessories.
Here are some great people and places to target, and some ideas about how they can absolutely benefit from your vinyl cutting abilities. For many of these ventures, it’s best to first find out what customers want, and then arrange a deal to custom make whatever they need.
- Schools. They have all sorts of events and organizations that could use decorating.
- Local sports teams. Bumper stickers, anyone?
- Kids sports teams. How cool would it be for every kid on a Little League team to get their own personalized water bottle, with their team name and number? You can even make iron-on jackets…
- Wedding planners. From invitations to menus to commemorative glasses, the possibilities are endless.
- Party planners. Stickers as party favors! Place cards for baby showers.
- Interior decorators. Vinyl wall decals are a great removable decoration to brighten up any room.
- Local businesses. Businesses and shops always need signs made. And you can probably sell them some stickers to advertise while you’re at it!
You can also try local craft shows and farmer’s markets. For these events you want beautiful, finished products to display, so people can pick up and handle a beautiful craft. You can sell decorated tumblers and mugs, but you can also sell just the loose stickers and decals. You should feel free to experiment, and see what works better with your audience.
And the best people to offer your business to at the farmer’s market? Other venders! Many of them would love a promotional sticker to give out with their products, and almost all of them are happy to barter their own goods for yours.
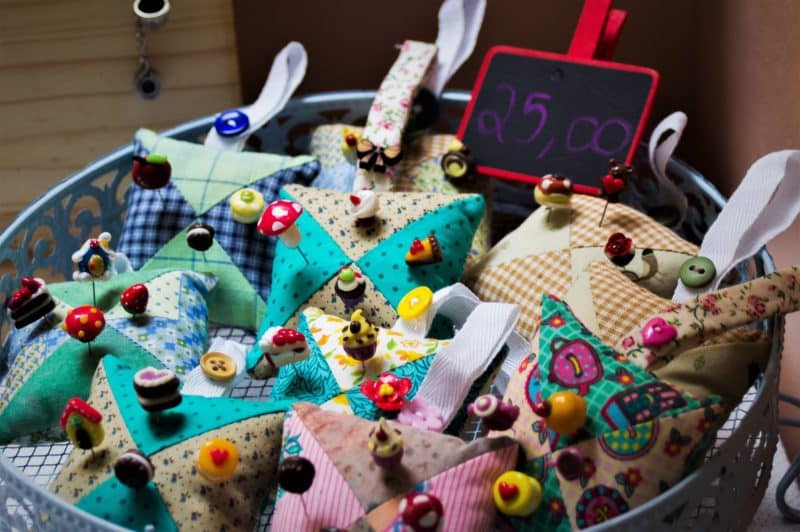
One of the best guides on setting up a booth at a craft show comes from hearthookhome.com, their most lucrative tips include:
- Nail the presentation. The first impression of your buyers will make or break your business. You can spruce up a table with a flat sheet from Walmart, old suitcases for flair (make sure they aren’t too smelly unless you’re selling vinyl soaps), or wooden crates to add depth.
- Advertise your business. Have a few business cards on your table and include one with every purchase. Refer people to your blog or Instagram so they can learn more…and purchase more later!
- Accept credit cards. You can set up an account with Square for free and advertise that you accept them.
Advantages of selling locally:
- Get to know people and organizations in your community
- Customers get to touch and look at your work
- Get to go to local events and fairs to get business
- You get to meet the people who will enjoy your crafts
Disadvantages of selling locally:
- Must be a people person
- Small market, cannot scale with your growth
- Working within other people’s deadlines
After you’ve mastered the local circuit it’s time to go online.
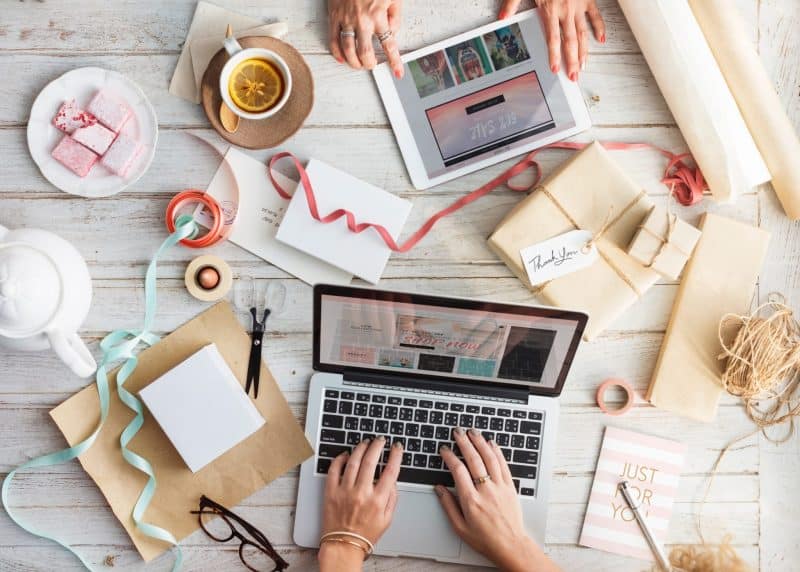
Open an online shop
The reach you can have locally is limited, so it’s no surprise that millions of people now sell on sites like Etsy. People will stumble across your online shop by browsing and searching for the sorts of things that you have for sale.
I suggest you go through their Beginner’s Guide to get started with Etsy. Or if you prefer, here’s a wonderful introduction on getting started with your first Etsy shop:
A few tips to get you started on Etsy:
- Gorgeous pictures are a must. Make sure they are well-lit and in focus. Your work won’t sell if it doesn’t look good!
- Have a few friends buy your products from your online shop to build up reviews + get their feedback.
- Pack and ship your products out quickly. No one likes having to wait!
- Consider having low prices at first to build a good reputation and a following.
- Look at the shops you want to grow into in the future and emulate them. Check out their products, photography, descriptions, and keywords.
- Optimize your keywords. See what is popular, try out different keywords, and keep what sells.
- Pretty packaging. This is the first thing people will see, and nice wrapping will make people feel positive about your product.
- Add a handwritten note with your orders. A little personal touch can make a big difference!
- Follow up with your customers to improve your service. Get feedback and remind them to leave reviews.
- Include a sticker with your shop name. Advertising built to stick around.
Once you’ve built up a bit of a following through your Etsy shop and social media, you can transition to selling on your own website to avoid the fees on Etsy.
Advantages of selling online:
- Set your own schedule.
- Don’t have to interact with people face-to-face.
- Giant market! Uncountable numbers of customers can view your products.
- Make sales while you are cooking dinner or napping!
Disadvantages of selling online:
- More difficult to get started and slow to make a name for yourself.
- Have to quickly pack and ship things.
- Must be responsive to online messages.
- People don’t get to physically look at your work.
- You don’t get to see customers smile as they take home your work!
Alright, enough of the internet. What sort of physical materials are needed, and how much will this all actually cost?
Supplies to get started
Luckily, the startup costs for a custom sticker business are pretty low!
If you already have the large equipment (a vinyl cutting machine, color printer, computer, and camera/iPhone), the rest of the supplies should be less than $200.
Even if you are buying a new vinyl cutter, and a new color printer, you should be able to get started for under $500.
So, what exactly do you need?
Vinyl cutting supplies
Let’s run over the list of the supplies you’ll need to be able to cut vinyl decals and get started with your own shop. Turns out, it’s not all that different from the tutorial above!
I’ll go over the most important ones in more detail below:
- Vinyl cutter & software. I recommend a Cricut Maker (on sale). It comes with free software (Design Space), but if you want an in-depth look at the options, I have a review where you can choose for yourself the best vinyl cutting machine.
- Color inkjet printer. Something with a high printing resolution (like this printer) and ability to handle thick paper is ideal.
- Computer. A PC or MAC will both work. Having Bluetooth will be helpful for connecting to your cutting machine, but you can always purchase a Bluetooth adapter if your computer is lacking. Not included in startup costs.
- Printable vinyl. From Cricut here. Also available by the roll. $30 for 8.5″ x 5yd roll
- Sticker paper. Available here.
- Clear vinyl laminate. Matte and glossy versions available by the roll. $20-30 for 12″ x 5yd roll
- Application tool. A hard plastic edge is needed for burnishing the vinyl and removing air bubbles. Something like this, or an old plastic credit card will work in a pinch. $5
- Cutting mats. Your machine will come one of these, but you’ll need to replace your cutting mat every 2-8 months as they lose their stickiness. The Silhouette and industrial-sized cutters, however, can cut straight from the roll of vinyl without a mat. $20-$30
Business supplies
- Printer. Even if you aren’t printing on vinyl, you’ll still need a printer for printing labels and shipping receipts. You can use a black & white one for that.
- Camera. If you don’t have a camera, you can either use your phone (many of them have great built-in cameras) or ask a friend to help out.
- Packing and shipping materials: tape, cardboard, envelopes, electronic scale, boxes & packing material, etc. $50-$80
Now, let’s break some of these down:
Selecting a vinyl cutting machine

The largest upfront cost for starting a vinyl decal business is the vinyl cutting machine. These machines range from $200 to over $3000, most machines I recommend run from $200-350.
If you need help comparing Cricut vs Silhouette you can check out that review of the two most popular machines, the Silhouette Cameo 4 and the Cricut Maker.
You’ll want something with speed and power if you’re cutting enough to make a business out of it. Out of the most popular machines, these make the cut:
- Cricut Maker
- Cricut Explore 3
- Cricut Joy (Not capable of using Cricut Print-Then-Cut, but does work with Draw-Then-Cut)
Selecting the right software to use is one of the most important decisions you can make with any project, and making custom decals is no different.

- Perfect for print-and-cut projects with stickers or vinyl
- Future-proof with the new Adaptive Tool System
- Bluetooth & wireless cutting
Choosing the right printer
Choosing a printer is just as important as choosing your vinyl, in fact, they go hand-in-hand.
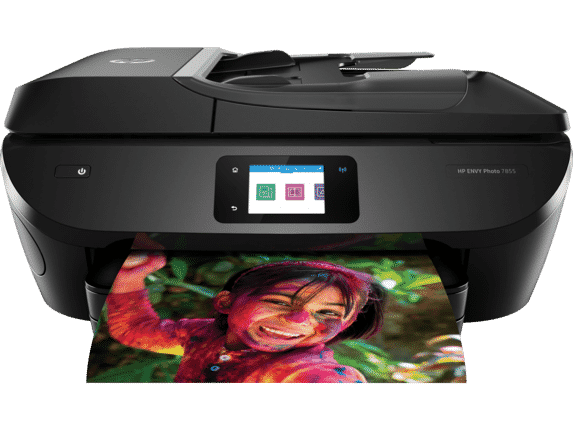
The best budget printer I’ve found is the HP ENVY 7855 Wireless All-in-One. This printer prints beautifully, and can handle heavier weight paper so it won’t have trouble with the thickness of printable vinyl.
If you are picking out a printer, there are a few things to consider:
- Dye or pigment. Pigment-based ink creates longer-lasting images. Dye-based ink works best on glossy paper.
- 4 or 6 color cartridges. 4 cartridges (CMYK) should be sufficient. If you know you’ll be using designs with large dynamic color ranges and subtle shading, check out printers with 6 color cartridges.
- DPI. 1200 DPI (dots per inch, the printer resolution) will look nice and crisp, even for photos.
- Vinyl is thick. Printable vinyl can jam in printers that can’t handle thick paper. Look for a printer that can handle heavy-weight paper or cardstock.
If you (or your friends) don’t have a color printer, you can always take a USB drive and your printable vinyl to a copy and print shop (like Staples, FedEx, Office Depot) and they’ll help you out.

- Mobile printing from your device such as iPhone with AirPrint
- Insert your SD card or USB to view, edit, and print directly from the 2.7 inch color touchscreen using dedicated paper trays that automatically adjust to match print settings and paper type
- Supports letter, legal, 4×5 inch, 4×6 inch, 5×7 inch, 8×10 inch, and more.
A bit on clear vinyl laminate
Covering your designs with a clear vinyl laminate is an extra step that will make your decals last so much longer, and stand up to water.
Without a laminate, the printable vinyl can withstand some moisture and is rated to last one year outdoors. But it won’t survive long on things that need to be washed (mugs and tumblers) or exposed to the weather (outdoor signs and mailboxes).
With a clear laminate overlay, you have waterproof stickers! (I still recommend handwashing over using the dishwasher though.)
You can buy the vinyl laminate by the roll, or by the sheet. As always, the rolls are cheaper and so better for starting a business. For a matte finish, I recommend Oraguard 210 Economy Vinyl Laminate. For a glossy finish, there is Oraguard 215 Premium Vinyl Laminate.
If you want to save money, can instead use a spray like Krylon Crystal Clear Acrylic. This won’t give you the great waterproofing of the laminate, so it’s not for use on dishware, but it is much cheaper and will help your handmade stickers last longer.
Expanding your business: other types of vinyl
As you probably can tell by now, I kind of fell in love with printing stickers as soon as I discovered how easy it is.
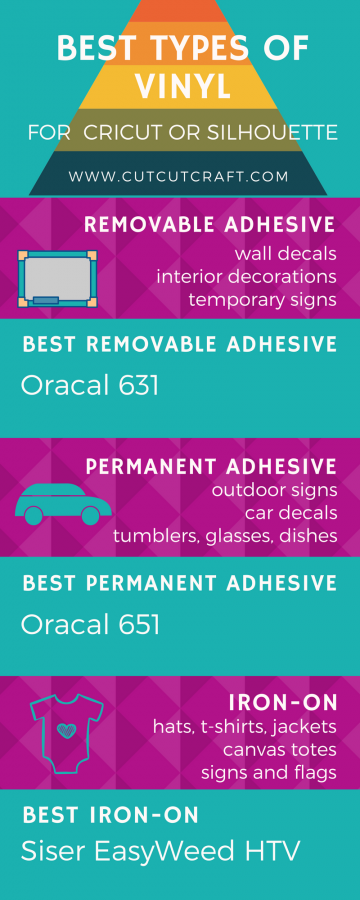
But there are so many other kinds of vinyl you can try out! Here’s an infographic I made of my favorite kinds of (non-printable) vinyl:
If you already know how to work with regular adhesive vinyl, it’s easy to transition from selling printed vinyl stickers to selling transferable vinyl decals. If you are new to vinyl, you’ll just have to play around and practice until you get the hang of things!
Heat transfer vinyl
If you want to make iron-on decals instead of printable stickers, you’ll need heat transfer vinyl (HTV). This vinyl can bond to cotton and polyester fabrics with high heat and pressure, like with an iron or heat press. Here is my guide all about how to use Cricut Iron-on Vinyl. If you want to go into great detail on the best heat transfer vinyl, just check out that review.
Supplies you’ll need for making and selling HTV decals:
- Rolls of heat transfer vinyl. The best (non-printable) heat transfer vinyl is Siser EasyWeed HTV. $45 for 12″ x 5 yd roll.
- Parchment paper. Place the parchment paper shiny side up to protect your iron or heat press. $4
- Iron or heat press. If you’re selling t-shirts, jackets, or canvas bags with iron-on decals, you’ll probably want to invest in something better than an iron for applying the decals. The most affordable option is the Cricut EasyPress, which provides a flat 9″ x 9″ heating area that is incredibly more effective than a regular iron.
- T-shirts, or other apparel. Whether you are selling only the decals or the finished product, you should test it out and display some finished pieces.
If you want to try printable HTV, Expressions Vinyl makes printable sheets for light and dark fabric, but it’s not sold by the roll.
If you’re still curious about all the vinyl types, I have an in-depth guide that I put together about the best vinyl for Cricut and Silhouette.
The Legal Side
(This information is for those in the US.)
You can start selling the things you have made as a sole proprietor, under your own name, without having to register as a business. Until you are actually making a profit, you are still considered a hobbyist by the IRS and don’t have to report what you make.
It’s a good idea to use this time as a trial period to see if selling vinyl decals is right for you. While you may feel like you’ve made money from your first few sales, you should actually tally up the costs that went into your venture.
Profit is your income minus your costs. Your costs are things like your vinyl cutter, vinyl, cutting supplies, shipping, maybe even a new desk, printer, or a drawing tablet for designing. All the purchases can add up to quite a sum you’ll have to earn back before you are actually making a profit.
If you want to sell under a different name, you should register a trademark or a “Doing Business As” name. The US Small Business Administration (SBA) has a great guide that will take you through choosing and registering your business name.
There you can check to make sure your prospective name hasn’t already been trademarked. You’ll want to make sure you aren’t trying to sell under a name that someone else is already using!
The SBA actually has a bunch of great resources to help you navigate this area. I suggest going through their guide to starting your own business. Each of those steps links to another post with a lot of great information.
Generally, you’ll have to check your local, county, and state regulations yourself. You can use the SBA’s lookup tool here (about halfway down the page) to find more information about your state.
Sticker designs
You shouldn’t sell designs that you don’t have commercial licensing for. There are a lot of wonderful graphics that are free for personal use but can’t be used for selling commercially. And of course, you’ll see people selling Disney decals on eBay or Etsy, which they absolutely don’t have permission for.
You should avoid doing this! People may fly under the radar for a little while, but this is considered copyright infringement, and people often have their items taken down for it. I have even heard stories of people having their entire Etsy store shut down.
So, if you do buy graphics, make sure that you can purchase the commercial license, which will often cost a bit more. But remember all the hard work and creativity that is poured into creating art for you to use. If you are making money off of it, it makes sense to give some of that back to the designers.
But really, if you want to be selling vinyl decals and customized stickers, you should be a designer yourself!
Is this right for me?
Starting a home business isn’t for everyone. It takes a lot of time, hard work, and dedication to get off the ground and make a name for yourself.
Check out some of the qualities that a new business owner should have. If you think you’ve got what it takes…
Some of these qualities you can definitely learn and get better at, and some you can offload onto friends or hired help. With your powers combined, you’ll have a successful home crafts business!
6 qualities of a successful home crafter
- Ideally, you should be passionate about crafting, and already know how to work with a digital cutting machine. If you don’t know how to make Stickers with Cricut but want want to go into business doing it, you’ll probably have to spend a few weeks just figuring out how to work with your machine and design software. It can be discouraging.
- You should be a designer. You should have an eye for what looks good, what is feasible to make out of permanent vinyl, and know how to create that in a design software. You can certainly license and use other people’s designs to sell decals and stickers, but without a unique vision or curation, people won’t be drawn to your store. And you won’t want to turn down opportunities to design custom work for someone who wants to place a large order.
- You need to be a people person, or at least be good at working with people, even if you don’t enjoy it. In order to actually make money, you have to be able to figure out what your potential customers want, what they will buy, and how to get them to buy that from you. Whether you’re selling online or locally, you’ll also have to deal with rude or irate customers from time to time. And if your business gets booming, you may want to hire help, which means more people to manage.
- You will also need to have a mind for the legal and accounting sides. There are county, state, and federal business regulations that you will have to be able to research and follow. You’ll also have to keep track of your expenses and sales, and be able to pack and ship everything out in a timely manner. (Those reviews are incredibly important!)
- It helps to be a photographer. Beautiful images are required to sell products online. It helps if you can make these yourself.
- You must be a diligent worker. Whether you’re painstakingly weeding decal after decal, or walking from store to store trying to get orders, your business will flourish if you consistently put focused effort towards your goals.
Tips
- Pack loose stickers and decals with a piece of stiff cardboard so they don’t get bent or damaged during shipping.
- If you are selling transfer stickers, you can place the transfer tape backing back on your design before you ship it out.
- You need well-lit, focused, and beautiful photographs in order to sell your work online. And if you’re starting a new business, you’ll have enough on your plate without adding “learn photography” to it, so maybe ask a friend for a hand.
- Have your online store focused on one aesthetic, or have stickers bundled by themes.
FAQ
Do you have to use an inkjet printer? Will a laser jet printer work?
Check the label on your printable vinyl! It typically says that it should be used only with inkjet printers. However, people do report success printing with a laser jet as well. If that’s all you have, I’d say try it out, but make sure to cover it with the clear vinyl laminate to protect the print job.
Which side of the printable vinyl do I print on?
You want to print on the matte side. The shiny side is the backing (think of it like sticker paper). If you aren’t sure which way to place it in your printer, test with a sheet of regular printer paper. You can mark “top” and “bottom” with a pen, and see which side your printer prints on.
Do I need transfer tape?
Not with printable vinyl stickers like these! Because the design is a single piece with an easy outline, we can just peel them and apply them by hand.
If you use regular adhesive vinyl you’ll typically need transfer tape to transfer the decal.


Thank you so much for posting this article.
I am a professional organizer and we are always working on kitchens, pantries, play spaces, etc.
We buy a lot of labels and I have the worst writing in the world 🙂 I thought it would be great if I could start making my own labels for clients and include that with their organization session.
I am new to understanding how the vinyl works and am hoping I can get as much info as possible before diving into it.
My instagram for organizing is Denise_ClearSpace. (I just opened up my instagram)
Thanks again for posting this article. It is by far the most helpful information I have come across on google.
Thank you for your article it is super helpful and I love the links you attached!
Thank you for writing such a thorough and informative tutorial! It’s very easy to follow and I love that you included links. This will help me take my crafting to a whole new level. Thanks again!!! 🙂
I like how you mentioned how you can advertise your company by using stickers. My wife and I want to make merchandise for a store we want to open, but we aren’t good at crafting. I’ll see if I can find a service that can create custom stickers for us.
Do you know of anywhere I can find information to aquire svg files for cutting stickers like the ones people sell at fairs and carnivals? Like auto widow stickers and such? Thanks
What a comprehensive, well-written guide. Thank you, Ali!
My ten yr old autistic daughter who loves design and crafts would like to start a small local business to keep her occupied and her interest going but I just don’t know where to start any tips would be great
(I’ve also always loved crafts so will obviously be helping her but it is something she has been talking about for a while). This has helped a lot but anything else you can think of that would help a child would be very useful to us ….. Please contact me back if possible 🙂
Hi Jaymie,
That’s a lovely idea! With our kids, I try to have our crafting be as ‘kid-directed’ as possible. I’d ask her what problems she sees that might be able to be fixed with crafts, and get working on solving one of them.
One of our kids started a small hobby-business by making vinyl stickers for her friends. They liked them so much that she was asked to make some for her soccer team too!
Almost all of the craft projects I talk about on this site are appropriate for ten year olds, if you let me know about some of her interests I can try to brainstorm with you 🙂
Hi I LOVE this post. I am experienced with my cricut, but always learning new things! In your post you used a silhouette and the part where you trace is amazing. I don’t think cricut design space has that capability. I really would love it to though! Do you know if there is an equivalent option or tool for a cricut? Thank you!
Ali, I love your work! I am looking to print transparent decals for shop doors. If you can advise me on what the best price/performance printer is, etc. I will buy the required products through you. I am looking for a starter kit to print about 1000 decals. Drop me a line at my email address.
Thanks!
Robert