I’ll just start with the most important part: cutting fabric with a Cricut machine is really easy, even for beginners.
I had a million questions before I ever learned how to cut fabric: how do I attach it after it’s cut?
How do I make sure it doesn’t scrunch up and get ruined while I’m cutting it?
What if I don’t want to sew it on?
I have the answers.
I’ll guide you through a very basic tutorial and then go into the most common mistakes beginners make and exactly how to avoid them.
I also have a few tips that I’ve learned over the past few years that make the whole process so much easier.
At the end, I have three awesome fabric tutorials, each one using Cricut.
Table of Contents
Tutorial: Cutting fabric with your Cricut
We have two ways to cut fabric with a Cricut, one uses the Explore series, the other a Cricut Maker. I’ll use an iron-on adhesive for this first tutorial and a Cricut Explore Air 2. If you have a different Cricut machine, that’s okay!
The basic principles are the same and you’ll be able to adapt this tutorial to your own device.
(In the following section we’ll cover using the Cricut Maker and its rotary cutter.)
If you haven’t worked with an adhesive like Heat N Bond, you’re missing out!
We’re going to use it to applique our fabric, this means we’re going to attach one piece of fabric to another without needing to sew it.
If you’d rather sew your fabrics together, that’s absolutely fine and you’ll just skip the steps that use the iron-on adhesive.
You’ll need:
- Heat N’ Bond (or another iron-on adhesive). You can also use freezer paper instead if you’re going to be sewing your cut fabric.
- A Cricut brayer (or rolling pin, optional)

Cricut brayer - A Cricut FabricGrip cutting mat (pink)
- Cotton fabric
- A simple design (use a simple shape or one of the free SVG cut files here)
- Broad-tipped tweezers (optional)
If you only have a regular Cricut mat, that’s okay, but make sure you’re using either Heat N’ Bond or freezer paper as your backing.
Applying the iron-on adhesive
-
Prepping the fabric: Before diving into the bonding process, ensure that your fabric is clean and dry. If your fabric is wrinkled, run an iron over it briefly to smooth it out. A wrinkle-free fabric will make the bonding process much easier and result in a better finish.
-
Place your fabric nice/bright side down on an ironing board or surface.
-
Measure the fabric you’re working with and cut a piece of Heat N Bond to match its dimensions. This step is crucial because an even adhesive layer will help the fabric adhere properly and allow for precise cuts with your Cricut. Place it on the fabric paper-side up.

-
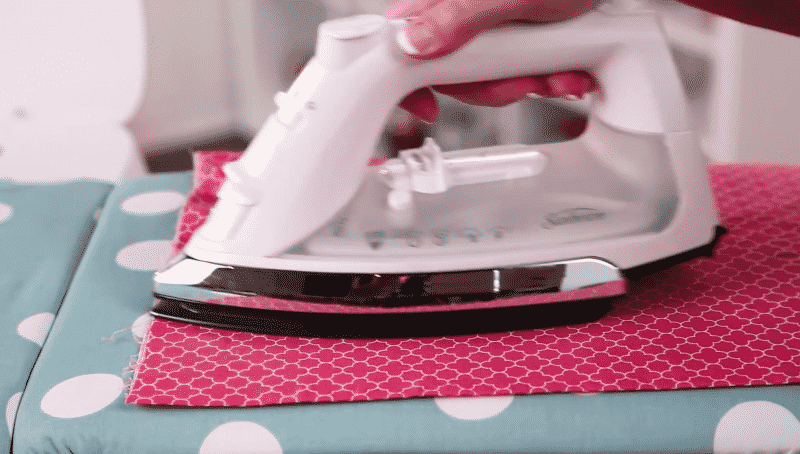
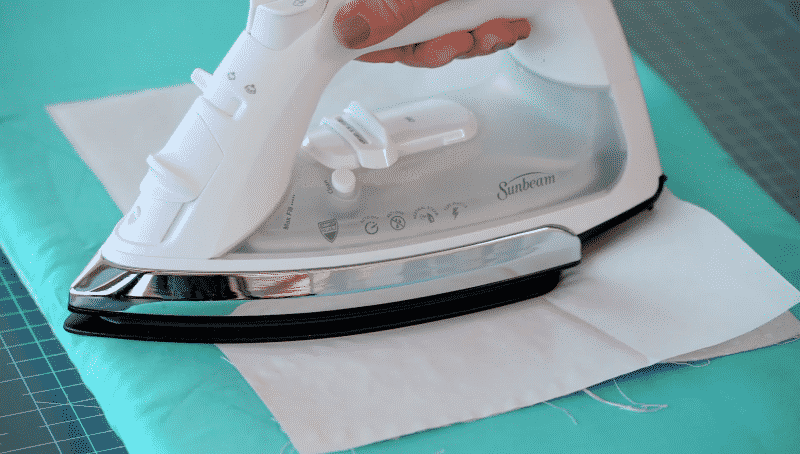
Bonding the adhesive: Lay your fabric nice/bright side down on an ironing board or a heat-resistant surface. Place the Heat N Bond on the fabric with the paper side facing up. Using a medium heat setting, gently iron over the paper and fabric, holding the iron in place for a few seconds before moving to the next section. Make sure to cover the entire surface to create a strong bond.
-
Load your project into Cricut Design Space. If you don’t have a project in mind, you can follow along with just a simple circle cut from fabric.
-
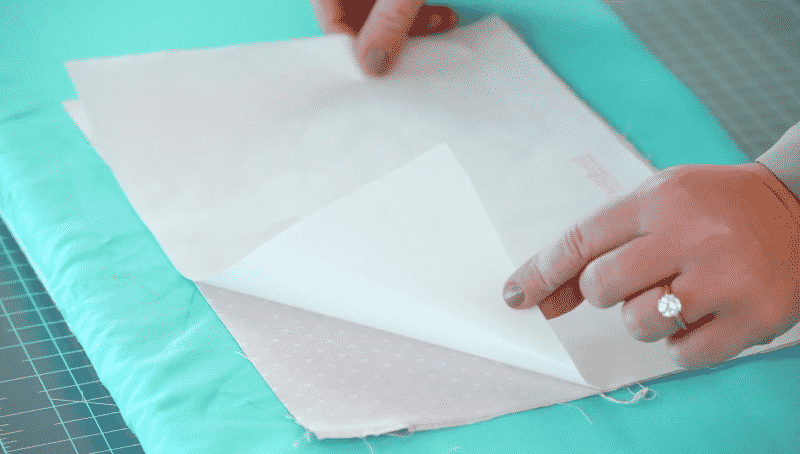
Cooling down: Allow the fabric and adhesive to cool for a few minutes. Cooling is essential, as it will make it easier to peel off the paper liner and prevent any mishaps. After it’s cool, remove the paper liner from the material.
-
Place the fabric bright side up on your cutting mat.
Now you’re ready to make the first cut to your material.
Tip: If you’re new to using iron-on adhesives, practice on a scrap piece of fabric first. This will help you get the hang of it before moving on to your main project.
Cutting fabric with your Cricut
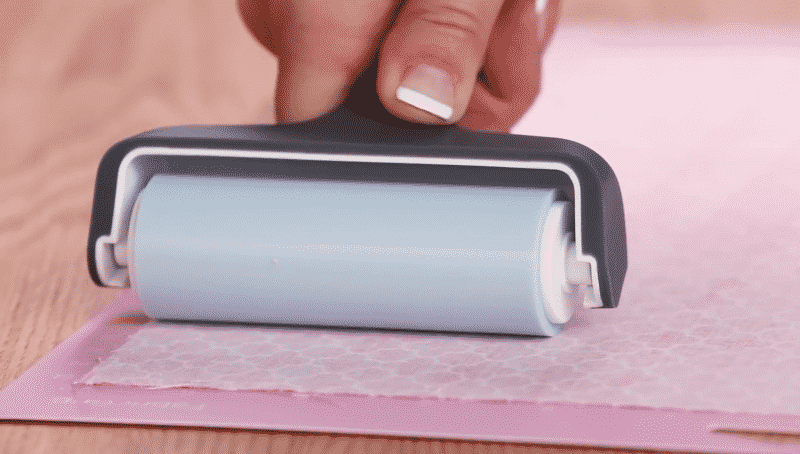
- Preparing the mat: Ensure your fabric is lying flat on the cutting mat. If your mat has a lot of debris, you might need to clean your Cricut mat first! If needed, use a Cricut brayer or an ordinary kitchen rolling pin to smooth and flatten the material. This helps the Cricut cutting machine make clean, precise cuts.
- Loading the mat: Carefully load the mat into your Cricut machine. Double-check that it’s properly aligned and secure.
- Using a fabric pen: If your design is intricate or requires multiple pieces, use a water-soluble fabric pen to label them. Load the pen into the machine, and it will automatically mark the pieces for you.
- Previewing the design: Take a moment to review your design on the mat preview screen. This step is crucial to ensure everything is in place before cutting.
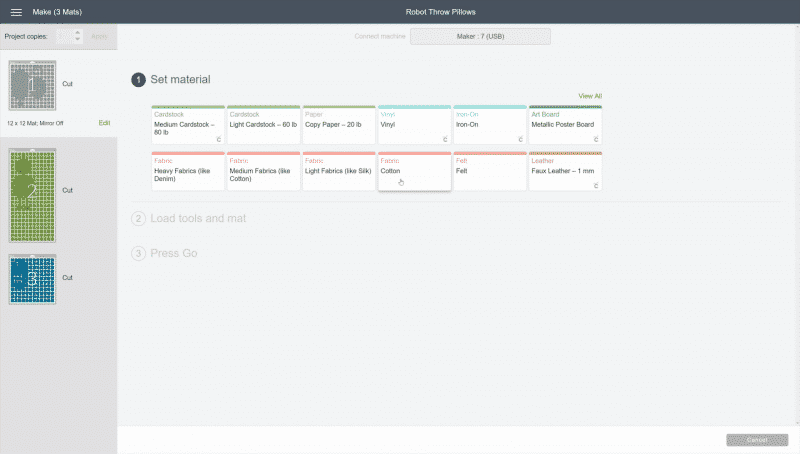
- Setting your material: In Cricut Design Space, set your material type. We recommend using a cotton fabric for your first attempt because it’s beginner-friendly and works well with the standard cutting blade.
- Press go.
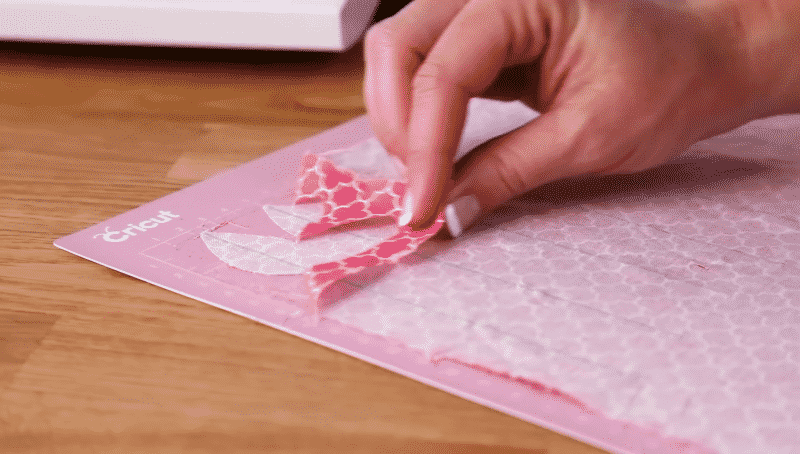
- Removing excess material: After the cutting is complete, gently pull off any excess material from the cutting mat.
-
Picking up your cuts: Use a pair of broad-tipped tweezers or a spatula to lift your fabric cuts from the mat. Be gentle to avoid damaging the fabric.
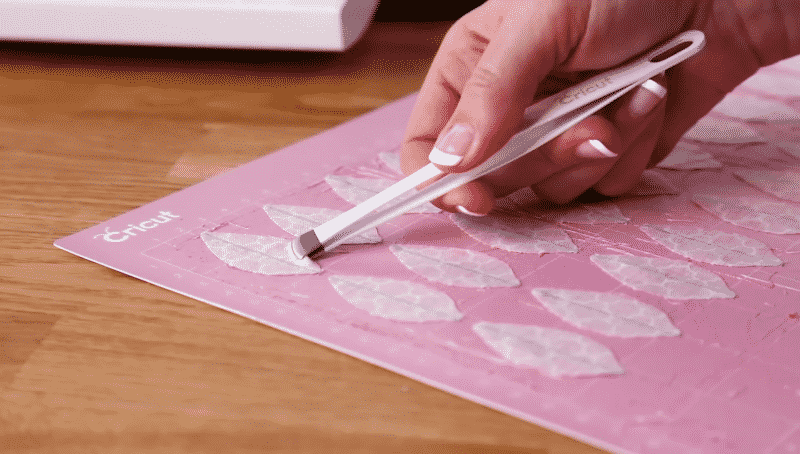
Your fabric should be precisely cut according to your design. If you’re going to attach it to another piece of fabric, just iron it on! The iron-on instructions will differ slightly depending on which adhesive you’re using, so just make sure to read the fine print on your packaging.
I prefer Heat’n Bond (sometimes it’ll be called HeatnBond or Heat N’ Bond, I feel like they keep changing it around) but any iron-on adhesive will do. I can usually pick it up at a Michaels or Jo-ann’s.
Okay, on to the tips and tricks I’ve accumulated from cutting fabric.
I’ll follow that up with an FAQ of the most common questions I get when explaining this to friends, and then link to three great fabric projects which will each teach with a different style and technique.
Cutting fabric with Cricut Maker & Rotary Blade
In this section, we’ll cover how to cut fabric with a Cricut Maker and its unique tools.
The rotary cutter (well-known to those immersed in the sometimes dramatic world of fabrics) is probably the best reason to own a Cricut Maker and it’s specifically designed for working with fabrics.
So we’d really be letting you (and us!) down by not talking a little bit about it and giving a quick how-to guide.
First, the advantages:
- Impeccable precision: With the rotary cutter’s circular blade, you’ll achieve clean and accurate cuts, ideal for both simple and intricate shapes.
- Swift and smooth: Say goodbye to time-consuming scissors! The rotary cutter significantly accelerates fabric cutting, making the process a breeze.
- Minimized fabric waste: The cutter’s precision means less wasted fabric, letting you make the most of your materials.
- Versatility galore: The rotary cutter works wonderfully with a wide variety of fabrics, including cotton, fleece, silk, and more!
The challenges are really just tiny and complex shapes. The rotary cutter might find it tricky to handle extremely small or intricate shapes, whereas a fine-point blade could be more precise because it doesn’t suffer from a turning radius.
Prepping Your Fabric and Workspace
- Choose your fabric: Select a fabric that is suitable for your project. Keep in mind that some fabrics are easier to cut with a rotary cutter than others, such as cotton or quilting fabric.
- Prepare your fabric: Wash, dry, and iron your fabric to remove any wrinkles or creases. This will ensure a smooth and even cutting experience.
- Set up your workspace: Make sure you have a clean, flat, and stable surface to work on. Place your pink fabric cutting mat on the surface, ensuring it is free of debris and lint.
Loading Your Fabric onto the Cricut Fabric Mat
- Cut your fabric: Trim your fabric to size, leaving a little extra around the edges to account for any shifting during the cutting process.
- Lay the fabric on the mat: Place your fabric onto the Cricut fabric mat with the right side facing up. Smooth the fabric out, ensuring there are no wrinkles or bubbles.
- Secure your fabric: Use fabric clips or painter’s tape to hold the fabric in place, especially along the edges. This will help prevent any shifting or slipping during the cutting process.
Setting Up Your Cricut Maker
- Install the rotary blade: Swap out the standard cutting blade in your Cricut Maker for the rotary blade. Follow your machine’s instructions for changing the blade to ensure it’s installed correctly.
- Load your design: Open Cricut Design Space and choose or create the design you’d like to cut from your fabric. Make sure it’s appropriately sized and laid out for your fabric piece.
- Choose your material: In Cricut Design Space, select “Fabric” as your material type. This will ensure the machine applies the right pressure and settings for cutting fabric with the rotary blade.
- Preview your design: Double-check your design on the mat preview screen to ensure everything is correctly placed and sized.
Cutting Your Fabric
- Load your mat: Carefully slide your pink fabric grip mat, with the fabric still secured, into the Cricut Maker. Make sure it’s correctly aligned and properly secured.
- Begin cutting: Press “go” on your Cricut Maker and watch as the machine uses the rotary blade to precisely cut your fabric.
- Unload your mat: Once the cutting is complete, carefully remove the mat from the machine.
- Remove the fabric cuts: Gently lift your fabric cuts from the mat, using a spatula or tweezers if necessary. Be careful not to stretch or distort the fabric as you remove it.
Tip: If you have any trouble lifting the fabric pieces from the mat, try using a sewing pin to lift the edges gently.
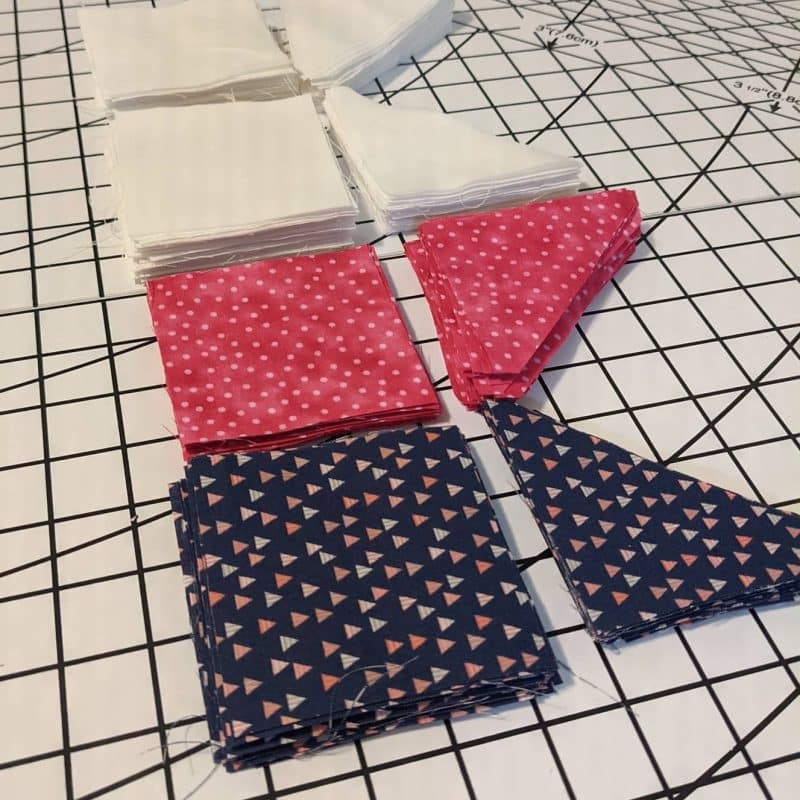
Straight lines and geometric shapes (including curves and circles) tend to work pretty well with a Cricut Maker. It really excels at cutting straight lines (squares, rectangles, half square triangles, diamonds).
Tips + Tricks
- Depending on your fabric you may want to pre-iron it before cutting. Wrinkle-free fabric that’s smooth will give you the best cuts.
- Make sure to check the instructions on your project to see which side of the fabric should face upwards.
- If your fabric isn’t sitting flat on your mat, you can use a Cricut brayer or a kitchen rolling pin to smooth and flatten the material.
- With stretchy fabrics make sure you don’t pinch them over the cutting mat, leaving wrinkles over the surface. If this happens just pick the fabric back up and gently lay it down without stretching.
- If you’re using a new material always make a small test cut first. This will save you time + $$$.
- You can use the Cricut spatula for removing delicate cuts.
- If your cutting mat has tiny threads left on it after a project don’t worry about removing them. Leaving them on your mat is safer than trying to scrape them off.
- Use your washable fabric pen to draw your seam allowances on your pattern pieces.
That’s it! You should hopefully know quite a bit more about how to cut fabric with a Cricut. If you still have a question, well… you’re in luck because boy do we have an FAQ for you along with some Cricut fabric projects after!

FAQ
Can you cut fabric quilt shapes with Cricut?
I’m always surprised how little-known this is, but you can use your Cricut to cut quilting shapes and quilt patterns! In fact, most people I know who have tried this can’t go back to doing it by hand after.
Cutting machines, like the new Cricut Maker are specifically designed to cut fabric for quilting, so you’re going to find that it’s supported from the hardware all the way through Cricut Design Space. It’s nice to be thought of!
Can you cut half-square triangles for quilting?
Yes! Really any Cricut cutting machine can cut half square triangles for quilting. You can find pre-made quilting patterns in Cricut Design Space or create custom quilt blocks yourself.
What is bonded fabric?
Bonded fabric is the result of two or more layers of fabric adhered together with an adhesive, usually heat-activated through ironing. This creates a single, more robust material that retains the properties and textures of the original fabrics. Bonded fabrics are often used in projects where added stability, structure, or durability is needed.
Is felt a bonded fabric?
While craft felt is made up of multiple layers of fibers pressed together, it’s not what we typically refer to as bonded fabric. Bonded fabrics are created by joining two distinct pieces of fabric with an adhesive, such as Heat and Bond or other fusible web products. Craft felt, on the other hand, is created through a process that compresses and interlocks fibers without the use of adhesives.
Do you need a fabric blade to cut fabric shapes?
Using a fabric blade, such as Cricut’s Bonded Fabric Blade, can be helpful when cutting fabrics, particularly bonded fabrics. A sharp blade ensures precise, clean cuts and helps prevent fraying or snagging. However, a fabric blade is not always necessary. For very fine fabrics, a rotary blade is preferable, as it provides a smoother cutting experience.
The rotary blade, however, does have a couple of limitations: it doesn’t work well with small designs (smaller than 3/4″) and should only be used with FabricGrip mats. For bonded fabrics, a sharp fine-point blade or the special pink Bonded Fabric Blade will suffice.
When should you use the bonded fabric blade?
The Cricut Bonded Fabric Blade (it’s super pink) is designed specifically for cutting bonded fabrics. It provides a cleaner and more precise cut, ensuring that your fabric projects look professional and polished.
Since the Bonded Fabric Blade was designed specifically to cut fabric with Cricut cutting machine. It’s designed for preciseness, accuracy, and to reduce the chances of fraying or snagging on a cut.
You generally don’t want to dull these blades on other materials, so it’s super helpful that they’re easy to identify (again, pink!). Makes me want to swap out my fabric scissors for a bright pink pair, too.
How do you cut fabric straight?
The two most important factors are making sure the fabric is securely attached to your cutting mat and using a fabric stabilizer.
Is it important to have backing on the fabric in order to cut it? What if I’m not going to be ironing it on?
Having some backing on the fabric is pretty important. If you aren’t going to be ironing it on you can definitely use freezer paper instead of Heat N’ Bond. You’ll iron the freezer paper in the same way but after you cut the fabric you’ll just peel the freezer paper off. I suggest making a sandwich, with the shiny sides of the freezer paper on the inside and the fabric in the middle.
Can you use a rotary blade?
Absolutely. The rotary blade makes cutting fabric with Cricut super easy. I reviewed it along with the Cricut Maker in another post.


Amazing tutorial! Can this method be used with lace fabric? Maybe putting the lace between two pieces of freezer paper?
Thanks!
Thank you for the tutorial. I’m excited to try something just to get my feet wet. Can we use our Easy Press to adhere the iron-on adhesive?
Just bought a Cricut Explore Air 2. Haven’t even received it yet. Am doing research for uses, to make sure I’ve made the right choice. Do a lot of sewing and quilting and the fact that designs can be cut from fabric is definitely one of the uses I’ll be taking advantage of. Thank you so much for your in-depth explanations. Now I will wait for the machine to arrive.