If you’ve just purchased a new Cricut and you’re just wondering how to use a Cricut?
I have a few easy Cricut projects for beginners that I’ll walk you through to show you its most common and useful features.
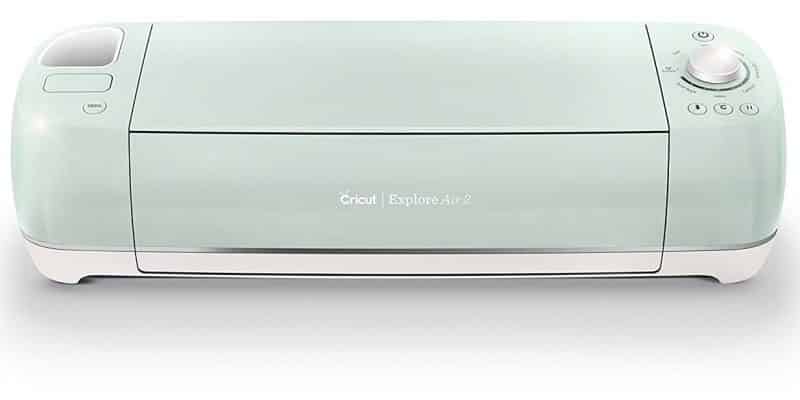
I’ll start at the beginning: unboxing this cutie (mine’s mint green) and I’ll end with some awesome tips and how to avoid common issues that might arise. Most importantly? We’ll get into how to use a Cricut so that it doesn’t stay in its box for too long.
At the end, I have 14 bonus Cricut tutorials that will change your life.
Okay, you’re probably thinking “change my life?” What is this girl talking about?
All I have to say is: if the perfect glittery shirt can’t change your life then nothing can!
If you have an older Cricut Explore Air model, a Cricut Joy, or a Cricut Maker: don’t worry. This is a general guide to getting started with Cricut machines. We’ll be using a Cricut Explore Air 2 in this tutorial, but we’re also going to learn how to to use any Cricut cutting machine.
Table of Contents
Cricut for Beginners: A Complete Guide
(If this is your very first Cricut machine you should definitely check out my complete guide at that link after reading this article.)
If you want to follow along you should have a Cricut machine, Cricut Design Space (we can walk you through installing this), a Cricut mat (optional). If you don’t have one yet, that’s totally fine, this tutorial assumes you don’t know how to use a Cricut yet. Cricut Design space is also really easy to use, so don’t worry about that.
If you already know how to use a Cricut, feel free to skip ahead to the bonus tutorials.
That’s right! We’re going to walk you through your first Cricut project! So exciting.
Let’s make sure you aren’t missing any items.
If anything isn’t included either return your Explore Air 2 to the store where you purchased it or contact Cricut support for a speedy replacement. If you have a different Cricut cutting machine, your materials will look slightly different.
If you have anything extra, well, that’s just a nice bonus!
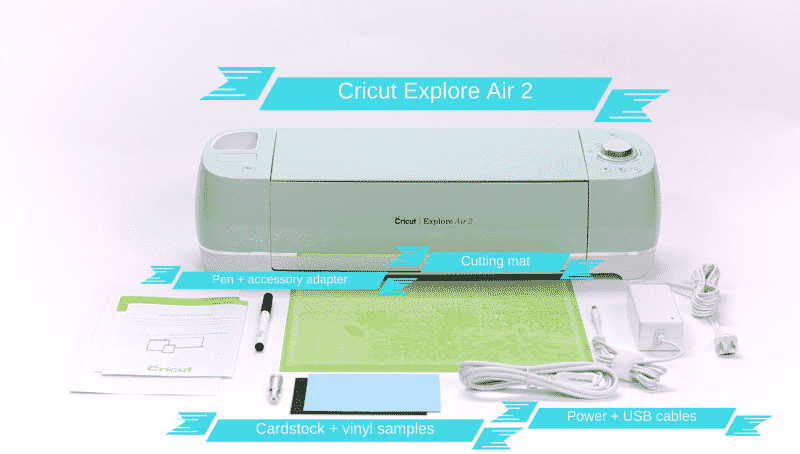
Your package should at least include the following:
- Instruction manual.
- Cricut mat.
- Cutting blade (pre-installed)
- Cricut Explore Air 2 (if you’re missing this, the box was probably pretty light)
- Power + USB cords
- Silver pen + accessory adapter (pre-installed)
- Cardstock + vinyl samples (we’ve heard of some kits missing these)
Note: there are several different kits available (Premium Vinyl, Ultimate Kit, Tools Kit, Complete Starter Kit, Vinyl Starter Kit) so you might have a few extra items included like a fine point blade, or Cricut access subscription. A desktop or laptop computer also is going to be helpful too, but not necessary.
Differences between the Explore Air and Explore Air 2
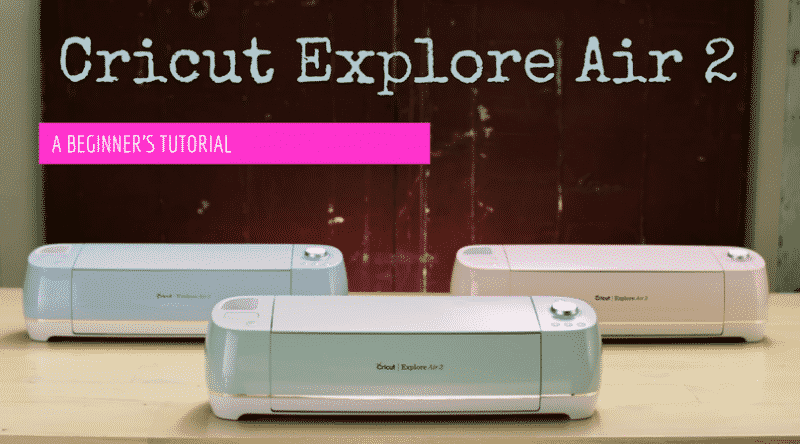
A common question I’m asked is: the Explore Air and Explore Air 2 look basically the same and seem to have all of the same features so… what’s the difference? The answer is: color and speed. The Explore Air 2 has a 2x fast mode which works with vinyl, iron-on, and cardstock. It also comes in three pretty colors: mint green, pastel pink, and sky blue. That’s it!
Now let’s take a look inside.
Inside the Cricut Explore Air 2
Here I’ll cover the basic features of the Explore Air 2, and a few of them are nifty. The overview below is of the original Explore Air but the layout is entirely the same. Just imagine the pretty mint finish.
(If you’re looking for a detailed look at every aspect of the machine, check out my Cricut Explore Air 2 review)
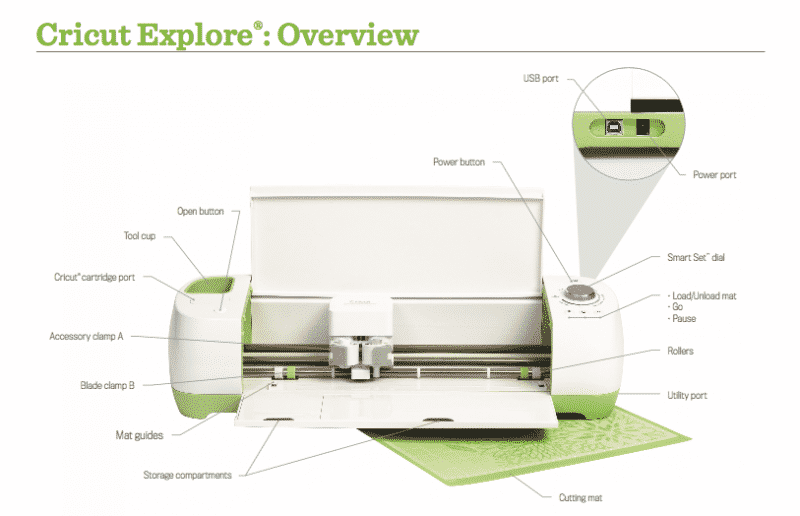
- Tool cup – holds pens, scissors, etc.
- Accessory clamp A. This is where the accessory adapter is pre-installed and where you can insert a pen for drawing instead of cutting. It’s also useful for holding scoring blades.
- Blade clamp B. The blade comes pre-installed. If you ever need to replace it or remove bits of vinyl, this is where you want to look.
- Accessory storage compartments. In addition to the tool cup, the Explore Air 2 has two storage compartments. The smaller compartment on the left holds additional blade housings, blades, and the accessory adapter. It features a magnetic strip to keep replacement blades safe and free from rolling around. The larger compartment is great for storing longer tools/pens.
- Smart Set dial. Rotate the dial to select the material you’ll be cutting. It feels great to turn and indicates which materials you can cut with 2x fast mode.
- Cutting mat. This is going to be how we load most material into our Cricut machine. It’s sticky on one side for holding our material securely in place.
A brief note on the accessory and blade clamps: if you ever need to remove the blade or accessory clamp just pull open the lever and pull out the metal housing. The blade sits on the inside and there’s a tiny plunger on the top. You can press down on this to reveal the blade which is magnetically held out. If you ever need to replace the blade just pull it out and drop another one in.
To use a pen just open accessory clamp A, drop it down in, and then close the clamp.
OK, let’s get your machine connected and install the necessary drivers.
Connecting your machine to your PC/MAC/iPad
Even though the Cricut Explore Air 2 can be used wirelessly we’re going to start by setting it up with the USB cable. Start by placing it on a surface with at least 10″ available behind it as the cutting mat will move back and forth inside of the machine.
- Plug the machine in, connecting the power adapter and the USB cable.
- Turn on your Explore Air 2 machine as well as your computer.
- Visit the Cricut website and register a user account and download the most recent plugin software. This is where you can check out some beginner Cricut crafts, or follow along with us.
- Run the installer and visit design.cricut.com.
- Click the menu icon in the top left corner and select New Machine Setup. You will be guided through the installation process and your very first project, a thank you card.
Before we start this project, I want to go over the Cricut accessories you’re going to rely on the most. If you’re already familiar, feel free to skip ahead to the thank you card tutorial.
The Essential Accessories
Cricut mats
Your cutting mat is maybe the most important accessory that you’ll use – it’s how we’ll load most cutting material into our machine. It’s sticky on one side so that our material is held securely in place while it’s being cut, scored, or inked. Basically, all Cricut machines will use this, unless you’re using Cricut Smart Vinyl.
I’ve put together an extensive tutorial all about Cricut mats and their maintenance. It covers how to clean your mat as well as how to make it sticky again so if you’re interested in all of the tips and tricks go check that out here.
There are three basic mat types. Each one is used for a different set of materials, so depending on what you commonly work with you might use all three.
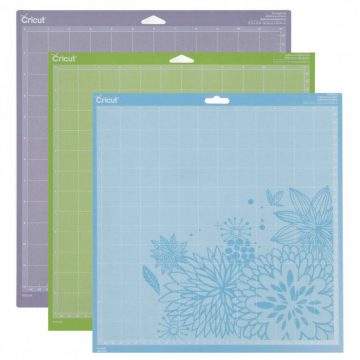
- Light grip (blue)
- construction paper
- light cardstock
- printer + scrapbook paper
- vellum
- Standard grip (green)
- regular + embossed cardstock
- heat transfer (iron-on) + regular vinyl
- window clings
- vinyl
- Strong grip (purple)
- backed fabric
- chipboard
- corrugated cardboard
- leather + suede
- foam
- magnetic material
- posterboard
- wood (including balsa)
Cricut Tools Craft Basic Set
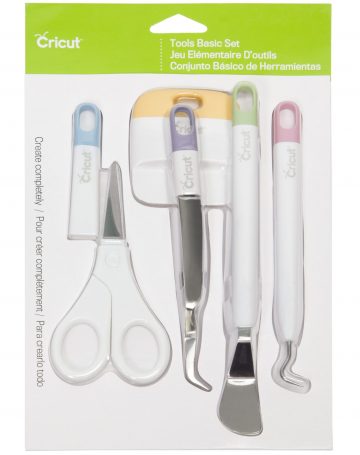
This is a bundle of useful tools that you can purchase directly from Cricut. It includes:
- Scissors. (self-explanatory)
- Tweezers. These are reverse-grip which means you squeeze the handle to open and release to close. Super useful for holding projects together as they dry and a million other tiny functions.
- Scraper tool. Essential for working with vinyl and cleaning your cutting mat.
- Spatula. Used to carefully lift material off of your cutting mat.
- Weeder. Helps remove excess vinyl from its paper backing or removing tiny little cuts.
If you don’t have these tools already, I highly recommend either purchasing the bundle from Cricut or buying a Cricut Explore Air 2 bundle that contains them. They should run you around $15 if purchased as a set.
(You’ll also want either some heat transfer vinyl, permanent vinyl, or adhesive vinyl for most projects. Transfer tape is super important, too.)
Using the Cricut Explore Air 2: Your first design
Now I’ll walk you through a sample craft project that you can make with just the materials that came with your machine. If this is your first Cricut project: don’t worry, it’s actually going to be really easy!
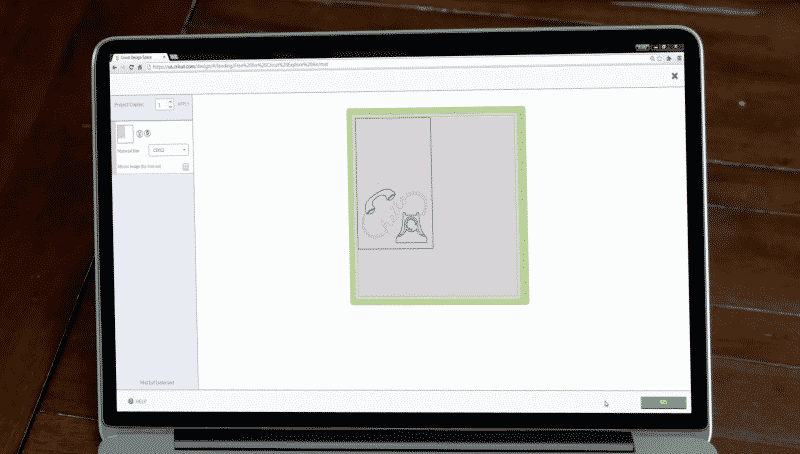
On your computer, if you’ve followed the “New Machine Setup,” from earlier you should see a design placed on the screen. If you don’t see the design visit design.cricut.com. Click the menu icon in the top left corner and select New Machine Setup.
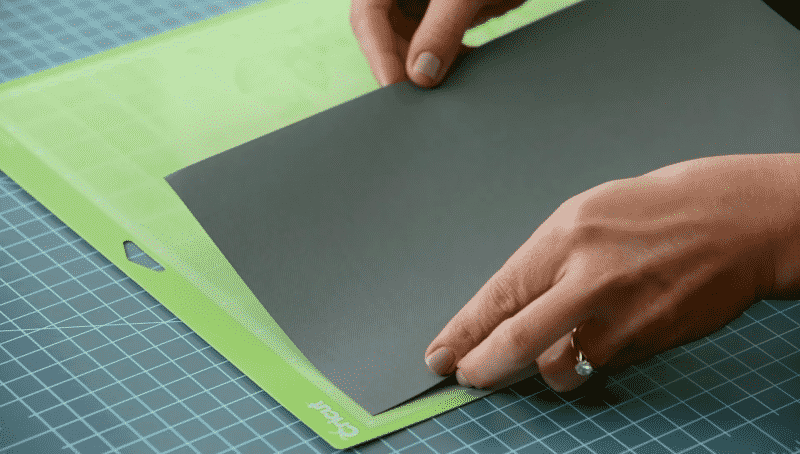
You’ll want to have handy: your included sample cardstock, paper, cutting mat, and your silver pen. If you still have the protective film on your cutting mat remove it now and set it aside for later. It should be kept for protecting the surface while you’re not using it.
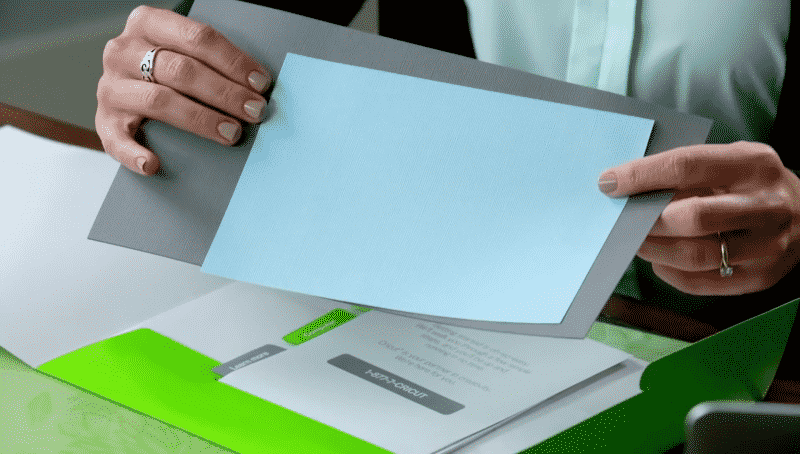
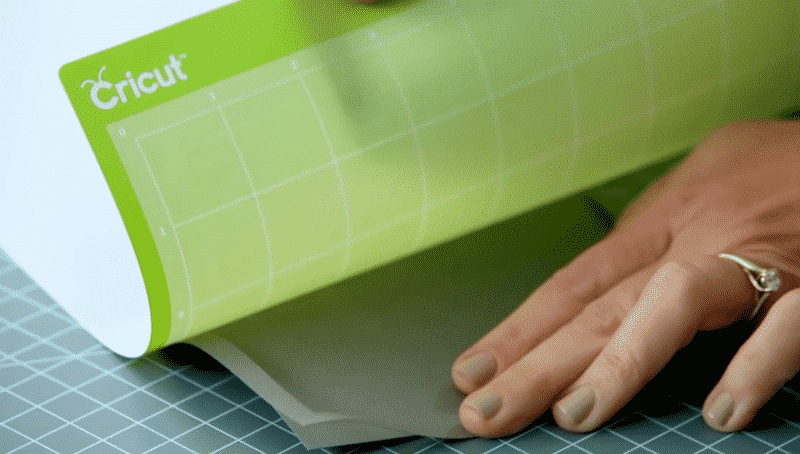
- Load the grey cardstock on to the cutting mat. With the textured side facing up, line it up vertically on the mat. It should be lined up on the top left corner, just under the Cricut logo.

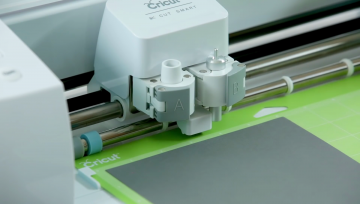
- Load the mat into the machine. Insert the mat in line with the mat guides, here’s a picture to see what it should look like. Keep the mat pressing firmly against the rollers while pressing the “load/unload” button on the top right of the machine. The icon looks like a set of double-arrows.
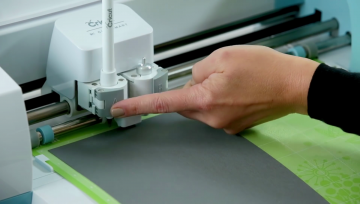
- Insert the silver pen. Open accessory clamp A. Take off the pen cap and place it tip-down into the housing until the arrow on the pen disappears. Go ahead and close the clamp. Tip: place the cap on the end of the pen while cutting so you don’t lose it.
- Check the design on the mat preview screen. Press go.
- Set the dial on your machine to cardstock.
- The “C” button on the machine should be flashing. Press it to start the design and watch the magic happen!

- Unload the mat. Once the project is finished press the load/unload button and remove the pen. I usually keep mine in the accessory compartment, but there’s also the handy bin on the left of the machine if you’d rather have easy access.
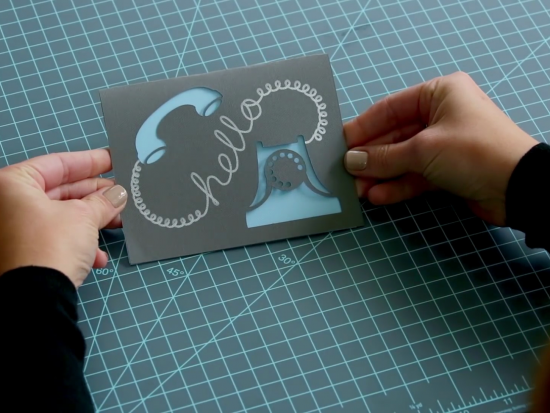
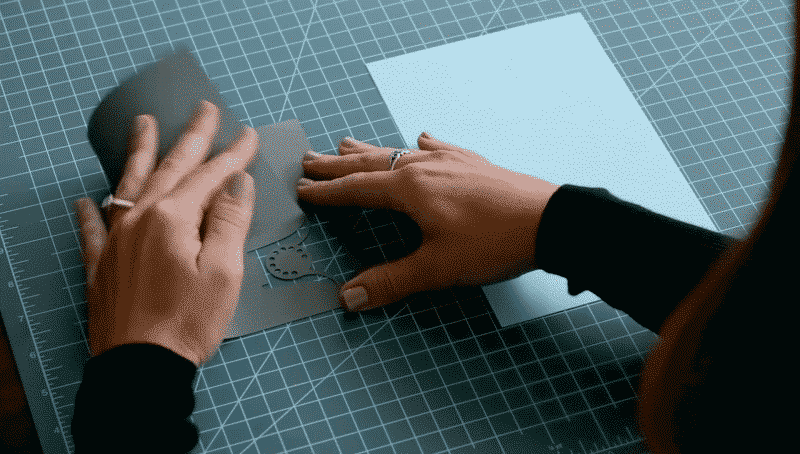
- Place the cutting mat face down on a clean surface and curl the edge of it up toward you. The material should peel away from the mat, and as you pull it off just keep curling the mat up to make this a bit easier.
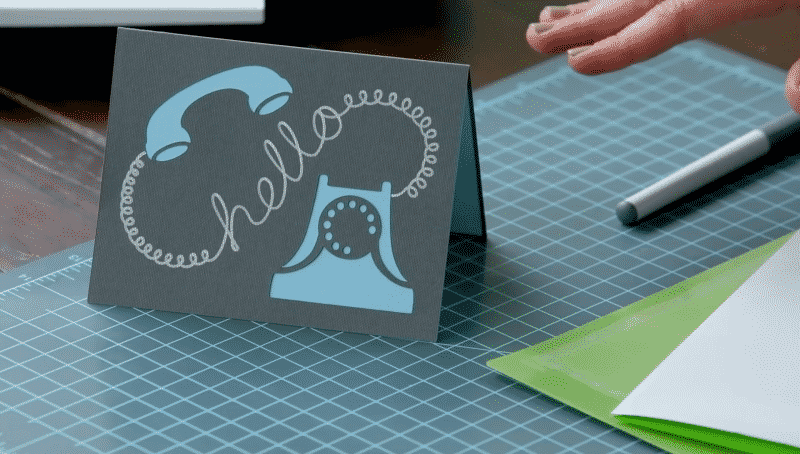
- Fold the card over, creasing it in half. Do the same with your blue paper and place inside the grey card. You can glue this in place if you like.
Tada, your finished product should look like this:
Cricut Access
Cricut Access is a premium subscription service offered by Cricut. Depending on the plan you choose you’re given unlimited (but temporary) access to your own fonts free images, designs, or even a 10% discount on all purchases from Cricut.
Cricut Access could definitely be worth it if you find yourself buying a lot of items in the Cricut Design Space app store.
Personally, I prefer to purchase designs as I need them and this way I own them forever.
Bluetooth usage
The Explore Air 2 features Bluetooth out of the box so it will work with your desktop computer, wirelessly, your iPhone, or your iPad. If you need help pairing it with your computer, Cricut has a great page that covers Windows/Mac/iOS/Android devices.
Tricks and tips
- You can use Design Space with basically any image you find. Check out Cricut’s step-by-step instructions.
- If you need images to use I’ve put together an awesome collection of free SVG images that you can import. This is great if you don’t already have your own images as you can import these SVG files and get going with a project right away.
- Always make a test cut first, on a small amount of material. It takes an extra minute but it can save you so much money if you have your settings calibrated incorrectly or if your blade is gunky.
- You can use the Explore Air 2 without an internet connection if you pair it with an iOS (iPhone/iPad) or Android device.
That’s it for our Cricut for Beginners guide. You should feel pretty confident walking through a new project, and you can always come back here for a quick refresher!
Now let’s explore how to get started with some ready to make projects, if you aren’t quite ready to work with your own designs yet.
14 bonus Cricut tutorials
I’ve put together my 14 favorite Cricut tutorials for beginners, experts, and everyone in between.
Each tutorial is super easy, fun, and explains all the tiny details that can really make or break your design.
Most are videos but there are a handful of text tutorials sprinkled in.
Some of the projects you’ll be making: Disney tee’s, DIY stickers, personalized mugs, and 3d pop-up art!
Cricut Explore Air Beginner Projects
DIY Custom Stickers with the Cricut Explore Air
If you haven’t seen this yet you’re in for a treat. Auntie Tay goes over how to make personalized stickers. These are awesome for planners, business promos, or maybe you’re just like me and never really grew up!
Cricut Explore Air: Create your first project
From Cricut’s official YouTube this tutorial will guide you through creating your very first project with the Explore Air 2 by unboxing it:
Cricut 101: How to Cut and Apply Vinyl Decals
I’ve collected the most common questions and issues and put together this tutorial to explain exactly how to cut vinyl on a Cricut machine. I also discovered a great resource for trying out free samples of vinyl, so make sure to check it out.
Cricut Explore Air 2 Beginner Projects
Cricut Explore Air 2: Setup & Projects
Great overview! Covers using an iPad, loading in an illustration pen and two project ideas: a foil iron-on + a card.
Cutting Vinyl with the Cricut Explore Air 2
Michelle goes over how to make a personalized mug with the help of a little bit of craft vinyl too.
How To Create a Custom T-Shirt Using Cricut Explore Air 2
Liz teaches us how to make a custom Disney t-shirt, so cool!
She links to her cut files (free) so that you can either follow along to make the same design or swap in your own SVGs.
This project does require some iron-on vinyl (heat transfer vinyl) which you should definitely have! You can usually pick it up at a Hobby Lobby or Michael’s.
Cricut Joy Beginner Projects
Cricut Joy: Unboxing and getting started
This Cricut Joy unboxing is a great way to get to know your machine or figure out if it’s the right one for you. You’ll get a tour of the machine, of Cricut design space, and how to use Cricut Access.
Cricut Maker Projects (intermediate-level)
Cricut Maker: From Setup to First Cuts
George and Ken are informative, chatty, and they know their crafts. Their video takes us through the setup process through working with different fabrics and materials. Very easy-to-follow overview of the Cricut Maker.
Using Cricut Design Space
Cricut Design Space for Beginners
I love all of Lorrie’s tutorials, and this one is no exception. In 40 minutes she guides us through the basics of Cricut Design Space.
Slice, Weld, Attach, Flatten & Contour – Cricut Design Space
After you’ve learned the basics of Design Space, this tutorial is the next logical step. It covers the most common tools you’ll use and she includes easy, downloadable cheat sheets for keeping track of each tool as you’re working.
Importing Images from Google into Design Space
Anytime I’m asked about how to import an image this is the first video that comes to mind.
How to Slice in Design Space
This is one of my own tutorials (part 1 of 5 on the most important tools in Cricut Design Space) on how to slice in Criccut Design Space. It covers using one of the most useful (and frustrating!) tools available.
Free Cricut projects, designs, tips & tricks (bonus!)
Paper Tips and Tricks – working with Cricut Maker
Worth watching just for the tip on finding the direction of your paper grain
Cricut Pens: Writing and Envelope Addressing Tutorial
Jennifer gives us a tour of 11 different pens on the Cricut Explore / Cricut Maker. She also covers picking a font, how to use a calligraphy pen, whether or not other brand pens work, and how to address envelopes & invitations! Woo!
Using Sure Cuts A Lot with Cricut
Cricut machines no longer support using SCAL, but because it’s such a useful piece of software I’ve figured out how to use Sure Cuts A Lot with Cricut machines.
That’s all 14! If you have any favorites (or even your own!) that I left off the list please comment below, I’d love to check them out.
The tutorials listed above are some of my favorites, but it’s not the only good compilation. Here are another few lists to check out that I’ll always be adding to:
- Cricut has a great collection of project tutorials.
- Also, check out the official Cricut YouTube.
FAQ
Can you use the Explore Air 2 without Bluetooth?
Yup! This tutorial (the one you’re reading, hi!) takes you through how to set up your machine without needing Bluetooth.
What is a Cricut mat? Is it like transfer tape?
You’ll use your Cricut mat to hold your material in place while it’s in the cutting machine. You’ll sometimes (especially if you calibrate them a bit off) cut into the mat itself if you think you have a regular knife blade loaded in but it’s actually your fine point blade.
Transfer tape is used for taking a vinyl design and applying it to another surface. The mat is just used temporarily while it’s being passed through the machine, unlike a paper backing on adhesive vinyl.
Do I need a Bluetooth adapter for my Explore Air 2?
Nope. It has the wireless module built-in.
Which Cricut machine should I consider if I’m just getting started?
I wrote an article in late 2023 all about the best Cricut machines for beginners. If you’re looking for your first machine, that’s where I’d look to get started. They’ll all support Cricut Design Space software. Many recommend the Cricut Joy, but it’s worth looking at the full array of each Cricut cutting machine available.


How can I download a copy of the user’s manual for my Explore Air 2?
where can you get a power cord and a usb cord for the explorer?
Do you have to have a computer to use the Cricut Mint Explore Air 2 or can you solely use an iPad / iPhone.
You can just use an iPad or iPhone, no computer required.