If you don’t know how to use a Cricut to cut vinyl decals, you’re in the right place!
I’ve collected the most common questions and issues and put together this tutorial to explain exactly how to cut vinyl on a Cricut machine.
I’ve also discovered a great source for getting free vinyl samples which I’ve added at the end of the article.
Table of Contents
How to make vinyl decals with Cricut
It’s pretty easy to cut paper with a Cricut machine, but we’ve all all seen absolutely gorgeous projects using vinyl and wonder: how can I do this?
Is there a special type of vinyl? How do you apply the vinyl decal?
This tutorial will teach you how to create your own vinyl decals, wall graphics, and window decals.
(We have a full guide on how to make stickers with Cricut that you should definitely check out.)
Vinyl can be applied to any smooth surface (ceramic, a wall, glass) with just transfer paper. For rough surfaces, you’ll need stronger adhesive-backed vinyl. Don’t worry, I’ll cover the differences below as well as when to use a cutting mat and when you’ll want to avoid it.
We’ll also cover using the Joy a bit later, and get into print then cut if you’re interested.
For this tutorial, we’ll assume you’re using a Cricut Explore Air 2 and Cricut Design Space, but other Cricut machines follow the same principles so this will work for Cricut Joy and Cricut Maker as well.
Let’s get started!
Supplies you’ll need to get started
- A Cricut machine. I use the Cricut Explore Air 2 (this is the current best deal).
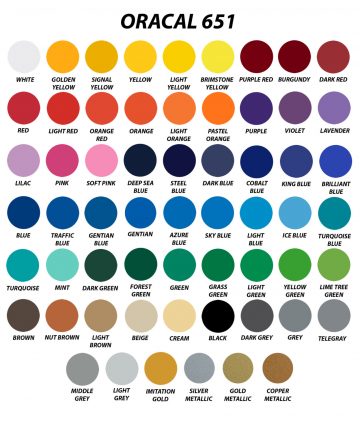
- Vinyl (Oracal 631 (matte/removable vinyl), Oracal 651 (glossy/semi-permanent), or Cricut Vinyl)
- Transfer tape
- A cutting mat (optional)
- Either a Cricut Tools Basic Set or
- Tweezers
- A scraper to smooth/burnish your vinyl
Making the first cut
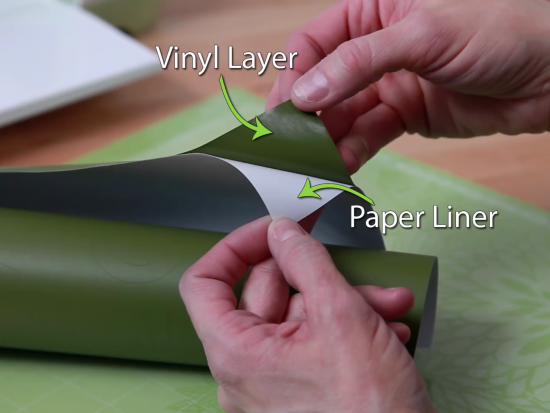
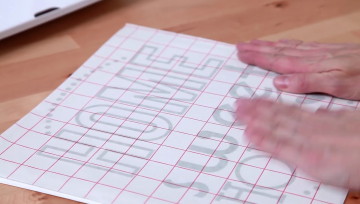
If you haven’t inspected your Cricut vinyl yet, take a close look.
Vinyl that you’ll use will typically be made up of two parts: the vinyl and a paper liner. It looks like this:
- Have your design ready to go. If you need a hand loading a design into Cricut Design Space, head over to their YouTube page where they have a great class posted.
- Place your vinyl on your cutting mat with the paper liner side towards the mat.

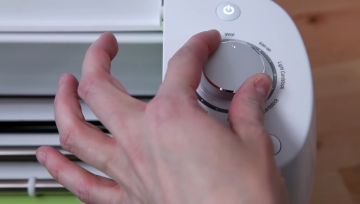
- Load the mat into your machine and turn the smart set dial to Vinyl. Your machine will be set to cut the vinyl but not the paper backing.
- Press go (the C icon underneath your dial).
- Remove your vinyl from the mat once your cut is complete.
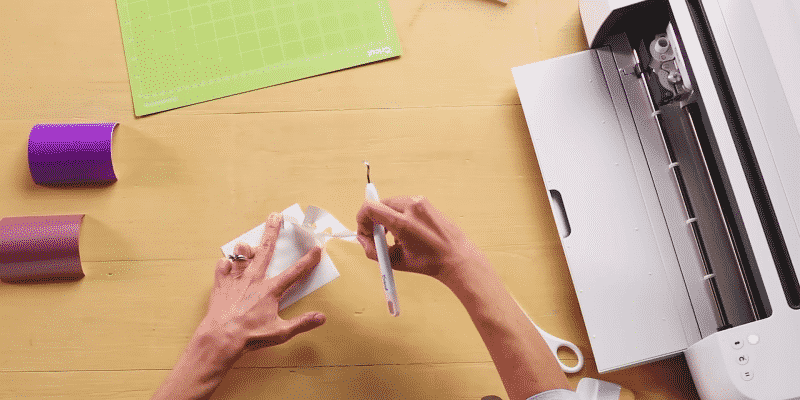
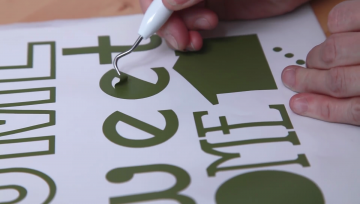
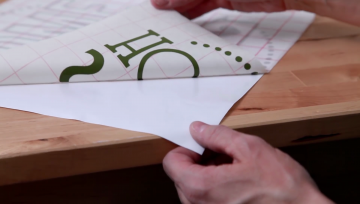
- Remove the leftover vinyl film from your image. This is known as weeding, we’re simply peeling off all of the parts of the image that we aren’t using. You can use either a pair of tweezers or a Silhouette/Cricut hook tool to make this simple.
Applying your cut vinyl
- Completely clean and dry the smooth surface area where your vinyl will be placed.
- Mark the placement of your design. You can use a level if applying it to a wall.
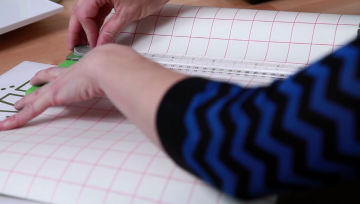
- Cut a piece of transfer tape the size of your image.
- Remove the liner from the transfer tape.
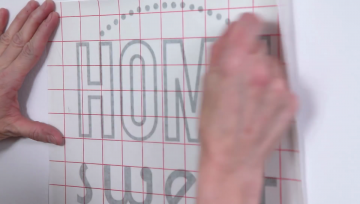
- Use the alignment grid to to lay the tape over your image.
- If there are any air bubbles, smooth them out.
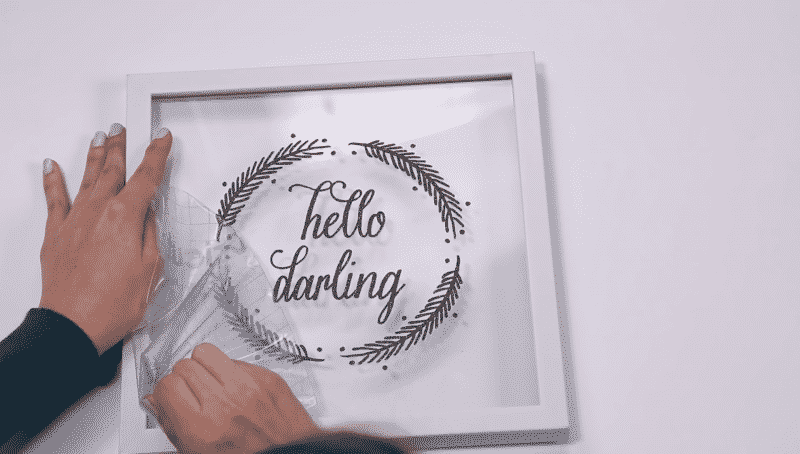
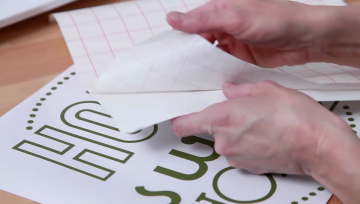
- Now, peel the liner from your vinyl image. The vinyl will be held in place by the transfer tape.
- Now place the transfer tape and image on the wall/item, line up the grid for careful placement.
- Working from the center to the edges, press down firmly on the image until it is completely smooth.
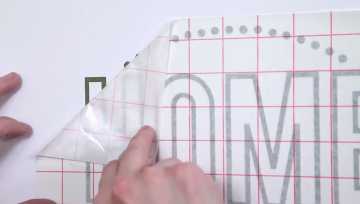
- Starting from a corner, slowly peel the transfer tape from the surface.
That’s it!
The first time is always the most difficult, I usually need to have a tutorial open the first few times I try anything new and then a week later I’m flying solo.
Cricut Design Space should be pretty easy to use, but we’re putting together a complete class if you are having difficulty. Design Space has improved a lot over the past few years, and it basically walks you through the whole process but you can keep this tutorial open too if it helps.
I’m hoping to speed up that process for you a little bit by going over the most common mistakes and tips in the next section. After that, I’ll cover different types of vinyl, which ones to avoid, and the best vinyl for each application.
Quick tips
- When removing the transfer tape, make sure to pull from the image at a 45-degree angle.
- Do not pull the tape quickly, instead use a slow, gentle rocking motion.
- If the tape doesn’t want to release the vinyl, simply reapply the tape to the surface and press down firmly once more.
- The thinner your design, the slower you should remove the transfer tape.
- For large images, consider having a friend help out.
- You can use heavy adhesive-backed vinyl when applying to rough surfaces.
- If you’re using iron-on/heat transfer/t-shirt vinyl make sure to mirror your image in Design Space or it’ll apply reversed! This is also true if you’re applying vinyl to an interior window so that it reads correctly from the outside.
- Even though you can pass the vinyl directly through your machine because of its paper liner it’s still better to use a cutting mat for more reliable results. Experiment!
- With adhesive vinyl make sure not to peel off the backing before placing it on your cutting mat as it will stick.
- Cricut has a great video tutorial on using glitter vinyl.
Got it? Good!
If you’re wondering what can you do with a Cricut or looking for more projects, make sure to read through our huge guide on everything Cricut.
Using the Cricut Joy to make vinyl decals
The Cricut Joy is a smaller and more compact version of the Cricut Explore Air 2 or Cricut Maker. It’s really designed for small projects and portablilty. You can use the Cricut Joy to cut vinyl just like the other Cricut machines, but there are a few differences to keep in mind.
First, let’s talk about size. The Cricut Joy can cut up to 5.5 inches wide and 4 feet long without a cutting mat, thanks to the Cricut Smart Vinyl. This is a great option if you want to make Cricut vinyl decals for your laptop or phone or for small home decor projects.
If you want to use regular removable vinyl or permanent vinyl those work too with the help of a cutting mat.
Let’s walk through using Design Space. You’ll want a vinyl decal design ready and (optionally) transfer tape.
(Remember that only the Maker and Cricut Explore Air 2 can use print then cut for colorful designs.)
Quick tutorial on cutting a vinyl decal
To make vinyl decals with your Cricut Joy, follow these steps:
- Open Cricut Design Space and create or upload your design.
- Load your vinyl into the Cricut Joy. If you’re using Cricut Smart Vinyl, you don’t need a cutting mat. Simply feed the vinyl into the machine and align it with the guides on the machine. If you’re using regular adhesive vinyl, place it on a cutting mat and load the mat into the machine.
- Select the vinyl setting on the Cricut Joy. If you’re using Cricut Smart Vinyl, select the “Smart Vinyl – Permanent” or ” – Removable”f setting, depending on your vinyl type. If you’re using regular adhesive vinyl, select the “Vinyl” setting.
- Press the “Go” button to start the cut.
- Once the cut is complete, unload the vinyl from your Cricut machine.
- Weed the excess vinyl from your design using a weeding tool or tweezers.
- Apply transfer tape to the vinyl design and use a scraper to smooth out any bubbles.
- Peel off the paper backing and apply the vinyl to your surface, starting from the center and smoothing out any bubbles with a scraper.
How to layer your vinyl decal
Layering vinyl is great for really taking your project to the next level, but it can be very tricky to get just right.
Here are our favorite tips for layering your vinyl decal like a pro, and getting it right on the first try, every time.
(Okay, maybe every other time.)
- Use the right type of vinyl: Make sure the vinyl you’re using is compatible for layering. Some vinyls, such as glitter vinyl, may not adhere well to other vinyls.
- Cut each layer separately: Cut each layer of your design separately, and use registration marks to help align the layers. Time to get the most out of that Cricut machine.
- Weed carefully: Take your time when weeding each layer, and be sure to leave the registration marks intact.
- Use transfer tape: Use transfer tape to transfer each layer onto your surface, and use a scraper to smooth out any bubbles.
- Apply heat: If you’re layering heat transfer vinyl, apply heat to each layer before applying the next. This will help the layers adhere better and prevent lifting.
Christopher Alan has the very best tutorial I’ve seen on the subject, have a look!
Vinyl recommendation
I wrote an entire post on the best vinyl for Cricut and Silhouette machines. Check it out, because I’ll only cover two of them here.
Vinyl comes in three basic categories: stencil, self-adhesive, and heat transfer (also known as T-shirt vinyl). I’m going to list my favorite but please experiment with different types of vinyl.
- Top choice: Oracal 631 (removable, matte)
If I could only take one vinyl with me to a desert island this would be it. Oracal 631 is basically the same as Cricut vinyl but it’s a bit cheaper and easier to use. It comes off the transfer paper super easily and the common colors/styles are really pretty.
Conclusion
That’s it!
You hopefully should now know how to make vinyl decals with Cricut. If you still need help, we’ve compiled the questions we get the most in our FAQ.
If you’re wondering what to do with all of that excess vinyl, Cricut has a great list of ways to recycle and repuprose permanent vinyl, sticker paper, really any scraps you have left over.
Feel free to drop us a line with anything you think we left out.
FAQ
When should I use a cutting mat to cut vinyl?
If your material fits on it or if it doesn’t have paper backing. If you try to cut vinyl without a mat and without backing the cuts will just slide around inside of the machine, making an awful mess. The cutting mat or paper backing both keep the material firmly in place, even after it’s cut.
When shouldn’t I use a cutting mat to cut vinyl?
Pretty much the only reason I’d cut without my mat is that I want to cut something larger than my cutting mat. My Silhouette Cameo lets me cut 12 inches wide, but without a mat I can cut as long as my material is instead of being limited to 12″ by 12″.
Why do you use transfer tape?
Vinyl can be very flimsy. If your design has several parts keeping it positioned exactly like you designed will prove difficult after peeling it and replacing. As your designs grow in size and complexity it becomes outright impossible: enter transfer tape. Transfer tape lets you pick up the entire design in one go and apply it as a collection.
Wwhich Cricut would you recommend?
I have an entire comparison of the top Cricut machines. You can’t go wrong with the Cricut Explore Air 2 or Cricut Maker. Both of these support print then cut, are great to use with permanent vinyl, and are basically a blank canvas for making whatever you can imagine!
Why are my cuts crooked?
Make sure your cutting mat is being loaded in straight. If you’re using vinyl without a mat and with paper backing, make sure to adjust your rollers so that they securely grip the edges of the material.
Can you tell me how to make reusable stencils with Cricut?
Absolutely! Megan Lowrey has a great tutorial on her YouTube that uses a Cricut Explore to make reusable stencils out of plastic binder dividers.
What about those free samples?
If you contact Oracal they’re happy to send you free samples, up to 5 at a time. The sheets are 8×10 which is a pretty generous size and they have a variety of thicknesses, durability, and styles (reflective, metallic, gold leaf, frosted glass, etc.) to try out. The only thing you can’t ask for is a specific color, they’ll dispatch you one at random. Just put a request in on the Oracal website and fill out their Contact Us form, specifying exactly which samples you’re looking for. If you like the material, make sure to place an order!


Thanks for the help. I keep wondering why my Explore Air 2 has a vinyl setting, but also selections on the knob just to the left and just to the right of the vinyl setting. Does the one to the right add more pressure, and the one to the left remove pressure? I’ve not seen any body explain what to do if the the kiss cut is too deep or too shallow. Any idea?
I’m excited to try and have some fun with this. I now need to learn how to use different cuts and put them together with vynal
When making a car decal or outside decal, do you use the same steps above? with the same vinyl 631 or 651? same application?
I am trying to print out my images. But it tells me I need to print it . With my printer. I want to just print it out on my Cricut. What am I doing wrong?
I’m not sure what cricut machine you have. I have the cricut maker. To do what I think you want done. I would go to your cricut design space, highlight the image you want to print, select the layer option, there you have the option to print, cut or write. You will want to chose the write option then make it. I hope that helps.
I’m looking for information on cutting a different kind of vinyl. I can’t seem to find any information on how to cut marine vinyl/ embroidery vinyl. I’ve tried different settings but depending on the vinyl the blade only makes a mess from dragging while it cuts leaving little fragments around the edges of the finished pieces! I could really use some help with this one!
Hello
I am fed up with paying for printed vinyls for my tree baubles, so decided to make my own. What is the best machine to use and can you purchase metalic colours ie silver and gold?