For years, I struggled with the chaos of a disorganized craft room, constantly feeling overwhelmed by the clutter. Then, we moved.
The kids cared about the backyard. My husband loved the basement. Me? I… was eyeing that very empty, very un-cluttered room. Sure it had carpet. And some wood-paneled walls.
But it didn’t have clutter.
As an engineer and a mom, I’ve always loved reverse engineering, taking apart electronics to understand their inner workings and creating schematics. So, why not apply the same approach to craft room organization?
I immersed myself in a world of inspiration, meticulously studying thousands of craft rooms, dissecting what worked and what didn’t, and identifying the secrets behind the most effective and stunning spaces.
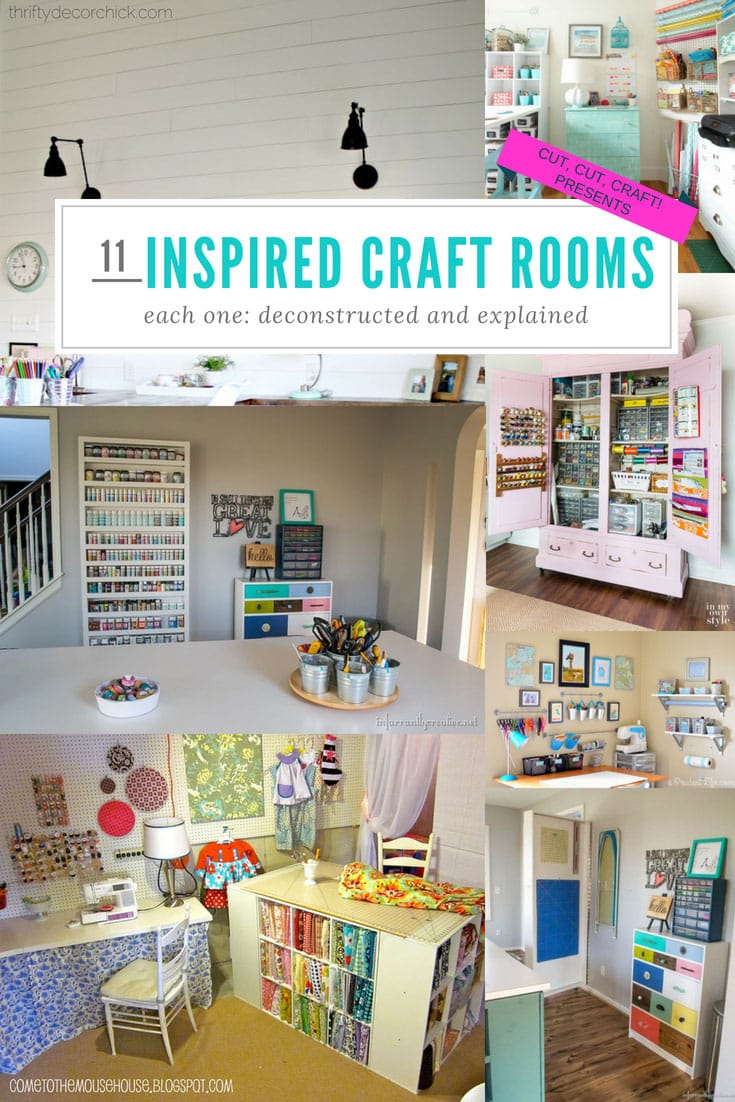
After hours of research, I’ve compiled a treasure trove of ideas, and I’m thrilled to share my findings with you: 11 breathtaking, organized craft rooms, brimming with creativity and ingenuity, ready to spark your imagination and help you create your very own organized oasis.
Table of Contents
Craft Room Organization 101
We’re going to cover everything you need to know about craft room organization. I’m going to go idea-by-idea so that by the end of this, you’ll not only have some real-world inspiration but also the organizing principles to work with your own supplies and space.
We’ll cover craft room storage, how to use your floor space, and what to do if you don’t have a dedicated craft room. First, let’s get into the general principles of how to store craft supplies, then we’ll go through 11 amazing spaces.
We’re not just going to admire them, we’re going to harvest all of the ingenious craft room organization ideas held within.
5 principles for organizing a craft room
- Imbue it with your own personality. Each room here could only have been created by one person: the very person who made it. Find what calls out to your inner genius and listen to it!
- Function will lead to form. Set out to have all of your most-used machines & tools at arm’s reach.
- Use stations. Divide your room into sections and have different areas for different activities. This will help guide you on how to organize your room and where to place your equipment and supplies.
- Don’t hide away your supplies in storage boxes unless they’re clearly visible, labeled, or color-coordinated. You want to be able to find your craft supplies quickly or you’ll start accumulating dust and spider webs in that room.
- Work with what you have, and give away what you don’t need. Small spaces? Add hooks, a pegboard wall, whatever you can.
I contacted each and every one of these crafters and interviewed them about how they approached organizing their craft room. We’ll see everything from vertical storage, to how to use wall space, and what to do with that endless washi tape.
What? Don’t give me that look, I know you’re probably cramming washi tape into every nook you can.
So whether you’re a Cricut or Silhouette crafter, scroll through and enjoy!
1. Use your vertical space
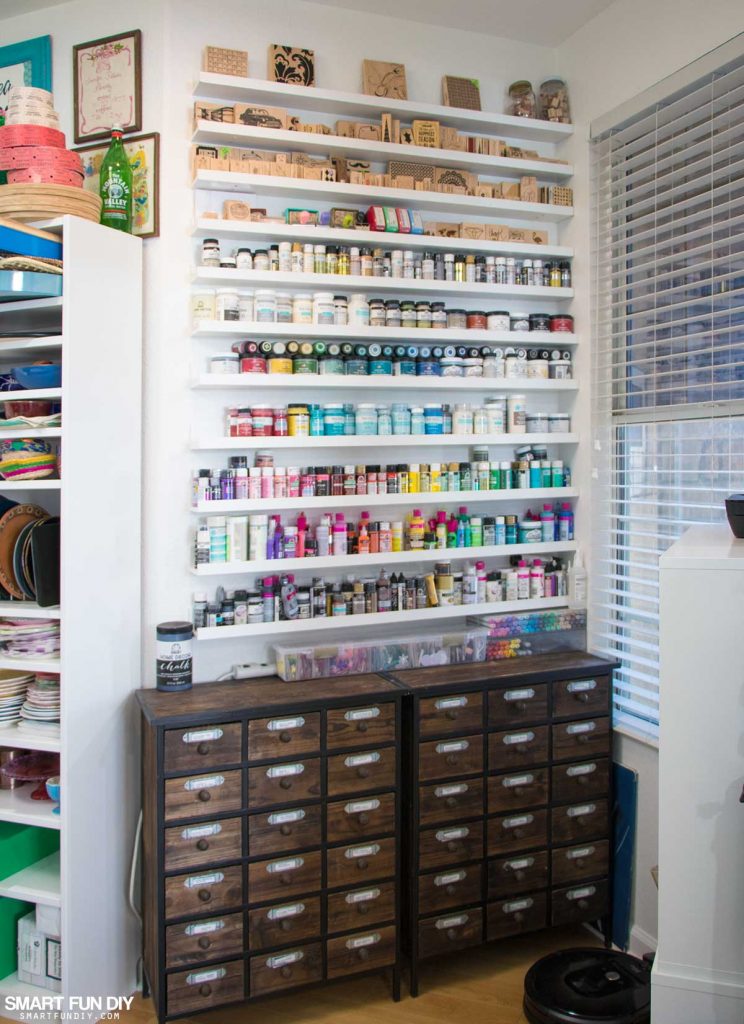
Jennifer’s crafting area has transformed year to year, but one consistent feature is its use of the height that it has for organizing craft supplies. She has a beautiful rainbow of paints and stamps, and takes advantage of card catalogs, narrow shelving, and color coordination to keep things organized and open-feeling.
The analysis:
- All the paints and inks are arranged by color on narrow shelves that have a short lip to keep everything in place. Paint brushes are left out, so they have good airflow and to easily grab.
- Jennifer put all of her stamps on display, so none are in danger of being forgotten and buried in a bin somewhere. She has the pretty, printed side of the stamps facing out, so it’s easy to tell which is which.
- The dark wooden card catalogs are simply gorgeous. Each one has its own label so you don’t have to go digging in each drawer, unable to find what you’re looking for.
- This craft room is shown after Jennifer went and purged her stash of craft supplies, by donating them to teachers, schools, and charities. I think we all could follow in her footsteps and give some of the supplies we don’t use to those in need.
What sets it apart
For my favorite part of this craft room, you’ll have to take a look at the video below. I love these bright blue and yellow triangles Jennifer painted on her walls.
It’s so unique and full of personality, I can tell that just walking into this colorful space would put a smile on my face and help me get inspired. How fun is that rainbow wall of color?
You can see from the video that this craft “room” isn’t actually walled off from the rest of the studio. That could be a downside, except for the giant craft table I spotted outside the craft storage area. Who wants to have walls separating their craft supplies from that amazing work space?
2. Stay flexible
The next craft room we’ll look at is by Melissa over at Polished Habitat. Instead of going for a designated craft room she’s combined it with a guest room.
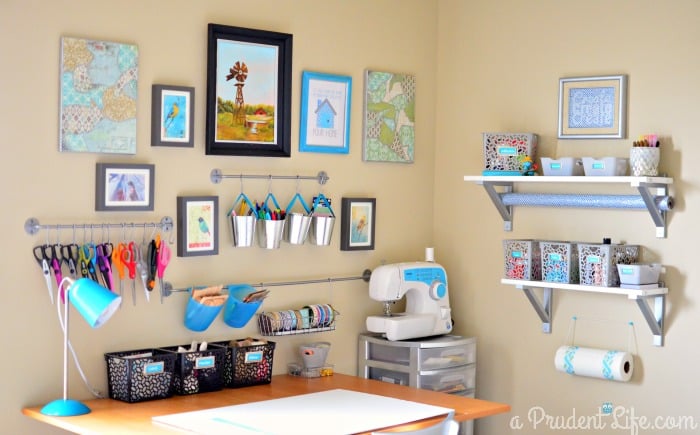
The analysis
- The crafting corner is nestled into the guest room, a fabulous dual-use of the room. Melissa manages to keep the crafting supplies well-contained, while maintaining a clean and inviting area for guests.
- Slim metal bars mounted on the wall provide ample storage space for hanging all sorts of containers.
- Her scissors are beautifully hung on S-hooks from these metal bars. I’ve never seen craft scissors so wonderfully displayed! Finally, having so many pairs of scissors makes sense.
- Yarn and pushpins are used to make a simple but clever paper towel holder.
- Melissa interspersed framed art with her hanging storage solutions. This helps the craft organization become integrated into a cohesive room decor.
What sets it apart
My favorite thing about this space is that everything is labeled. The hanging buckets have vinyl lettering for pencils, markers, and pens.
Buckets, plastic bins, drawers, and containers has a designated purpose-written right there! Even the shoeboxes in the closet are all labeled. You’ll never just toss whatever you’re using in the nearest bin that has empty space. You know exactly where everything should go!
The biggest problem I can think of is that guests might never want to leave this room. I know if I were staying here, I would have trouble deciding whether to actually sleep, or stay up all night making something fun.
3. Keep your craft room organization fun
Kimbo, from a Girl and a Glue Gun has the most fun-packed space I’ve seen. With striking black and white patterns and explosions of color, it’s the craft room I most want to run around and make a mess in.
Let’s see what we can find on her sewing wall.
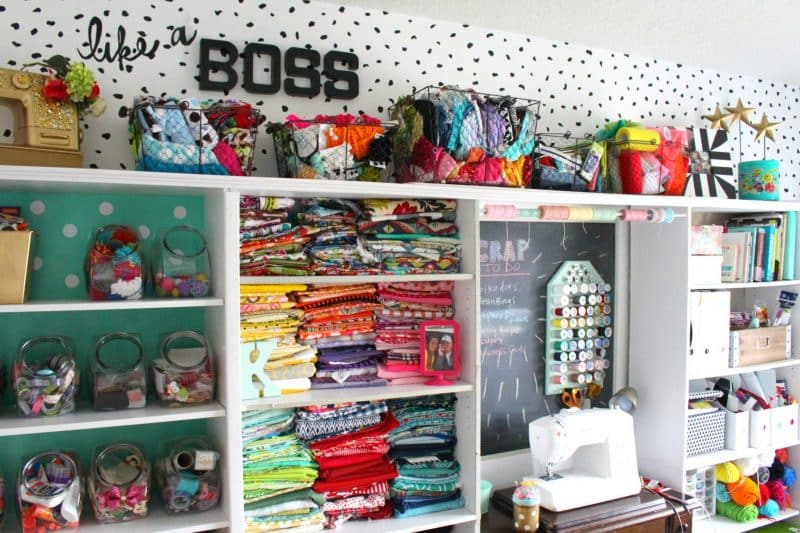
The analysis
- An entire bookshelf is filled with fabric, organized by color. You’ll never have to run out to the fabric store if you have a great supply of fabric to inspire your every project.
- Kimbo uses open jars. You can just reach in and grab the tape or ribbon you need, without having to fuss around with lids.
- Behind the jars, she has put up a teal, patterned lining, which provides some much-needed color to the shelf. White shelving would look out of place in this room. Adding the lining shows that every project (even your craft room) can be iterated on.
- I love the little chalkboard snuck between two shelves that are packed with other craft supplies. It’s so useful for brainstorming ideas, or keeping track of to-dos.
- With the wall of thread hung on a spool rack, and twine running along a long ribbon bar up top, she has everything she needs for her sewing station.
What sets it apart
My favorite aspect of Kimbo’s craft room is the style. I love the striking black and white patterns that are on display. (There’s an awesome houndstooth rug you can’t see in this picture.)
The black, white, and shiny gold accents contrast nicely with the explosions of color from her supplies of yarn and fabric and thread. It’s like an empty coloring book and a bucket of markers, you know beautiful crafts are just waiting to be made.
Some of the bins might appear a little messy. But you know, I get a little bored of craft rooms that are so sanitary and orderly and full of white expanses.
There’s so much personality crammed into this space, it makes sense for it to overflow a bit. You just know Kimbo must have tons of fun messing around in here.
There are so many more great views and closeups that I couldn’t show in just one picture, so to see it all, check out this video for her full craft room reveal:
4. Craft supplies can go anywhere
This craft room was built in an unbelievably gorgeous space. Thankfully, Beckie from Infarrantly Creative is certainly making some amazing use of it.
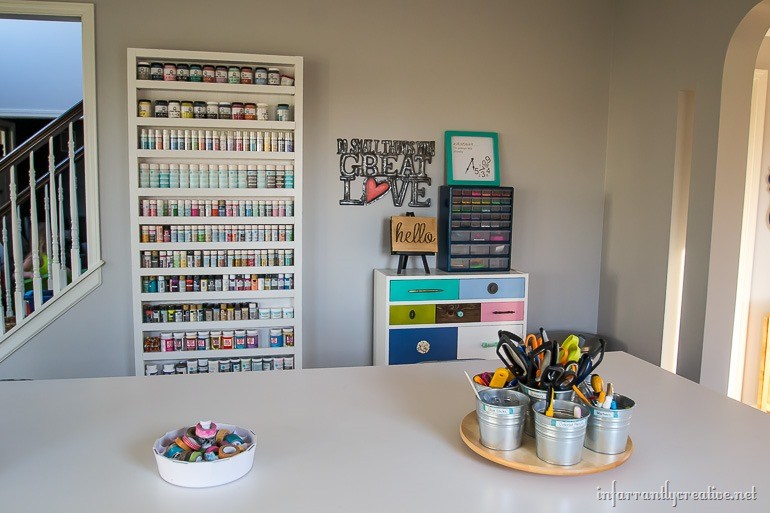
The analysis
- This space has lots of windows and great light, which is accentuated by a lovely neutral gray on all of the walls. It’s so soothing, even just looking at it through a computer screen.
- A massive craft island spans the center of the room. It has shelves and cubbies underneath with plenty of easy access but out-of-the-way craft room storage.
- In the center of the table are Lazy Susans with buckets and bins of the most commonly-used tools, glues, and tapes. Such a great idea to keep things within arms reach!
- On the far right is a colorful dresser repurposed from an Ikea bookshelf. Colorful paints and a variety of handles turn it into an art piece itself.
- There is a giant wall of craft paints. A seven-foot-tall, custom-built paint shelf with adjustable shelves. This woman is amazing.
What sets it apart
Okay, and my favorite part is that the wall of paints isn’t actually a wall…
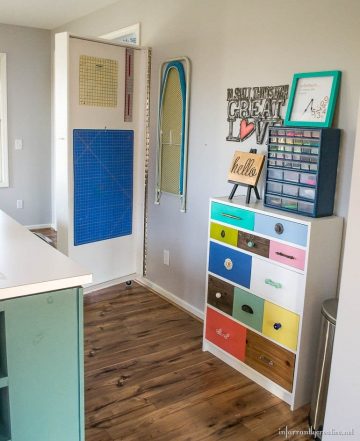
It’s a door! The shelf wall is actually on a pair of casters, and hinged to the wall with long piano hinges. So it can swing to the side and reveal a flip-out ironing board and cutting mats for a Cricut machine.
I’ve seen something like this contraption for storing and displaying posters in a poster store. But Beckie’s is way more robust, and she made it herself! She even has a tutorial on how to do it, if you head on over to her site.
One problem could be that the arrays of buckets containing tools and take up space on the work surface. I know that once I start storing things on my table, the mess beings to sprawl and takes over.
However, this craft island is so large that there is still plenty of space, enough for multiple people working on their own crafts! And with all the storage underneath the tabletop, it should be easy to keep containers for anything left on the table.
5. Your office can also be your craft room
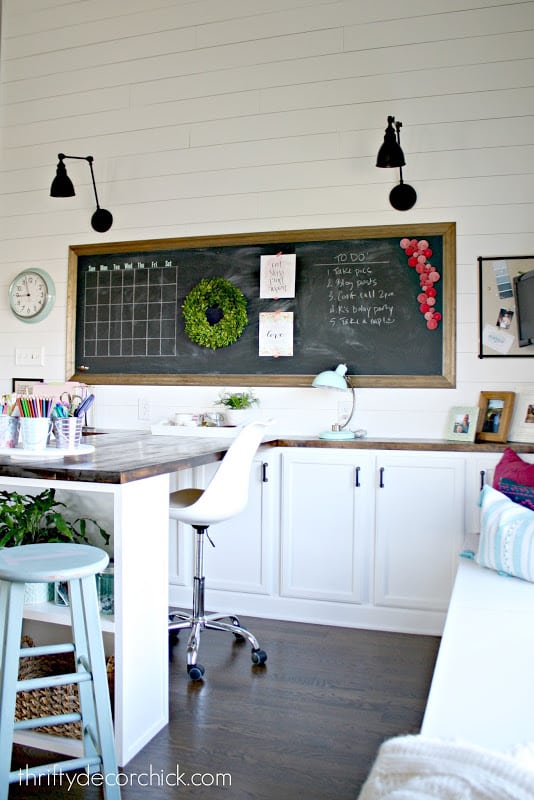
Sarah from Thrifty Decor Chick shared this amazing hangout office room she built. It looks like the perfect example for working, lounging, and doing homework.
The analysis
- The butcher block countertop looks amazing. I love that it wraps around and provides so much surface for writing, building, and crafting.
- On the right is a built-in bench right in front of the window. Ideal for sprawling out with a book to read or a notebook to sketch in.
- A spinning caddy of pens, markers, and craft scissors sits at the edge of the table. The buckets are screwed right into the Lazy Susan so they don’t tumble off and spill colored pencils all over.
- The high ceilings and smooth surfaces in this space help it keep it bright and spacious.
What sets it apart
The best part of this room is that amazing chalkboard stretching across the wall. It’s so wide, you can reach it sitting on either side of the work table. The trim matches the stain on the butcher block, really pulling the room together.
Along with the clock, it has a great old-school classroom feel. I can imagine the kids sprawling all their homework on the work surface, and still having enough room to work on my own crafts.
I’m curious how much Sarah keeps hidden in those cupboards to keep this space looking so neat.
6. Color coordinate your storage baskets
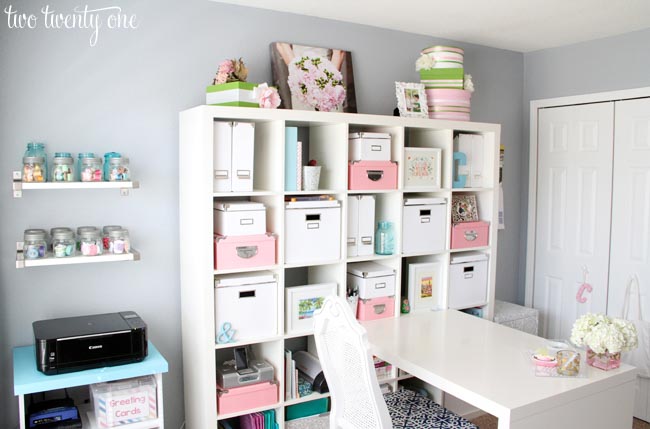
This next one is a home office made with Ikea furniture. Sounds pretty typical; however, you can see from the coordination of colors in this space that Chelsea from Two Twenty One is…basically a visionary. I’m in love with this room.
The analysis
- This is absolutely the prettiest version of one of these Ikea cubby shelves I’ve ever seen! (If you’re buying, look for the Kallax series.)
- All of the boxes selected for storing papers and supplies on the shelves are quite elegant.
- The room has a wonderful airy feel, matched by the pale colors and a light gray on the walls. (I think I might need to jump on this gray wall train.)
- A double row of mason jars fits snugly on the floating shelves. They’re filled with sewing supplies, like buttons and spools of thread, that all look pretty through the glass.
- That filing cabinet hidden in the corner is covered in beautiful, but subtle stenciled roses.
What sets it apart
And finally, the colors. The best thing about Chelsea’s workroom is the color coordination, and how it is drawn into every nook and corner of the space. It is so fresh looking, and the feeling is matched by the fresh hydrangeas on the desk. The pink, white, and blue scheme is perfectly feminine, yet sophisticated. I just want to sneak into this room and maybe try to live under the desk with a bottle of Rosé.
I suppose one drawback is that this craft room might deter anyone who is afraid of the color pink. But it’s so elegantly done, I think even people who don’t love pink would find this space breathtaking.
7. Pick a strong theme
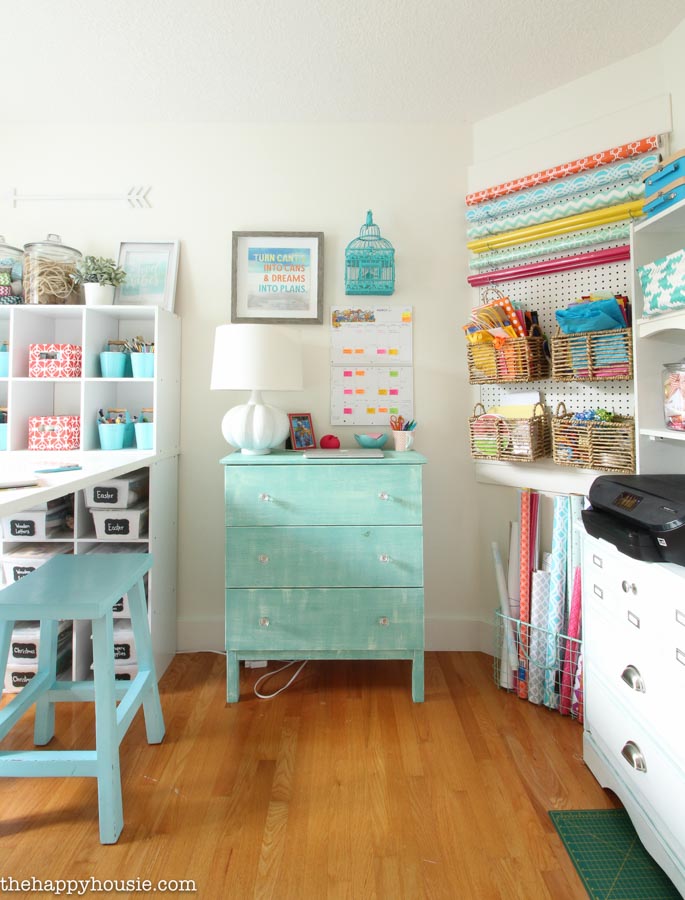
Over at the Happy Housie, Krista shared her beautifully organized craft room. It’s gorgeous, and she has tutorials on how she built or renovated most of the pieces in this room.
The analysis
- On the left, Krista has a workbench constructed from 3 x 3 shelving units. It’s a cheap and easy way to make a counter-height crafting space, that has plenty of storage down below.
- The storage continues above that work table with a 2 x 3 cubby nestled on top. It’s where she keeps her most often used tools and supplies, so they are within handy reach of her workspace but don’t clutter it up.
- Putting a peg board on the angled wall is a great use of the awkward space. It’s so smart, plus it has all the wrapping paper supplies, all in one place.
- I love the theme of pale blue running through this space. The restored dresser on the right even matches, though it’s hard to see here. It brings the room together but helps keep it feeling bright and friendly.
What sets it apart
My favorite thing is the filled-up cubbies underneath her work table for other craft supplies like wrapping paper, and vinyl storage.
She used these inexpensive clear shoeboxes for storing supplies, which fit nicely on a shelf without threatening to pinch your fingers. But she completely transforms them from cheap plastic bins to functional and cute by adding white cardstock fronts and little chalkboard labels to each one. Now they look cute and custom, and you know just where to find everything.
There are a bunch of giant bell jars used to store ribbons and twine throughout this room. I worry that they’re a little difficult to pull down and access. But because they are clear glass, you can see the wonderful colorful contents inside, so you always know exactly which jar you need.
8. Room constraints can work to your advantage
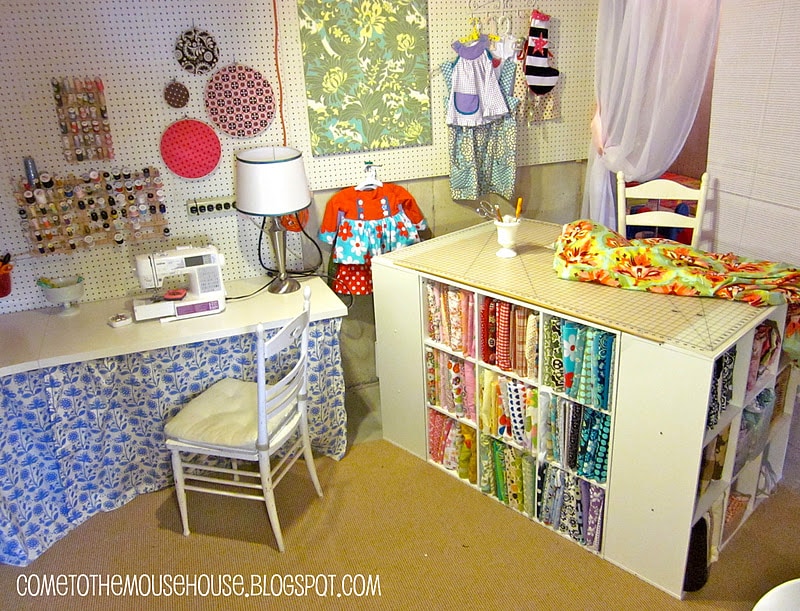
Haley from Welcome to the Mouse House presented the first stage of her amazing sewing studio makeover she did on her basement craft space.
The analysis
- The floor-to-ceiling pegboard wraps around and continues on the next wall. This gives a ton of vertical space to use for other supplies, a storage container or two, and is a great place to store pens.
- Haley makes use of all my favorite hanging contraptions on that peg board: wooden spool racks for thread, little cups for scissors and writing utensils, and ribbon bars for ribbon.
- A pretty desk skirt is used to hide the more unsightly storage under the wraparound sewing desk. This is one of my favorite craft room organization ideas we have here.
- She put together a cutting table that is perfect for quilting. It is made from three sets of 3×3 cubbies, and topped with plywood and a huge cutting mat. I absolutely need a giant cutting mat like that.
- A beautiful rainbow of fabric fills the cubbies beneath the cutting surface. With more cubbies around back, she has ample storage for all sorts of fabric scraps and other odds and ends.
What sets it apart
I suppose the biggest drawback of this sewing space is that it’s in the basement. But this is actually a great feature! Without sunlight coming in through the windows, you don’t have to worry as much about fabric getting bleached by UV radiation.
So you can leave these colorful arrays of fabric on display, all the time, and they won’t get the pernicious fading along the folded seams that I see so often from these sorts of displays. (It’s best to use LED lights because even fluorescent and incandescent bulbs have some UV bleaching powers.)
9. Peg board is popular for a reason
From Ginger Snap Crafts, Ginger presented a tutorial on how to make this giant pegboard and snuck in some glamour shots of the rest of her craft storage solutions.
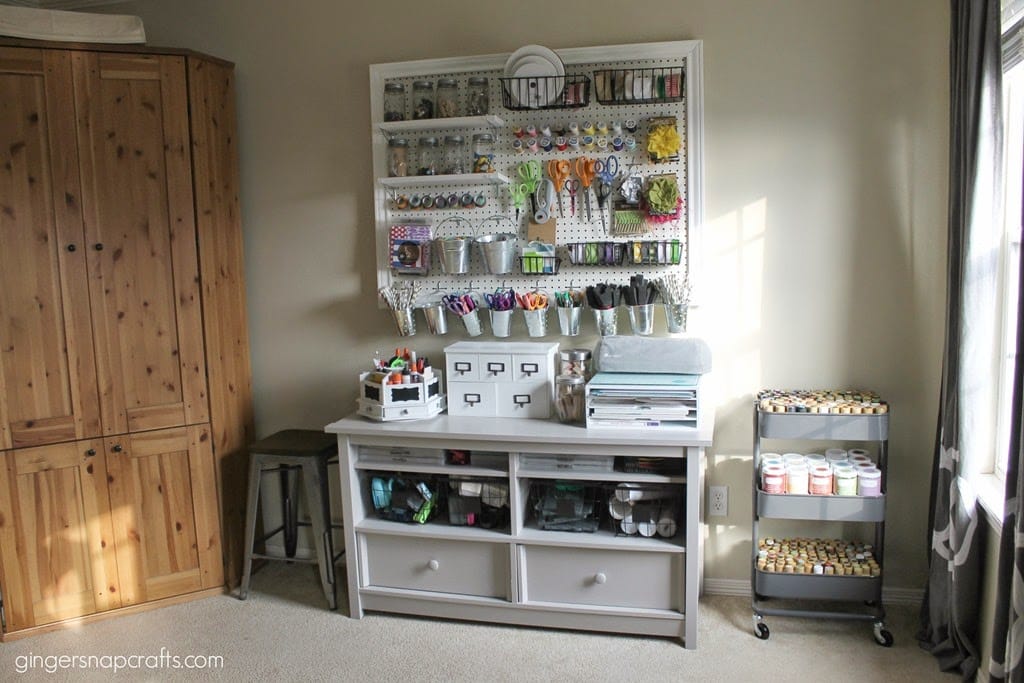
The analysis
- This room is filled with grays and neutral tones, which keeps it feeling fresh.
- A three-tiered, wheeled cart on the right is absolutely filled with paints. You can see that there’s a circle of color on the lid of each paint, so you can easily find the shade you want.
- The wooden wardrobe on the left is filled with tiny stackable tubs, all labeled of course.
- There are a couple of super cute storage pieces on the unit below the pegboard. A rotating caddy with markers and glue has chalkboard labels are fantastic ways to organize supplies.
- All her scrapbook paper and notes are squirreled away in the small card catalog and shelves for flat, paper storage.
What sets it apart
Okay, best for last: I absolutely adore how well-organized this pegboard is. The orderly arrays just make all my organization genes so happy.
Shelves for mason jars, scissors on hooks and in a row of buckets, spools of thread displayed on straight pegboard hooks. All the storage baskets and buckets can contain so many supplies.
I suppose I’m a little disappointed that this picture doesn’t show you the inside of the cabinet so you can see how well she organizes that interior space. But it can be valuable to hide some things away and reduce the amount of crafting supplies that are always on display, so you can’t really blame her.
10. Add wheels or casters
If you shared any disappointment in not getting to see the inside of that cabinet, this next craft space should cheer you right up. Diane from In My Own Style opens up her creative craft cabinet, giving us an amazing view of her craft room organization ideas.
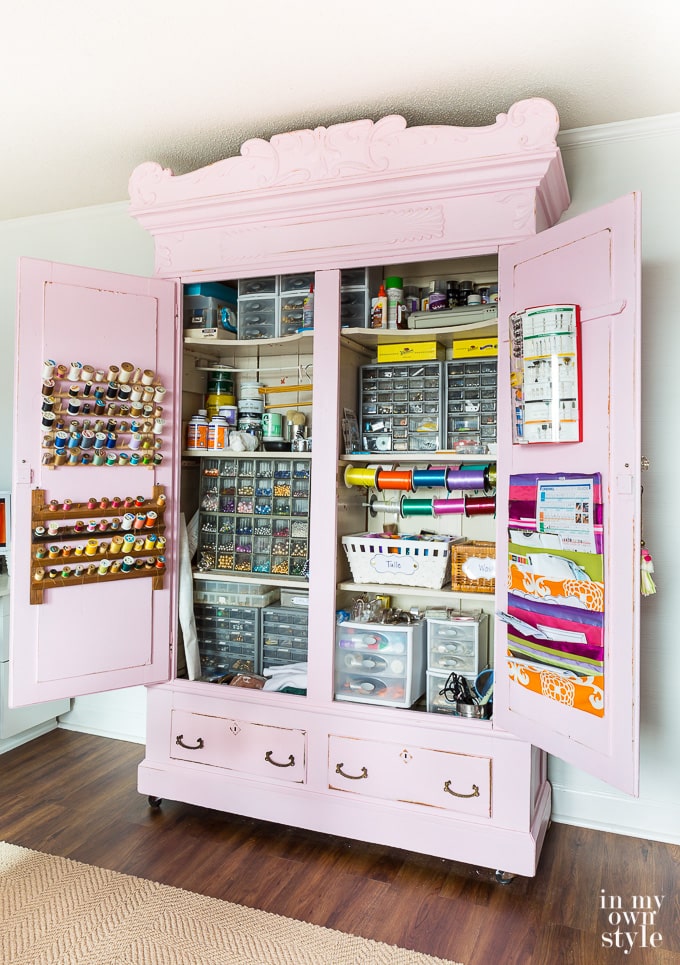
The analysis
- This armoire is a hundred years old and has been in Diane’s family for that entire time. How precious is it that she gets to use a family heirloom in such a wonderful way?
- I am absolutely enthralled by the many little drawers, all filled with beads and buttons and maybe some clip-on earrings. So much shiny to play with!
- Diane’s most used thread is arranged by color on the racks on the left. I’m always a fan of spools kept how they should be, on spool racks.
- Colorful, thin ribbon is stored on a couple of ribbon racks in the cabinet. (If that doesn’t look like enough ribbon, she has another wall with shelf after shelf of it.)
- The pale pink color Diane chose to paint the cabinet is lovely and elegant. The distressed look really makes it feel like an heirloom.
What sets it apart
My favorite part about this piece is that it’s on wheels! How amazing is that? Suddenly, what seems like a hulking immovable piece of furniture can actually be a mobile station. You can actually rearrange the furniture in your craft room.
It’s amazing. I think I should start adding caster wheels to everything.
I’m a little sad that the inside isn’t lined with some beautiful pattern hiding behind all the craft room storage bins and drawer dividers. But it sounds like Diane is planning on replacing some of the wood to keep this heirloom piece going strong for another hundred years.
So I’m sure we’ll continue to see more amazing makeovers of the inside and the outside, and I can understand wanting to preserve a bit of where it came from.
11. Mix old and new
Dinah shared a tour of her craft space over on her blog, DIY Inspired. It’s a wonderful mix of great new furniture sprinkled with cool vintage and thrift store finds.
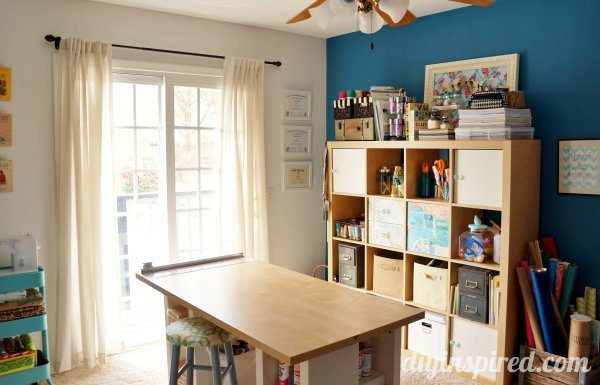
The analysis
- The Ikea shelving unit is superbly personalized with recycled maps mod podged onto the drawers in the middle.
- A cute, vintage wooden crate is recycled to store wrapping paper and other tubes to the right of the shelves.
- There’s a big workspace in the center of the room. It is supported by cubbies underneath for more storage, of course. And yes, that is a giant paper cutter across the tabletop. Need I say more?
- I love the dark blue behind the shelving unit. It provides a wonderful contrast to all the pale wooden finishes used in the room.
- Just peeking out on the left is a 3-tiered, wheeled, blue sewing station, made out of a kitchen rolling storage cart. It’s amazing how much stuff she fits on that, even with the sewing machine on top.
What sets it apart
My favorite part of Dinah’s room is actually the diplomas hung on the wall. If you’ve got it, rock it, girl! I love that she gets to proudly display her multiple degrees and feel that affirmation to get those creative juices flowing.


oh, I just love these!! my fav has to be the happy housie one. if you’re still taking questions i’d like to know where you buy the fixtures for the pegboard?
You compiled some absolutely wonderful craft rooms! I love seeing how other people organize their supplies. Thanks for linking up at The Ultimate Pinterest Party last week – your pin is one of my featured pins for this weeks party!
From one Ali to another: thanks for the feature and kind words!
I love to see all the super creative craft rooms. However, my room (12×12) has a door on 1 wall. windows on 2 other walls, and a wide bifold closet on the fourth wall. It also doubles as my office, so i need a desk for that. My sewing machine cabinet sits under 1 window, the desk under the other window, then I have a office cabinet (stores all office supplies) and an armoire that my father in law built for me. Needless to say, it is packed. I don’t know how people get around all these obstacles.
Ooh, that sounds really tricky, but the armoire sounds like a wonderful feature! A friend of mine had an older one (so probably not as nice as the one your FIL built) and she took the doors off to make it easier to see her supplies. Or you could do what Diane did (room #10 above) and build additional storage on the doors of the armoire.
I think you’ll find that a lot of these rooms have shelving/storage attached to the walls wherever they can fit it in. A lot of towel racks, small shelves, whatever they can jam in there!
I believe in you!